
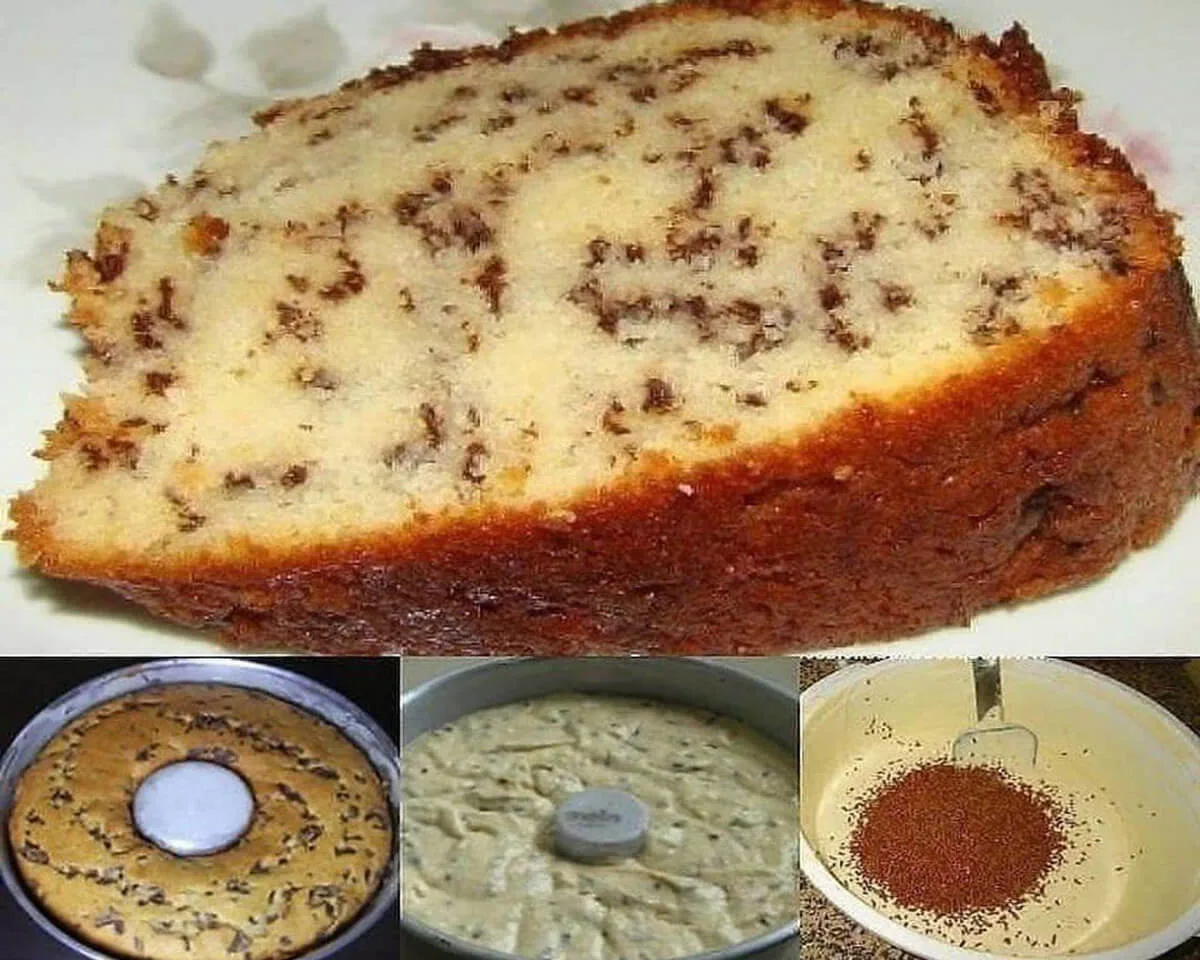
Antique cake brings old-fashioned flavor and simple ingredients back to your kitchen. This vintage dessert relies on basic pantry staples like margarine, eggs, flour, and milk. No fancy equipment or hard-to-find items needed. You bake one batter, then add chocolate coating or coconut as you wish. This guide walks you through the history, the recipe, and the secrets to baking an antique cake that tastes just like Grandma used to make.
The Story & Introduction
My First Bite of Antique Cake at a Country Auction
Antique cake found me on a rainy Saturday at a farmhouse auction. I walked past dusty furniture and old quilts. Then I saw a small table with a glass dome. Underneath sat a tall cake with simple chocolate drizzle and shredded coconut on the sides. An elderly woman named Ruth sold slices for a dollar. I bought a slice of antique cake and took a bite. The crumb felt dense yet soft. The chocolate coating cracked gently. The coconut added chewiness. I asked Ruth for the recipe. She laughed and said, “It’s just an antique cake. My mother made it during the Depression.” That antique cake recipe used margarine because butter was expensive. It used egg whites beaten separately for lift. No electric mixer required. I have baked that same antique cake dozens of times since that day. Each batch fills my house with a warm, vanilla-like aroma. Now I share it with you.
Why This Antique Cake Recipe Stands the Test of Time
Modern cakes rely on chemical leaveners, preservatives, and complicated techniques. This antique cake uses baking powder and whipped egg whites for rise. The method is simple: cream margarine and sugar, add yolks and milk, fold in flour and beaten whites. You do not need a stand mixer. A wooden spoon and a whisk work fine. The grated coconut and granulated chocolate add texture and sweetness without overwhelming the crumb. This antique cake stays fresh for days because the fat from margarine and richness from eggs lock in moisture. You can serve it plain, with a dusting of powdered sugar, or covered in a homemade chocolate glaze. Families have passed down this exact recipe for generations. Now you become part of that tradition.
Part 1: Understanding Antique Cake Ingredients
The Role of Margarine Instead of Butter
Margarine appears in many antique cake recipes from the early to mid-20th century. During World War II and the Depression, butter was expensive or rationed. Margarine offered an affordable, shelf-stable alternative. For this antique cake, use stick margarine with at least 60% vegetable fat. Do not use tub margarine, which contains more water. The margarine should be at room temperature so it creams easily with the sugar. If you prefer butter, substitute an equal amount of unsalted butter. The flavor will be richer, but the texture becomes slightly denser. Many vintage recipes specifically call for margarine to achieve a lighter, fluffier crumb. Trust the original ingredient for the most authentic antique cake experience.
Why Separate Egg Whites Matter in Vintage Baking
This antique cake recipe uses four eggs, but you separate the whites from the yolks. Beaten egg whites act as a natural leavener. When you whip them to soft peaks, they trap air bubbles. Folding those whites into the batter at the last moment creates a lighter, taller cake. Modern recipes often skip this step, relying on extra baking powder. This antique cake uses only one tablespoon of baking powder plus the whipped whites. The two work together for a perfect rise. Make sure your mixing bowl for the egg whites is completely clean and dry. Any grease or yolk will prevent the whites from whipping properly. Beat the whites until they hold a soft shape when you lift the whisk. Do not overbeat until dry and clumpy.
| Ingredient | Amount | Purpose in Antique Cake |
|---|---|---|
| Margarine | 4 Tbsp | Tenderness, moisture |
| Sugar | 1.5 cups | Sweetness, structure |
| Eggs (separated) | 4 | Leavening (whites), richness (yolks) |
| Flour | 2 cups | Body, crumb |
| Milk | 1 cup | Hydration, softness |
| Granulated chocolate | 100g | Bursts of chocolate flavor |
| Grated coconut | 100g | Texture, sweetness, chew |
| Baking powder | 1 Tbsp | Additional rise |
Part 2: Step-by-Step Mixing Method
Creaming Margarine, Sugar, and Yolks Correctly
Start by preheating your oven to 180°C (350°F). Grease a 9×13-inch baking pan or two 8-inch round pans. In a large bowl, beat the 4 tablespoons of margarine with the 1.5 cups of sugar. Use a wooden spoon or a hand mixer on low speed. Continue until the mixture looks pale yellow and creamy. This takes about three minutes. Add the four egg yolks one at a time, beating well after each addition. The yolks add richness and help emulsify the batter. Do not add the whites yet. Pour in the 1 cup of milk and mix again. The mixture may look slightly curdled at this stage. Do not worry. The flour will bring everything together.
Adding Dry Ingredients and Folding Egg Whites
In a separate bowl, whisk together the 2 cups of flour and the 1 tablespoon of baking powder. Gradually add the dry mixture to the wet mixture, stirring gently until just combined. Overmixing at this stage develops gluten and makes the cake tough. Next, fold in the 100g of granulated chocolate and the 100g of grated coconut. The granulated chocolate is small chocolate pieces, not cocoa powder. If you cannot find granulated chocolate, chop a chocolate bar into tiny chunks. Now whip the four egg whites until they form soft peaks. Fold one-third of the beaten whites into the batter to lighten it. Then gently fold in the remaining whites. Use a spatula and cut through the center, then lift and turn the bowl. Do not stir. The goal is to keep as much air as possible.
Part 3: Baking and Testing for Doneness
Pan Preparation and Oven Temperature
Pour the batter into your prepared pan. Spread it evenly with the spatula. Bake at 180°C (350°F) for 35 to 45 minutes. The exact time depends on your pan size and oven accuracy. A 9×13-inch pan bakes faster than two round pans. Start checking at 35 minutes. Insert a wooden skewer or a thin knife into the center. If it comes out clean or with a few moist crumbs, the antique cake is done. If you see wet batter, bake for five more minutes and test again. The top should look golden brown, and the edges should pull slightly away from the pan sides. Do not open the oven door during the first 25 minutes. Sudden temperature drops can cause the cake to sink.
Cooling and Preparing for Chocolate Coating
Let the antique cake cool in the pan for 10 minutes. Then run a knife around the edges. Turn the cake out onto a wire rack to cool completely. Cooling is essential before adding any chocolate coating. A warm cake will melt the coating into a messy puddle. While the cake cools, prepare a simple chocolate glaze. Melt 100g of semisweet chocolate with 2 tablespoons of butter or margarine in a microwave or double boiler. Stir until smooth. Pour the glaze over the cooled cake and spread it evenly. Sprinkle extra grated coconut on top before the glaze sets. For a less sweet option, dust the antique cake with powdered sugar instead of chocolate. You can also serve it plain with a scoop of vanilla ice cream.
Part 4: Storing, Serving, and Variations
How to Keep Antique Cake Fresh for Days
This antique cake stays moist longer than many modern cakes. Store it in an airtight container at room temperature for up to five days. Do not refrigerate unless your kitchen is very hot. Refrigeration dries out the crumb. If you added the chocolate coating, place parchment paper between layers if stacking. You can freeze this antique cake for up to three months. Wrap it tightly in plastic wrap, then aluminum foil. Thaw overnight in the refrigerator or for a few hours on the counter. For best texture, bring the cake to room temperature before serving. The coconut and chocolate flavors become more pronounced as the cake sits. Many bakers say this antique cake tastes even better on day two.
Variations to Personalize Your Vintage Cake
Change up the add-ins to make this antique cake your own. Replace the granulated chocolate with 100g of chopped dried apricots or raisins. Soak the dried fruit in warm water for 10 minutes and drain before adding. Swap the grated coconut for chopped walnuts or pecans for a nutty crunch. Use lemon zest and a tablespoon of lemon juice instead of chocolate for a bright, citrusy antique cake. For a tropical version, add 1/2 cup of crushed pineapple (well drained) along with the coconut. You can also bake this batter as cupcakes. Reduce the baking time to 18 to 22 minutes. The recipe makes about 18 standard cupcakes. Top them with a simple buttercream or a dusting of cinnamon sugar. Each variation honors the original vintage spirit while letting you experiment.
FAQ Section
Can I use butter instead of margarine in this antique cake?
Yes. Use 4 tablespoons of unsalted butter at room temperature. The texture will be slightly richer and denser. Many original antique cake recipes used margarine for affordability, but butter works fine.
Why is my antique cake too dense?
You likely overmixed the batter after adding the flour, or you deflated the egg whites. Fold gently. Also check that your baking powder is fresh. Old baking powder loses strength.
Do I have to add the chocolate and coconut?
No. The base antique cake is delicious on its own. Omit both for a plain vanilla cake. Add 1 teaspoon of vanilla extract to the batter for extra flavor.
How do I make a chocolate coating from scratch?
Melt 100g of dark or milk chocolate with 2 tablespoons of margarine or butter. Stir until smooth. Pour over the cooled cake. Let it set for 30 minutes before slicing.
Can I make this antique cake gluten-free?
Yes. Substitute the 2 cups of all-purpose flour with a gluten-free 1:1 baking flour that contains xanthan gum. Do not change any other ingredients.
Conclusion
Antique cake connects you to a simpler time in baking. You use basic ingredients: margarine, sugar, eggs, flour, milk, baking powder, and your choice of chocolate and coconut. The method asks for patience when whipping egg whites and care when folding. The reward is a tall, tender, flavorful cake that stays moist for days. Serve it at family dinners, holiday gatherings, or afternoon tea. Share the story of Ruth and her farmhouse auction. Pass the recipe to someone younger. This antique cake is more than a dessert. It is a piece of living history. Preheat your oven to 180°C, cream that margarine, and beat those egg whites. A delicious slice of the past awaits you.
Full recipe:
Ingredients :
4 tablespoons margarine
1 and 1/2 cup sugar
4 eggs (beaten egg whites)
2 cups flour
1 cup milk
100g granulated chocolate
100g grated coconut
1 Tbsp baking powder
PREPARATION:
Beat the margarine with the sugar until creamy, add the yolks and continue beating. Add the milk and the other ingredients. Finally, add the beaten egg whites, stirring delicately. Bake at 180 degrees. Make a chocolate coating if you prefer.