
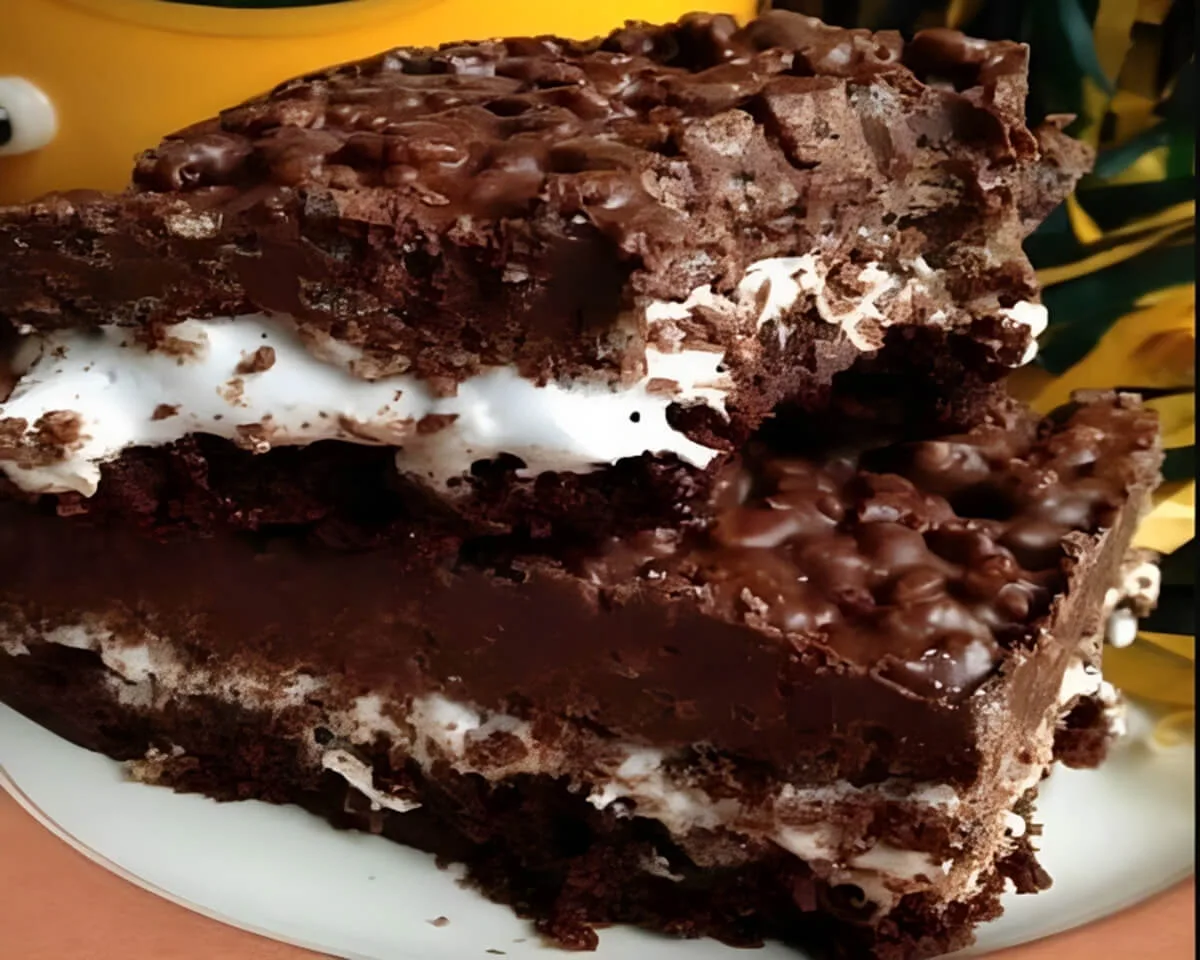
There is a specific kind of joy that comes from a dessert that doesn’t just taste good, but actually surprises you with its layers. I remember bringing a batch of these Brownie Bomb Bars to a neighborhood block party, and they were the first thing to disappear. People couldn’t quite figure out what was inside—was it a brownie? A candy bar? A Rice Krispie treat? It’s actually all three. This recipe takes the classic, fudgy brownie we all love and builds a tower of decadence on top of it. You get the chewy base, the cloud-like marshmallow center, and a crunchy, peanut butter-infused chocolate topping that ties it all together. It’s the kind of treat that makes you feel like a professional pastry chef, even though the preparation is incredibly straightforward. Whether you’re fueling a late-night study session or looking for the star of your next dessert spread, these Brownie Bomb Bars deliver an explosion of flavor in every bite.
Building a Fudgy Brownie Foundation
The success of any great bar dessert starts with a reliable base. For these Brownie Bomb Bars, you want a foundation that is sturdy enough to hold the weight of the toppings but soft enough to remain fudgy. I always suggest using a high-quality boxed brownie mix because it provides a consistent texture that stands up well to layering. When you follow the box instructions with eggs, oil, and water, you create a rich, cocoa-heavy layer that sets the stage for the sweetness to follow. One of the most important things I’ve learned is that you must allow the brownies to cool completely before moving on. If they are even slightly warm, the next layer will turn into a messy puddle.
Preparing the Perfect Baking Dish
To ensure your bars come out cleanly, you should always start by spraying a 9×13-inch pan with a light coating of cooking spray. This prevents the edges from sticking and makes it much easier to slice into uniform squares later. I find that using a glass or ceramic pan helps the brownies bake evenly without burning the bottom. Once you’ve prepped the pan, spread your batter into the corners to ensure a level surface. A flat base is essential for achieving those beautiful, clean layers you see in bakery windows.
The Importance of Cooling Time
I know it’s tempting to start layering as soon as the brownies come out of the oven, but patience is your best friend here. A fully cooled brownie creates a firm surface that can handle the marshmallow crème without absorbing it. I usually bake the brownie base in the morning and let it sit on the counter while I go about my day. If you’re in a rush, you can pop the pan into the refrigerator for about 30 minutes. Once the pan is cool to the touch, you are ready to assemble your masterpiece.
The Marshmallow Crème Secret Layer
The “bomb” in Brownie Bomb Bars really comes from the middle layer of Jet-Puffed Marshmallow Crème. This provides a velvety, gooey contrast to the dense brownie below and the crunchy topping above. It’s an unexpected element that adds a nostalgic, campfire-treat vibe to the dessert. Spreading the crème can be a bit tricky because it’s naturally very sticky, but the results are well worth the effort. This layer acts as a sweet adhesive, bonding the two chocolate sections together into one cohesive bar.
Tips for a Smooth Marshmallow Spread
To make spreading the marshmallow crème easier, you can use a spatula that has been lightly coated with cooking spray or dipped in warm water. This prevents the crème from pulling up pieces of the brownie as you work. I suggest starting with large dollops in the center and gently pushing them toward the edges. You want an even, white blanket of marshmallow covering every inch of the chocolate base. This ensures that every single square you cut later will have that perfect trio of textures.
Crafting the Crunchy Chocolate-Peanut Butter Topping
The final layer is where the “explosion” of texture really happens. You combine semi-sweet chocolate chips with smooth peanut butter to create a rich, pourable ganache-style mixture. The peanut butter adds a savory depth that balances out the sugar from the marshmallow and brownie. Once melted, you stir in Rice Krispies, which provide a light, airy crunch that keeps the dessert from feeling too heavy. This combination is essentially a homemade version of a gourmet chocolate bar, and it provides a satisfying “snap” when you bite into it.
Melting for Maximum Smoothness
When melting your chocolate chips and peanut butter in the microwave, you must be careful not to scorch the chocolate. I always use a microwave-safe bowl and heat the mixture in one-minute intervals, stirring thoroughly in between. Even if it looks like there are still unmelted chips, the residual heat from the peanut butter will usually finish the job as you stir. This prevents the chocolate from becoming grainy and ensures a glossy, beautiful finish on top of your bars.
Adding the Rice Krispie Bliss
Once your chocolate and peanut butter mixture is perfectly smooth, fold in three cups of Rice Krispies. You want to move quickly so the cereal stays crisp and doesn’t get soggy in the warm chocolate. Spread this mixture immediately over the marshmallow layer, using a spatula to level it out. The contrast of the dark chocolate against the white marshmallow is visually stunning. This top layer will firm up as it chills, creating a sturdy crust that protects the gooey interior.
Chilling and Serving Your Masterpiece
The final step in the process is perhaps the most difficult: waiting for the bars to set. You need to cover the pan and chill it in the refrigerator for at least two hours. This resting period is crucial because it allows the fats in the chocolate and peanut butter to solidify, making the bars easy to cut. If you try to cut them too soon, the layers will slide apart and you’ll lose that beautiful defined look.
How to Get Clean, Bakery-Style Cuts
When you’re ready to serve, I recommend using a long, sharp knife dipped in hot water. Wipe the knife dry between each cut to ensure the marshmallow layer stays clean and doesn’t smudge into the chocolate. Depending on how many people you’re feeding, you can cut these into 24 large squares or 36 bite-sized pieces. Because they are so rich, a smaller square is often the perfect amount for a quick sweet fix.
Serving Suggestions and Storage
These Brownie Bomb Bars are spectacular on their own, but they also pair beautifully with a cold glass of milk or a hot cup of coffee. If you want to go all out, serve a square warm with a scoop of vanilla bean ice cream on top. To keep them fresh, store the bars in an airtight container in the refrigerator for up to five days. They actually taste fantastic when they’re cold, as the crunch of the Rice Krispies becomes even more pronounced.
| Layer | Primary Ingredients | Texture Goal |
| Bottom | Brownie Mix, Eggs, Oil | Fudgy and Dense |
| Middle | Marshmallow Crème | Smooth and Gooey |
| Top | Chocolate, Peanut Butter, Rice Krispies | Rich and Crunchy |
Frequently Asked Questions
Can I use a different type of cereal for the top layer?
While Rice Krispies provide the classic “bomb” crunch, you can certainly experiment with other puffed grains or even crushed pretzels for a salty-sweet twist. Just make sure whatever you choose is fresh so you don’t lose that essential texture.
What if I don’t have peanut butter?
If you have a nut allergy or simply don’t have peanut butter on hand, you can substitute it with almond butter or a sunflower seed butter. If you want to skip the nut butter entirely, you may need to add a tablespoon of coconut oil to the chocolate chips to help them melt smoothly and stay slightly soft when chilled.
How do I prevent the marshmallow from sticking to everything?
The best trick is moisture or oil. Keep a small bowl of warm water nearby to dip your spreading tool into. A wet spatula will glide over the marshmallow crème instead of sticking to it. This is the secret to getting that perfectly even middle layer.
Can I make these in a smaller pan for thicker bars?
You could use a 9×9-inch pan, but you will need to significantly increase the baking time for the brownie base. Also, keep in mind that these bars are very rich, so a 9×13-inch pan usually provides the perfect thickness-to-richness ratio for most people.
Conclusion
The Brownie Bomb Bars are a true testament to the power of layering. By combining three distinct textures and flavors, you create a dessert that is far more than the sum of its parts. It’s an easy, crowd-pleasing recipe that brings a sense of fun and indulgence to any occasion. I hope you enjoy the process of building these layers and the satisfaction of that first, crunchy, chocolatey bite. Whether you’re sharing them with friends or keeping a secret stash in the fridge, these bars are sure to satisfy your deepest sweet cravings. Happy baking!
Full recipe:
Ingredients:
**Bottom Layer:**
– 1 Box Brownie Mix (follow box instructions fully and for cooking times.)
– 2 Large Eggs
– 1/4 cup Vegetable Oil
– 1/4 cup Water
**Middle Layer:**
– 1 Jar (198 g) Jet-Puffed Marshmallow Crème
**Top Layer:**
– 2 Cups Semi-sweet chocolate chips
– 1 Cup Peanut Butter
– 3 Cups Rice Krispies
How To Make Brownie Bomb Bars:
1. **Prepare the Pan:** Spray a 9×13 pan with cooking spray.
2. **Bake the Brownies:** Follow the instructions on the brownie mix box, using 2 large eggs, 1/4 cup vegetable oil, and 1/4 cup water. Bake as directed and allow the brownies to fully cool.
3. **Marshmallow Layer:** Spread Jet-Puffed Mallow Crème evenly over the cooled brownies.
4. **Chocolate-Peanut Butter Topping:** In a medium-sized microwave-safe bowl, combine chocolate chips and peanut butter. Microwave until well blended, pausing at 1-minute intervals.
5. **Rice Krispie Bliss:** Once melted, stir in Rice Krispies and spread the mixture evenly over the marshmallow crème layer.
6. **Chill & Set:** Cover the pan and chill for two hours before cutting into squares.
7. **Serve & Enjoy:** Yields 24-36 bars, depending on your preferred square size. Enjoy these delightful Brownie Bomb Bars that promise to satisfy your sweet cravings!
Indulge in the layers of chocolatey goodness and the delightful crunch of Rice Krispies in each bite of these Brownie Bomb Bars. Perfect for any occasion, these bars are a surefire way to sweeten your day. Share them with friends and family or savor them as a decadent treat for yourself. Either way, these bars are bound to be a crowd-pleaser!