B. Indulgent combination of cheesecake, peanut butter, and brownie
The appeal of the cheesecake peanut butter brownie lies in the harmonious blend of three distinct elements. The fudgy and decadent brownie layer provides a deep chocolate flavor and a dense texture. The creamy and tangy cheesecake layer adds a luscious richness and a velvety smoothness. The nutty and slightly salty peanut butter complements the chocolate and cheesecake, elevating the overall taste experience. Together, these layers create a dessert that is a true symphony of flavors.
II. Making the Peanut Butter Brownie Base
A. Selecting quality ingredients
To create a delicious and fudgy brownie base, it’s essential to use quality ingredients. Here’s what you’ll need:
- Dark chocolate or semi-sweet chocolate: Opt for a good quality chocolate with a high cocoa content for a rich and intense chocolate flavor.
- Unsalted butter: Choose unsalted butter to have better control over the overall saltiness of the brownie.
- Granulated sugar: Use granulated sugar to sweeten the brownie and provide structure.
- Eggs: Eggs add moisture and help bind the ingredients together.
- All-purpose flour: All-purpose flour gives structure and thickness to the brownie.
- Cocoa powder: Cocoa powder intensifies the chocolate flavor and adds depth to the brownie.
- Salt: A pinch of salt enhances the overall flavor and balances the sweetness.
B. Mixing and baking the brownie layer
Follow these steps to make the peanut butter brownie base:
- Preheat the oven to the specified temperature, usually around 350°F (175°C). Grease a baking pan and line it with parchment paper for easy removal.
- In a heatproof bowl, melt the dark chocolate and unsalted butter together using a double boiler or in short bursts in the microwave. Stir until smooth and well combined.
- In a separate mixing bowl, whisk together the granulated sugar and eggs until well blended.
- Pour the melted chocolate mixture into the egg and sugar mixture, stirring until fully incorporated.
- Sift in the all-purpose flour, cocoa powder, and salt. Gently fold the dry ingredients into the wet ingredients until just combined. Avoid overmixing to prevent the brownie from becoming tough.
- Pour the brownie batter into the prepared baking pan and spread it evenly with aspatula.
- Place the pan in the preheated oven and bake for the specified time, usually around 25-30 minutes, or until a toothpick inserted into the center comes out with a few moist crumbs. Be careful not to overbake, as you want the brownie base to remain fudgy and moist.
- Once baked, remove the brownie from the oven and let it cool completely in the pan on a wire rack. Cooling the brownie will allow it to set and make it easier to layer the cheesecake on top.
III. Preparing the Cheesecake Layer
A. Creaming the cream cheese and sugar
To create the creamy and luscious cheesecake layer, you’ll need:
- Cream cheese: Use full-fat cream cheese for the best texture and flavor.
- Granulated sugar: Sweetens the cheesecake layer and helps achieve the desired consistency.
- Eggs: Provide structure and richness to the cheesecake.
- Vanilla extract: Adds a subtle hint of vanilla flavor.
- Peanut butter: Use smooth peanut butter for a creamy texture and even distribution of flavor.
Follow these steps to prepare the cheesecake layer:
- In a mixing bowl, beat the cream cheese until smooth and creamy using an electric mixer or a stand mixer fitted with the paddle attachment.
- Add the granulated sugar to the cream cheese and continue beating until well combined and no lumps remain.
B. Adding eggs, vanilla extract, and peanut butter
- Add the eggs one at a time, beating well after each addition. Scrape down the sides of the bowl as needed to ensure even mixing.
- Stir in the vanilla extract, mixing until incorporated.
- Finally, add the smooth peanut butter to the cream cheese mixture. Beat until the peanut butter is fully combined and the mixture is smooth and creamy.
IV. Layering and Baking the Cheesecake Peanut Butter Brownie
A. Spreading the brownie batter into the pan
Once the brownie base has cooled completely, it’s time to layer the cheesecake on top. Follow these steps:
- Gently spread the prepared cheesecake batter over the cooled brownie layer in the baking pan. Use a spatula or the back of a spoon to achieve an even and smooth layer.
B. Pouring the cheesecake batter over the brownie layer
- Pour the prepared cheesecake batter over the brownie layer, starting from the center and working your way to the edges. Ensure that the batter covers the brownie layer evenly.
- Use a spatula or the back of a spoon to smooth the surface of the cheesecake layer, creating an even and level top.
V. Creating Swirls and Marbling Effects
A. Techniques for achieving swirls
To create beautiful swirls in your cheesecake peanut butter brownie, you can use the following techniques:
- Toothpick or Skewer: Insert a toothpick or skewer into the batter and gently swirl it in a figure-eight pattern, dragging the peanut butter cheesecake layer into the brownie layer. Repeat this process in various spots across the batter for a marbled effect.
- Offset Spatula: Use an offset spatula or the back of a spoon to create gentle waves or swirls by lightly pushing and pulling the batter.
- Spoonfuls: Place spoonfuls of the brownie and cheesecake batter alternately on top of each other in the pan. Then, use a skewer or toothpick to swirl the two batters together in a random pattern.
B. Tips for marbling the two layers together
When marbling the brownie and cheesecake layers together, keep the following tips in mind:
- Avoid overmixing: Gently swirl the layers together without fully combining them to maintain distinct layers and achieve an attractive marbled appearance.
- Create contrast: Alternate between swirling from the top and the bottom, as well as from left to right, to create a visually appealing pattern with contrasting colors.
- Don’t overdo it: Be careful not to swirl too much, as it can blend the layers together too much and diminish the desired marbling effect.
VI. Baking and Cooling the Cheesecake Peanut Butter Brownie
A. Proper baking time and temperature
Bake the layered cheesecake peanut butter brownie in the preheated oven according to the specified temperature and time, usually around 325°F (163°C) for about 35-40 minutes. The exact baking time may vary, so keep an eye on the brownie as it bakes. The cheesecake layer should be set around the edges but slightly jiggly in the center.
B. Allowing the brownie to cool and set
Once baked, remove the pan from the oven and let the cheesecake peanut butter brownie cool completely in the pan on a wire rack. This cooling process is crucial for the cheesecake layer to set properly and achieve a smooth and creamy texture. Avoid rushing the cooling process by refrigerating the brownie, as it can lead to condensation and affect the texture of the dessert.
VII. Serving and Garnishing
A. Slicing the brownie into portions
After the cheesecake peanut butter brownie has cooled and set, carefully lift it out of the pan using the parchment paper overhang. Place it on a cutting board and use a sharp knife to slice it into individual portions. Wipe the knife clean between each cut for cleaner slices.
B. Optional garnishes and serving suggestions
The cheesecake peanut butter brownie is delicious on its own, but you can enhance its presentation and flavors with optional garnishes and serving suggestions:
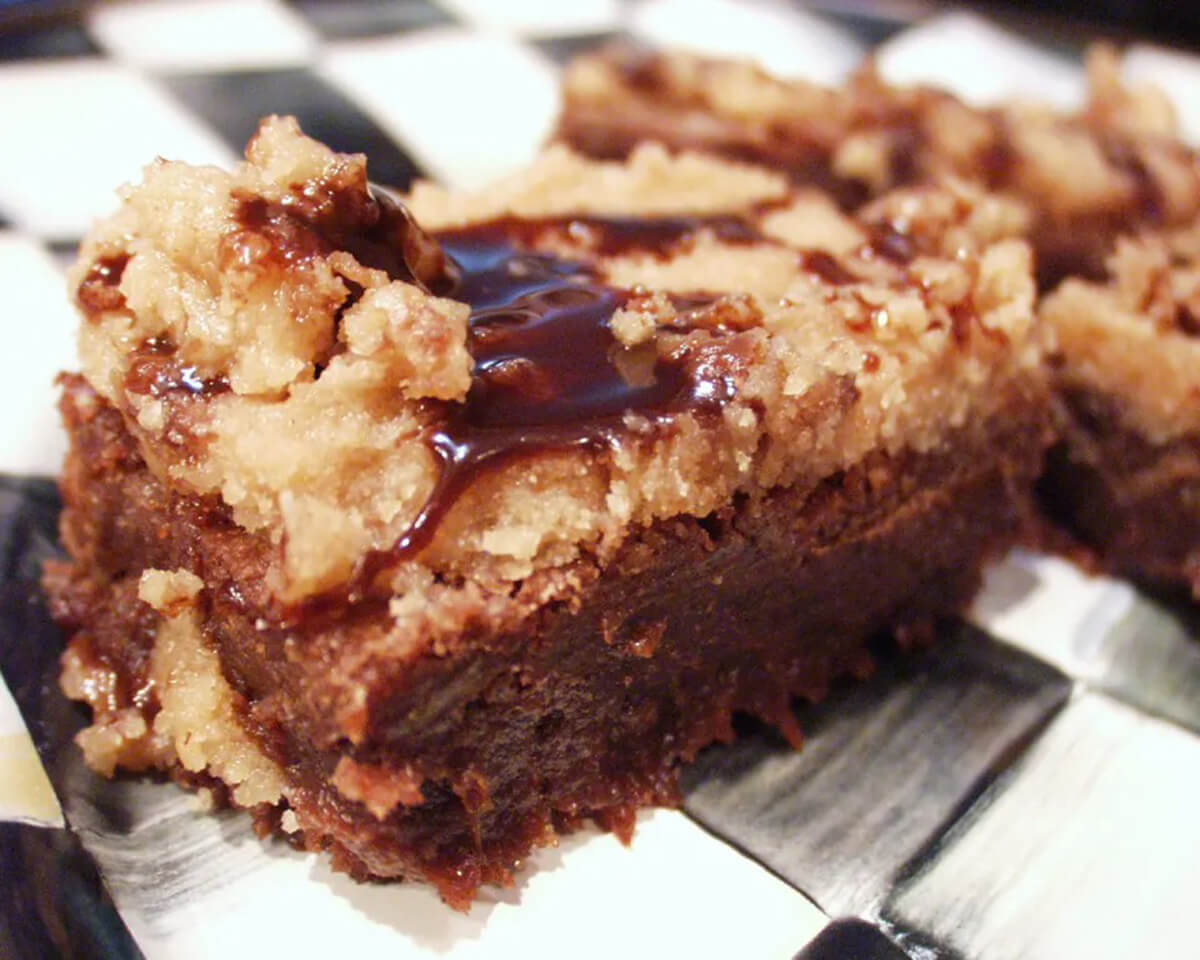
- Drizzle: Drizzle melted chocolate or warm peanut butter over the sliced brownie for added decadence.
- Whipped Cream: Serve each slice with a dollop of freshly whipped cream to balance the richness.
- Chopped Peanuts: Sprinkle chopped peanuts over the top for a crunchy texture and added nutty flavor.
- Chocolate Shavings: Use a vegetable peeler to create delicate chocolate shavings and sprinkle them over the brownie for an elegant touch.
Serve the cheesecake peanut butter brownie at room temperature or slightly chilled, and enjoy the creamy and nutty delight it brings to your taste buds.
VIII. Variations and Additions OF Cheesecake Peanut Butter Brownie
A. Incorporating chopped nuts or chocolate chips
To add more texture and flavor to your cheesecake peanut butter brownie, consider incorporating chopped nuts or chocolate chips into the brownie batter or as a topping. Walnuts, pecans, or peanuts work well with the peanut butter and chocolate combination. Simply fold them into the brownie batter before spreading it in the pan, or sprinkle them over the top of the cheesecake layer before baking.
B. Trying different flavors of cream cheese or nut butter
While peanut butter adds a delicious nuttiness to the cheesecake layer, you can also experiment with different flavors of cream cheese or nut butter to customize the dessert to your liking. Try using flavored cream cheese, such as chocolate or caramel, to infuse the cheesecake layer with an extra layer of indulgence. Alternatively, explore different nut butter like almond butter, cashew butter, or hazelnut spread for a unique twist.
Feel free to get creative and adapt the recipe based on your personal preferences and flavor combinations.
IX. Storage and Shelf Life Of Cheesecake Peanut Butter Brownie
A. Storing the brownies to maintain freshness
To keep the cheesecake peanut butter brownies fresh and delicious, follow these storage tips:
- Store the brownies in an airtight container or wrap them tightly in plastic wrap. This helps prevent them from drying out and keeps them moist.
- Keep the brownies at room temperature or in a cool, dry place away from direct sunlight and heat sources. Avoid storing them in the refrigerator, as it can affect their texture and make them less enjoyable.
- If you live in a warm climate or during hot summer months, you may need to refrigerate the brownies to prevent the cheesecake layer from melting. In this case, allow them to come to room temperature before serving for the best texture and flavor.
B. Best practices for extending shelf life
Cheesecake peanut butter brownies are best enjoyed within 2-3 days of baking when they are at their freshest. However, if stored properly, they can last up to 5 days.
- If you have leftover brownies, you can freeze them for longer storage. Wrap individual portions tightly in plastic wrap, place them in an airtight container or freezer bag, and freeze for up to 3 months. Thaw the frozen brownies in the refrigerator overnight before enjoying them.
- Before serving leftover brownies, you can briefly warm them in the microwave or oven for a few seconds to enhance their gooey texture and melt the peanut butter slightly.
Remember, the longer the brownies are stored, the more they may dry out. So, it’s best to consume them within the suggested timeframe for the ultimate freshness and enjoyment.
X. Classic cheesecake peanut butter brownie recipe
Ingredients:
• 10.25 oz brownie mix
• 1/4 cup vegetable oil
• 2 tbsp water
• 1 large egg
• 16 oz cream cheese, at room temp
• 1/2 cup granulated white sugar
• 1/2 cup smooth peanut butter
• 1/2 tsp vanilla extract
• 2 large eggs, at room temp
• 1/4 cup of chocolate chips
• 1 tbsp peanut butter
Instructions:
1. Preheat oven to 325°F and spray a 9″ springform pan with non-stick spray. Set aside.
2. In a medium bowl, add the brownie mix, vegetable oil, water, and egg. Stir about 50 times (batter may be slightly lumpy) and spread into the prepared pan. Bake for 25 minutes or until a toothpick inserted in the center comes out clean.
3. While the brownie base is cooking, prepare the peanut butter cheesecake. In a large bowl, with a hand mixer (or in your stand mixer), mix the cream cheese, sugar, peanut butter, and vanilla until smooth and creamy. Add the eggs, one at a time, mixing on low between each addition, until just blended. Store in the fridge until the brownie is done baking.
4. Once the brownie bottom is done, pour the cheesecake mixture on top. Spread it evenly with a spatula. Raise the oven temp to 350°F. Bake for approximately 45-50 minutes or until the center is almost set. Check it after 35 minutes to see how it’s doing. Jiggle it – the center should be nearly set with only a small circle in the center jiggling when it is done.
5. Cool on the counter for 10 minutes then transfer to the fridge. Chill for at least 3 hours before serving.
6. Before serving, prepare the chocolate drizzle. In a microwave-safe bowl, add the chocolate chips and peanut butter. Microwave for 30 seconds, then stir. Microwave another 20 seconds or so or until creamy and fully combined. Add to a plastic baggie, then snip the very tip. Drizzle across the cheesecake.
7. Slice and serve!
XI. Conclusion
The cheesecake peanut butter brownie is a heavenly dessert that combines the richness of fudgy brownies with the creaminess of peanut butter cheesecake. The marriage of flavors and textures creates a decadent treat that is sure to satisfy any sweet tooth. By following the steps in this recipe, you’ll be able to create a delightful fusion of chocolate, cheesecake, and nutty goodness. Whether you’re serving them at a special occasion or enjoying them as a delicious indulgence, these cheesecake peanut butter brownies are guaranteed to impress.
XII. FAQs
A. Can I use a different nut butter instead of peanut butter?
Absolutely! If you’re not a fan of peanut butter or have allergies, feel free to substitute it with your favorite nut butter. Almond butter, cashew butter, or even hazelnut spread can all be used as delicious alternatives. Just make sure to choose a smooth and creamy variety for the best texture and flavor.
B. Can I use a different type of chocolate in the brownie base?
Yes, you can experiment with different types of chocolate in the brownie base. While dark chocolate or semi-sweet chocolate is commonly used for a rich and intense flavor, you can also try milk chocolate for a sweeter taste or even white chocolate for a unique twist. Adjust the sugar amount accordingly based on the sweetness of the chocolate you choose.
C. How can I make the brownies gluten-free?
To make gluten-free cheesecake peanut butter brownies, you can substitute the all-purpose flour with a gluten-free flour blend. Look for a blend that is specifically designed for baking and includes ingredients like rice flour, tapioca starch, and xanthan gum to mimic the texture of regular flour. Follow the recipe as usual, but be mindful of the different flour’s absorption rates and adjust the baking time if necessary.
D. Can I use a store-bought brownie mix as the base?
Certainly! If you prefer the convenience of a store-bought brownie mix, you can use it as a base for your cheesecake peanut butter brownies. Prepare the brownie mix according to the package instructions, then proceed with the cheesecake layer as described in this recipe. This shortcut saves time and still allows you to enjoy the delicious combination of flavors.
E. Can I freeze the cheesecake peanut butter brownie?
Yes, you can freeze the cheesecake peanut butter brownie for longer storage. Wrap individual portions tightly in plastic wrap, place them in an airtight container or freezer bag, and freeze for up to 3 months. Thaw the frozen brownies in the refrigerator overnight before serving. Freezing the brownies may slightly affect the texture, but they will still be delicious and enjoyable.
1 thought on “Cheesecake Peanut Butter Brownie”