
Part 1: The Story & Why These Chocolate Chip Cheesecake Bars Won My Kitchen
A messy kitchen memory that started it all
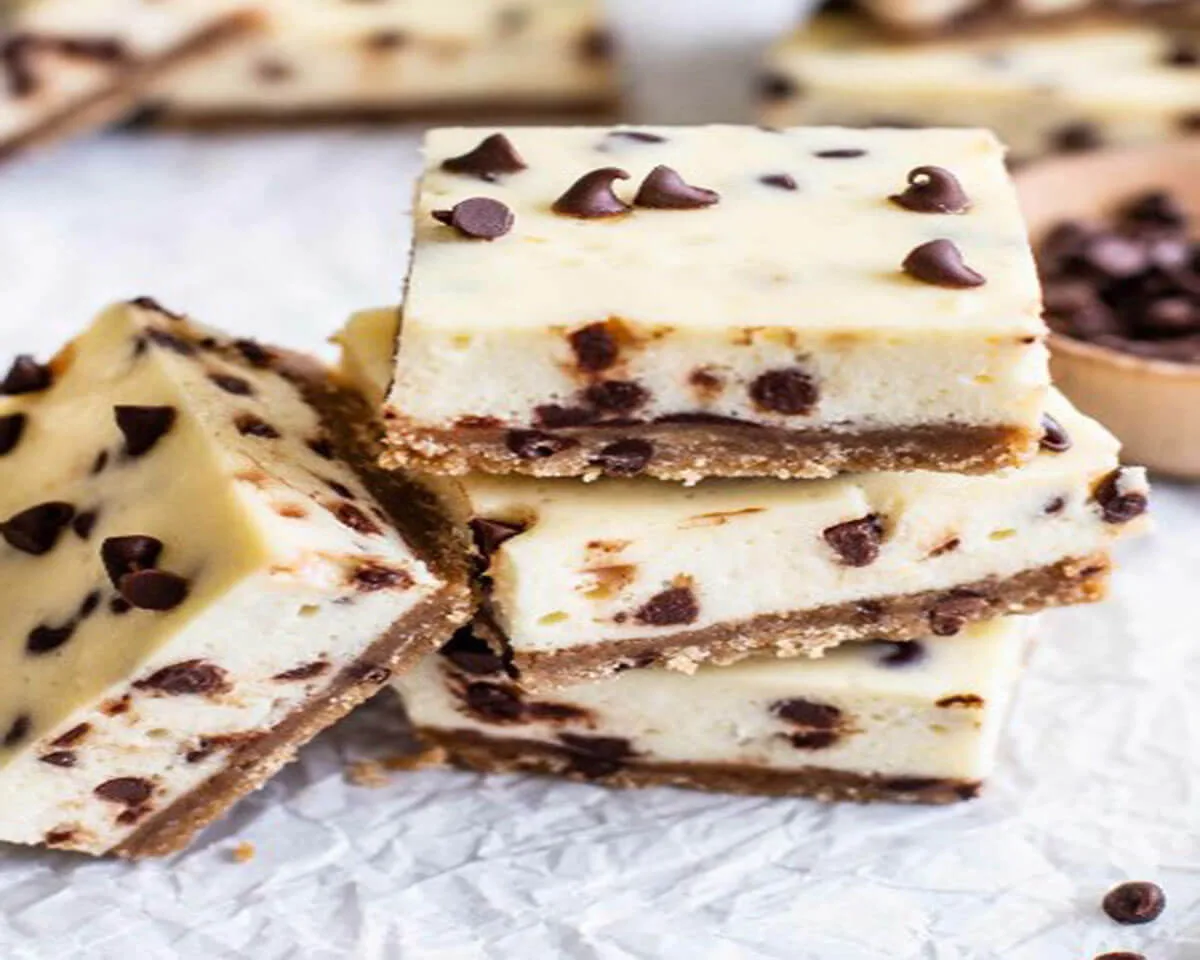
Chocolate Chip Cheesecake Bars first showed up in my life during a potluck panic. I had promised to bring a dessert to my neighbor’s barbecue, but my oven decided to act up, and I only had an hour to spare. I needed something impressive but forgiving. That’s when I remembered a recipe my aunt used to make—these layered beauties with a crunchy crust, creamy center, and pockets of melted chocolate. I pulled out my mixer, crossed my fingers, and within 45 minutes, my kitchen smelled like a bakery. Everyone at that party asked for the recipe. From that day on, chocolate chip cheesecake bars became my go-to dessert for any last-minute gathering. They never fail me, and I promise they won’t fail you either.
Why this dessert wins over a full cheesecake every time
Making a traditional cheesecake requires a springform pan, a water bath, and hours of cooling. Chocolate Chip Cheesecake Bars skip all that fuss. You get the same silky, tangy filling and buttery crust, but you bake everything in a simple 9×13 pan. The bar shape also means you can cut them into small squares for parties or larger portions for a serious sweet tooth. Plus, the chocolate chips add texture and sweetness without needing a separate ganache or topping. If you love cheesecake but hate the stress, these bars are your new best friend.
The magic of combining cheesecake and chocolate in bar form
Cheesecake brings a rich, creamy contrast, while chocolate chips deliver little bursts of intense flavor. When you bite into a chocolate chip cheesecake bar, you first hit the crumbly crust. Then the smooth cheesecake melts on your tongue, and finally, the chocolate chips release their warm, semi-sweet notes. This layering creates a more interesting experience than a plain cheesecake slice. You also get more surface area for browning, which means those lovely golden edges that everyone fights over.
What makes these bars different from regular cheesecake brownies
People often confuse chocolate chip cheesecake bars with chocolate cheesecake brownies. The difference comes down to ratio. Brownies use a dense, fudgy base with a thin cheesecake swirl. These bars flip that balance. Here, the cheesecake filling takes center stage, and the chocolate chips act as a delicious accent. You still taste the cream cheese and vanilla clearly, while the chips provide contrast instead of overpowering the whole dessert. This balance makes the bars feel lighter and more refreshing, even though they are plenty rich.
Part 2: The Ingredients That Make Perfect Chocolate Chip Cheesecake Bars
Choosing the right crust for a sturdy base
The crust does more than just add flavor. It holds everything together when you cut into these bars. A graham cracker crust works beautifully, but many home bakers prefer an Oreo crust for extra chocolate depth. To make an Oreo crust, crush 30 Oreo cookies with the cream filling still inside. Mix those crumbs with 6 tablespoons of melted butter. Press the mixture firmly into a 9×13 pan lined with foil and sprayed with nonstick spray. Bake the crust at 325°F for 10 minutes, then let it cool for at least 20 minutes before adding the filling. A cooled crust prevents the cheesecake layer from sinking or turning soggy.
The cheesecake layer – cream cheese, sugar, and the perfect add-ins
For a smooth and creamy filling, start with three 8-ounce packages of cream cheese at room temperature. Cold cream cheese creates lumps. Beat the cream cheese with an electric mixer until it turns creamy and free of bumps. Then mix in 1½ cups of granulated white sugar, ¼ cup of sour cream, and 2 teaspoons of vanilla extract. Beat until the mixture looks smooth. Add ¼ cup of all-purpose flour and mix just until combined. Finally, add three large eggs one at a time, beating well after each addition. Overmixing after adding the eggs can trap too much air, which leads to cracks during baking. Stir in 1 cup of mini chocolate chips by hand. Mini chips distribute more evenly than regular chips and prevent the bars from becoming too heavy.
Part 3: Baking Chocolate Chip Cheesecake Bars Without Cracks or Soggy Centers
The water bath trick that works without a springform pan
A water bath keeps the oven humid, which stops the cheesecake from drying out and cracking. You do not need a springform pan for this recipe. Place a large, rimmed baking sheet on the bottom rack of your oven. Fill that sheet halfway with hot water. Then put your 9×13 pan on the rack directly above the water. The steam rises gently around the pan, cooking the filling slowly and evenly. This method also prevents the dreaded sunken center. If you skip the water bath, the bars may still taste good, but expect some cracks on the surface. Those cracks do not ruin the dessert, but they make slicing into clean squares more difficult.
Timing, cooling, and the overnight rest
Bake the cheesecake bars at 325°F for exactly 45 minutes. The edges should look set, but the center will still jiggle slightly when you shake the pan. Do not wait for the center to become completely firm. Carryover heat finishes the cooking process as the bars cool. Remove the pan from the oven and place it on a wire rack. Let the bars cool for one hour at room temperature. Then move the pan to the refrigerator and chill for at least four hours. For the best texture, chill overnight. Patience here matters. If you cut into warm cheesecake bars, the filling will ooze out, and the crust will crumble. Cold bars cut into neat squares, and the chocolate chips firm up into delightful little gems.
Below is a quick reference table for baking success:
| Problem | Cause | Fix |
|---|---|---|
| Cracks on top | Oven too hot or no water bath | Lower temp to 325°F, add water bath |
| Soggy crust | Filling added to warm crust | Cool crust 20+ minutes before filling |
| Dense, rubbery texture | Overmixed after adding eggs | Mix eggs on low speed just until combined |
| Chocolate chips sunk to bottom | Chips too heavy or batter too thin | Use mini chips and fold in gently |
| Bars crumble when cut | Not chilled long enough | Chill 4+ hours, preferably overnight |
Part 4: Serving, Storing, And Customizing Your Chocolate Chip Cheesecake Bars
How to slice and serve for the cleanest edges
For perfect squares, use a large, sharp knife and wipe the blade clean between each cut. Run the knife under hot water, dry it quickly, then slice straight down. Do not saw back and forth. Hot water melts through the cheesecake without dragging the filling. Cut 24 bars from a 9×13 pan by slicing six rows lengthwise and four rows crosswise. Serve the bars directly from the refrigerator. They taste best cold, but you can let them sit at room temperature for 10 minutes if you prefer a softer texture. A small dollop of whipped cream or a drizzle of warm chocolate sauce turns these into a restaurant-worthy dessert.
Storage, freezing, and make-ahead tips
Store leftover chocolate chip cheesecake bars in an airtight container inside the refrigerator. They stay fresh for up to five days, though the crust loses some crunch after day two. To freeze the bars, arrange them in a single layer on a baking sheet lined with parchment paper. Freeze for two hours until firm. Then wrap each bar individually in plastic wrap and place them in a freezer-safe bag. Frozen bars keep for up to three months. Thaw them overnight in the refrigerator before serving. Do not thaw at room temperature, or condensation will make the crust wet. These bars also make fantastic make-ahead desserts for holidays. Bake them two days early, keep them chilled, and simply slice before guests arrive.
Fun variations to try – dark chocolate, white chocolate, and swirls
You can easily change the flavor profile of these bars without altering the base recipe. Swap the semi-sweet mini chips for dark chocolate chips to add a deeper, less sweet note. Use milk chocolate chips for a milder, creamier taste. For a striking visual, swirl ¼ cup of melted white chocolate into the cheesecake batter before adding the chips. Another popular twist adds 2 tablespoons of instant espresso powder to the crust. The coffee flavor amplifies the chocolate without making the bars taste like mocha. If you want a peanut butter version, drop small spoonfuls of softened peanut butter on top of the cheesecake layer and swirl with a knife before adding the remaining chocolate chips.
FAQ – Answers To Common Questions About Chocolate Chip Cheesecake Bars
Can I use regular chocolate chips instead of mini ones?
Yes, but regular chocolate chips tend to sink to the bottom of the cheesecake layer because they weigh more. Tossing them in a teaspoon of flour before folding into the batter helps prevent sinking. Mini chips distribute more evenly and require no extra steps.
Why did my cheesecake bars crack on top?
Cracks usually happen from overbaking, sudden temperature changes, or skipping the water bath. Bake just until the edges set and the center still jiggles slightly. Cool the bars gradually on the counter before moving them to the fridge. Adding the water bath to your oven also reduces cracking significantly.
How long do these bars need to chill before cutting?
At least four hours, but eight hours or overnight gives the cleanest slices. The chilling process sets the cheesecake completely, so the bars hold their shape when you cut them.
Can I make this recipe gluten-free?
Absolutely. Replace the Oreos with a gluten-free chocolate sandwich cookie for the crust. Swap the all-purpose flour in the cheesecake filling with a gluten-free 1:1 baking flour. All other ingredients remain naturally gluten-free.
Do I have to use a water bath?
No, but your bars will look better with one. The water bath creates gentle, even heat. Without it, the edges may bake faster than the center, causing a dome shape or deep cracks. The taste remains delicious either way.
Can I reduce the sugar in this recipe?
You can cut the granulated sugar to 1 cup instead of 1½ cups. The bars will taste less sweet, but the texture stays creamy. Do not reduce the sugar further, or the cheesecake may turn out too soft and fail to set properly.
What is the best way to reheat a single bar?
Place one bar on a microwave-safe plate and heat for 10 to 15 seconds. This softens the cheesecake and slightly melts the chocolate chips. Avoid longer heating, or the cheesecake will turn runny.
Conclusion
Chocolate chip cheesecake bars bring together everything you love about traditional cheesecake without the hassle of a springform pan or a finicky water bath. The buttery Oreo crust, the smooth cream cheese filling, and the generous pockets of melted chocolate create a dessert that satisfies both cheesecake purists and chocolate lovers. You can bake them for a holiday dinner, a summer potluck, or a quiet Tuesday night treat. Just remember to chill them fully, slice with a warm knife, and keep leftovers in the fridge. Once you master this recipe, you will never reach for a boxed mix again. Go ahead, preheat your oven, and make a batch of these irresistible bars today.
Full recipe:
Ingredients :
CRUST
- 30 Oreo cookies
- 6 tablespoons (¾ stick) butter
CHEESECAKE
- Three 8 ounce packages cream cheese, at room temperature
- 1½ cups granulated white sugar
- ¼ cup sour cream
- 2 teaspoons vanilla extract
- ¼ cup all purpose flour
- 3 large eggs
- 1¼ cups mini chocolate chips, divided
Instructions
CRUST
-
Preheat the oven to 325 degrees F. Line a 9×13 inch pan with foil and spray with nonstick spray.
-
Place the Oreos (cream filling included!) in a food processor. Pulse the cookies until they become crumbs.
-
In a medium bowl, combine the crumbs and melted butter. Press the crumbs evenly into the prepared pan. Bake for 10 minutes. Remove to cool for at least 20 minutes before adding the filling. Keep the oven on.
CHEESECAKE
-
Place a large, rimmed baking sheet on the bottom rack of the oven and fill it halfway with water.
-
In a large bowl, use an electric mixer to beat the cream cheese until creamy. Then mix in the sugar, sour cream and vanilla; beat until smooth. Beat in the flour. Add the eggs one at a time, beating well after each addition. Stir in 1 cup of the mini chocolate chips.
-
Spread the cheesecake batter over the cooled crust. Sprinkle the top of the cheesecake with the remaining chocolate chips. Bake the cheesecake on a rack above the pan of water for 45 minutes.
-
Remove the pan from the oven and place it on a wire rack. Let the cheesecake cool for 1 hour, then refrigerate for 4 hours or until completely chilled.
-
Cut the cheesecake into 24 bars, and keep refrigerated until ready to serve.