Introduction
Prepare to embark on a journey of sweet indulgence with our “Ho Ho Cake Magic.” This decadent dessert pays homage to the classic Ho Hos snack cakes, combining layers of moist chocolate cake with rich cream filling and a luscious chocolate glaze. In this comprehensive guide, we will walk you through the step-by-step process of creating this delightful treat that captures the essence of childhood nostalgia. So, roll up your sleeves, and let’s dive into the world of chocolatey delight!
The Allure of Ho Hos
A Childhood Favorite
Ho Hos have been a beloved treat for generations, with their irresistible combination of chocolate and cream. The mere mention of Ho Hos can bring a smile to anyone’s face, reminding them of the joy of indulging in this iconic snack. But have you ever wondered what makes Ho Hos so special? Let’s take a closer look.
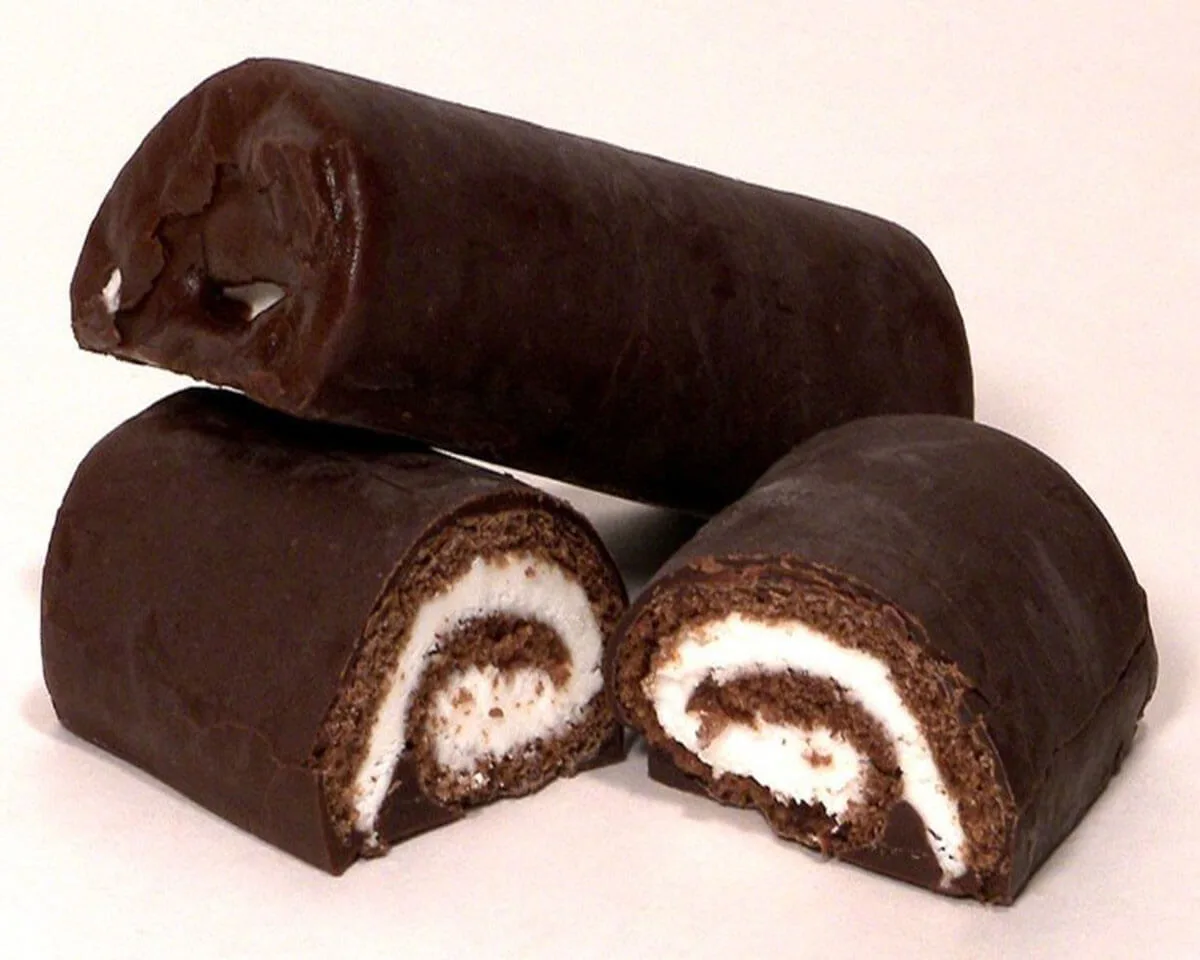
Ho Hos, created by Hostess, have been a cherished part of American snack culture since the 1960s. These cylindrical delights consist of a moist chocolate cake rolled around a rich and creamy filling, creating a perfect balance of textures and flavors. The smooth, chocolatey exterior conceals a creamy surprise inside, making each bite a delightful experience.
Homemade Nostalgia
While store-bought Ho Hos are undeniably delicious, there’s something truly special about recreating the magic at home. The process of baking your own Ho Ho-inspired cake from scratch allows you to infuse it with love and nostalgia. Here’s why homemade Ho Ho cakes hold a special place in our hearts:
The Joy of Baking
Baking is not just a culinary skill; it’s an art form that allows you to create something extraordinary from basic ingredients. Baking your Ho Ho cake from scratch provides a sense of accomplishment and a deeper connection to your dessert. Plus, the aroma of a freshly baked chocolate cake wafting through your kitchen is simply irresistible.
Recreating the Classic
To capture the signature Ho Ho flavor and texture in your homemade cake, you’ll need the right ingredients and techniques. Here are some tips for achieving that classic Ho Ho taste:
- Use high-quality cocoa powder: The quality of your cocoa powder greatly affects the chocolatey richness of your cake. Opt for a premium cocoa powder for the best results.
- Incorporate buttermilk: Buttermilk adds moisture and a subtle tanginess to your cake, enhancing its overall flavor and tenderness.
- Roll with precision: Rolling the cake can be a bit tricky, but practice makes perfect. Don’t be discouraged if your first attempt isn’t flawless; it’s all about enjoying the process.
Crafting the Chocolate Layers
The Foundation of Chocolate
Before you can assemble your Ho Ho cake, you need to create the perfect chocolate cake layers. These layers should be moist, fluffy, and rich in chocolate flavor. Here’s how to do it:
Baking the Cake Layers
- Gather Your Ingredients: To begin, make sure you have all your ingredients measured and ready. You’ll need flour, cocoa powder, baking soda, salt, buttermilk, eggs, sugar, and vanilla extract.
- Prepare Your Pans: Grease and line your cake pans with parchment paper to ensure the cakes don’t stick.
- Mix Your Dry Ingredients: In a mixing bowl, sift together the flour, cocoa powder, baking soda, and salt. Sifting helps break up any lumps and ensures even distribution of the dry ingredients.
- Combine Wet Ingredients: In a separate bowl, whisk together the buttermilk, eggs, sugar, and vanilla extract until well combined.
- Mix Dry and Wet Ingredients: Gradually add the dry ingredients to the wet ingredients, mixing until just combined. Be careful not to overmix, as this can result in a denser cake.
- Bake to Perfection: Divide the batter evenly between your prepared pans and bake in a preheated oven according to your recipe’s instructions. Use a toothpick to check for doneness; it should come out clean when inserted into the center of the cakes.
Layering Perfection
Once your cake layers are baked and cooled, it’s time to focus on achieving even and perfectly flat layers. Here’s how to do it:
- Level Your Cakes: If your cake layers have domed tops, level them by carefully slicing off the excess with a serrated knife. This ensures that your layers will stack evenly.
- Use a Cake Leveler: For precise results, consider using a cake leveler, which allows you to trim your cakes to an exact height.
- Stack and Frost: As you assemble your cake, add a layer of the cream filling between each cake layer. This filling will not only add flavor but also act as glue to hold the layers together.
Creamy Filling Bliss
Whipping Up the Filling
The heart of a Ho Ho cake lies in its creamy filling. To achieve that velvety texture and rich flavor, follow these steps:
How to Make a Velvety Cream Filling
- Gather Your Ingredients: You’ll need heavy cream, powdered sugar, vanilla extract, and a touch of salt to enhance the flavor.
- Chill Your Mixing Bowl: Place your mixing bowl and beaters or whisk attachment in the refrigerator for about 15 minutes before you start. This helps the cream whip up faster and to stiffer peaks.
- Whip the Cream: Pour the heavy cream into the chilled mixing bowl and whip it on medium-high speed until it starts to thicken.
- Add Sugar and Flavor: Gradually add the powdered sugar, vanilla extract, and a pinch of salt. Continue whipping until you achieve stiff peaks. Be careful not to overwhip, as this can result in butter instead of whipped cream.
- Taste and Adjust: Taste the filling and adjust the sweetness or flavor to your liking by adding more powdered sugar or vanilla extract if necessary.
Spreading the Joy
To ensure that your cream filling is evenly spread between the cake layers, follow these tips:
- Use an offset spatula or the back of a spoon to spread the filling evenly. Start from the center and work your way outward to the edges, ensuring uniform coverage.
- Aim for a consistent layer of filling to ensure a balanced flavor in every bite.
- Be gentle but thorough when spreading the filling to avoid disturbing the cake layers beneath.
Chocolate Glaze Extravaganza
The Chocolate Finish
Now that your cake is layered with creamy filling, it’s time to give it that iconic chocolate glaze. The glaze should be glossy, smooth, and utterly decadent. Here’s how to create it:
Creating the Chocolate Glaze
- Ingredients: You’ll need semisweet chocolate chips, heavy cream, unsalted butter, and corn syrup to achieve the perfect glaze.
- Melt Chocolate and Butter: In a microwave-safe bowl, combine the chocolate chips, unsalted butter, and corn syrup. Microwave in 30-second intervals, stirring between each, until the mixture is smooth and fully melted. Be cautious not to overheat, as chocolate can easily scorch.
- Add Cream: Gradually whisk in the heavy cream until the glaze is silky and glossy.
- Cool Slightly: Allow the glaze to cool for a few minutes before pouring it over your cake. This ensures that it’s thick enough to coat the cake but still pourable.
Pouring and Spreading
To achieve a flawless chocolate coating on your cake, follow these techniques:
- Place your cake on a wire rack set over a baking sheet to catch any drips. This makes the glazing process neater.
- Start pouring the glaze from the center of the cake and let it flow outward naturally. Use a spatula to help spread it evenly over the top and sides, ensuring complete coverage.
- If needed, you can gently nudge the glaze over the edges to create a smooth, glossy finish.
Presentation and Decorations
Showcasing Your Ho Ho Cake
Presentation is key when it comes to making your Ho Ho cake a showstopper. Here are some suggestions for presenting your cake to impress your guests:
Cake Display
- Cake Stand: Place your Ho Ho cake on a decorative cake stand or platter to elevate its appearance.
- Dusting of Cocoa: Lightly dust the top of the cake with cocoa powder to add a touch of elegance and enhance the chocolate flavor.
- Fresh Berries: Garnish the cake with fresh berries, such as strawberries or raspberries, for a burst of color and a fruity contrast to the richness of the cake.
Decorative Flourishes
- Chocolate Shavings: Create chocolate shavings using a vegetable peeler and sprinkle them over the cake for a stunning finish.
- Edible Flowers: Edible flowers, like pansies or violets, add a touch of whimsy and color to your Ho Ho cake.
- Chocolate Drizzle: Drizzle melted chocolate over the top of the cake for an artistic touch.
Accompaniments and Pairings
Whipped Cream Whirlwind
While Ho Ho cake is delightful on its own, you can take it to the next level by serving it with complementary accompaniments. One classic choice is whipped cream, which adds a light and airy contrast to the richness of the cake. Here’s how to create the perfect whipped cream:
The Classic Pairing of Whipped Cream
- Ingredients: You’ll need heavy cream, powdered sugar, and vanilla extract.
- Chill Your Tools: Just like when making the cream filling, it’s important to chill your mixing bowl and beaters or whisk attachment before whipping the cream.
- Whip to Perfection: Pour the heavy cream into the chilled mixing bowl and whip it on medium-high speed. As it starts to thicken, gradually add the powdered sugar and vanilla extract. Whip until you achieve soft peaks.
- Serve Fresh: Whipped cream is best when served immediately. Dollop it generously on each slice of Ho Ho cake for a delightful pairing.
Beverage Bliss
Pairing your Ho Ho cake with the right beverages can elevate the entire dining experience. Here are some beverage options to consider:
Coffee or Espresso
The rich and robust flavors of coffee or espresso make them ideal companions for Ho Ho cake. The bitterness of the coffee complements the sweetness of the cake, creating a harmonious balance.
Milk
For a classic pairing reminiscent of childhood, serve your Ho Ho cake with a cold glass of milk. The milk’s creaminess complements the cake’s texture and enhances the chocolatey goodness.
Red Wine
If you prefer a more adult pairing, consider a glass of red wine, such as a Merlot or Cabernet Sauvignon. The wine’s tannins and fruitiness can complement the cake’s sweetness.
Leftover Love
Storing Your Sweet Creation
If, by some miracle, you have leftover Ho Ho cake, it’s essential to store it properly to maintain its freshness. Here are some tips for refrigerating your cake:
Refrigeration Tips
- Cover It: Use plastic wrap or aluminum foil to cover the exposed cake surface. This prevents it from drying out or absorbing unwanted odors from the fridge.
- Store in an Airtight Container: If you have a cake carrier or an airtight container large enough, place the cake inside. This provides an additional layer of protection against moisture loss.
- Keep It Cold: Store the cake in the refrigerator at a temperature between 34°F and 36°F (1°C to 2°C). This ensures it stays fresh without freezing.
Reheating Hints
If you prefer your leftover Ho Ho cake slightly warmed, follow these techniques to maintain its texture:
Techniques for Warming Up Your Cake
- Room Temperature: Let the cake sit at room temperature for about 20-30 minutes before serving. This allows it to soften slightly without losing its moisture.
- Microwave: To warm individual slices, place them in the microwave for 10-15 seconds on low power. Check the cake’s warmth after each interval to avoid overheating.
- Oven: If you have a larger portion, preheat your oven to 350°F (175°C), and place the cake on a baking sheet. Heat for 10-15 minutes or until it reaches your desired temperature.
Creative Leftover Ideas
Instead of simply reheating your leftover Ho Ho cake, why not transform it into new and delightful creations? Here are two creative leftover ideas:
Ho Ho Trifle
Transform your leftover cake into a delightful Ho Ho cake trifle with layers of chocolatey goodness. Here’s how to do it:
- Cube the Cake: Cut your leftover cake into bite-sized cubes.
- Layer in a Glass: In a glass or trifle dish, layer the cake cubes with whipped cream and chocolate shavings. Repeat the layers until you fill the glass.
- Chill and Serve: Refrigerate the trifle for a couple of hours to allow the flavors to meld. Serve chilled and enjoy this new twist on your Ho Ho cake.
Milkshake Marvel
Blend leftover cake with ice cream and milk for a mouthwatering Ho Ho cake milkshake. Here’s a quick guide:
- Gather Your Ingredients: You’ll need leftover cake, vanilla ice cream, milk, and a blender.
- Combine Ingredients: In the blender, add a few cake slices, a scoop of vanilla ice cream, and a splash of milk.
- Blend Until Smooth: Blend until the mixture is creamy and smooth. Add more milk if needed to achieve your desired consistency.
- Serve and Enjoy: Pour the milkshake into a glass and savor the decadent flavors of Ho Ho cake in liquid form.
Conclusion
Ho Ho Cake Magic is a delightful nod to childhood memories and a celebration of the beloved Ho Hos snack cakes. With layers of moist chocolate cake, a velvety cream filling, and a glossy chocolate glaze, every bite is a burst of chocolatey delight.
Understanding the art of baking, layering, and glazing allows you to create this irresistible dessert in your own kitchen. Whether you serve it as the star of a celebration or enjoy it as a sweet indulgence, Ho Ho Cake Magic promises to transport you back to the simple joys of childhood.
And when you have leftovers, get creative with Ho Ho trifle or a mouthwatering Ho Ho cake milkshake. So, don your apron, gather your ingredients, and get ready to savor the sweet magic of Ho Ho cakes! Indulge in the nostalgia and share the joy with friends and family as you create this delicious treat that’s sure to become a favorite for generations to come.