Introduction
Prepare to embark on a delightful journey as we unwrap the secrets of the No-Bake Twix Cake. This dessert is a testament to the sweet indulgence of simplicity, offering layers of caramel, chocolate, and biscuit bliss that will satisfy your sweet cravings. Whether you’re an experienced baker or a novice in the kitchen, this cake promises a heavenly experience that will leave you and your guests craving for more. So, let’s roll up our sleeves, gather our ingredients, and create our very own Twixy masterpiece. Enjoy every bite of this decadent treat!
The Tempting World of No-Bake Desserts
No-bake desserts have a special place in the world of confections. They offer a hassle-free path to sweet satisfaction, allowing you to indulge in your favorite treats without the need for an oven. The No-Bake Twix Cake we’re about to explore is a prime example of how simplicity and creativity can come together to create a mouthwatering masterpiece.
Prepare for a Gastronomic Journey
Get ready for a gastronomic journey that will take you through the essential ingredients, the art of crafting layers of decadence, the secrets of achieving the perfect set, and the finishing touches that make this cake a true delight. Whether you’re making it for a special occasion or just to treat yourself, you’re in for a delightful adventure.
Gathering Your Twixy Ingredients
Before we begin crafting this delicious cake, let’s gather the essential ingredients that will make it a Twixy sensation.
The Essentials
Twix Bars: The Star of the Show
Twix bars are the heart and soul of this cake. Their combination of crunchy biscuit, creamy caramel, and smooth chocolate is what makes this dessert truly special.
Creamy Caramel: Sweet, Sticky Bliss
Caramel provides the sweet and sticky layer that binds everything together. You can use store-bought caramel or make your own for a unique touch.
Chocolate Galore: Dark vs. Milk
The choice between dark and milk chocolate is a matter of personal preference. Dark chocolate offers a rich, intense flavor, while milk chocolate provides a creamier, sweeter taste.
Buttery Bliss: The Foundation of Twix
Butter adds richness and a smooth texture to the biscuit base. It’s an essential element in creating the perfect Twixy experience.
Extra Flavor Boosts
Vanilla Essence: A Fragrant Addition
A dash of vanilla essence adds a fragrant note to the biscuit base, enhancing its overall flavor.
Salted or Unsalted Butter: Your Choice Matters
You can choose between salted and unsalted butter based on your taste preferences. Salted butter adds a hint of saltiness that complements the sweetness of the caramel and chocolate.
Adding a Dash of Sea Salt
For those who enjoy a sweet and salty contrast, a pinch of sea salt can be sprinkled on top of the caramel layer.
Crafting Layers of Decadence
Now that we’ve gathered our Twixy ingredients, it’s time to craft the layers of decadence that will make this cake a memorable treat.
Preparing the Biscuit Base
Selecting the Right Biscuits
Choosing the right biscuits is crucial. Opt for biscuits with a buttery, crumbly texture that will complement the caramel and chocolate layers.
The Binding Magic: Butter and Crushed Biscuits
Mixing crushed biscuits with melted butter creates the biscuit base, providing a satisfying crunch that mimics the Twix bar’s biscuit layer.
The Patting and Pressing Technique
Learn the art of patting and pressing the biscuit mixture into your cake tin to create a solid and even base.
Caramel Sensation
Melting and Mixing Caramel
If you’re making your own caramel, master the process of melting and mixing sugar until it transforms into a luscious, golden caramel.
Caramel and Biscuit Marriage
Discover how to spread the caramel evenly over the biscuit base, ensuring every bite is filled with sweet, sticky bliss.
Achieving Perfect Caramel Spread
Learn the techniques to achieve a flawless caramel layer that’s neither too thick nor too thin.
The Chocolate Blanket
Melting Chocolate Smoothly
Explore the methods of melting chocolate to achieve a smooth and glossy consistency.
Pouring and Spreading the Chocolate Layer
Discover how to pour the melted chocolate over the caramel layer and spread it evenly to create a flawless chocolate blanket.
Creating That Signature Ripple
Master the art of creating the signature Twix-like ripple pattern on the chocolate layer, adding a touch of authenticity to your cake.
Chilling and Setting the Magic
To ensure your No-Bake Twix Cake turns out perfectly, understanding the chilling and setting process is crucial.
Temperature Matters
Learn the importance of maintaining the right temperature throughout the process to prevent any mishaps.
Refrigeration vs. Freezing
Discover whether refrigeration or freezing is the best method to set your cake, ensuring it reaches the perfect texture.
The Perfect Set: Patience Required
Understand that patience is key as you wait for your cake to set. Rushing this step can lead to unwanted cracks in the chocolate.
Avoiding the Chocolate Crack
Learn the tips and tricks to prevent the chocolate from cracking while setting, ensuring a flawless finish.
Decorative Flair
The No-Bake Twix Cake isn’t just about taste; it’s also about presentation. Let’s add the finishing touches that will make your cake visually appealing.
Dusting with Cocoa Powder
Discover how a light dusting of cocoa powder can add a touch of elegance to your cake’s appearance.
Twix Bar Crumbles: Adding Texture
Crush extra Twix bars and sprinkle the crumbles over the top of your cake to create texture and hint at the deliciousness within.
Adding a Drizzle of Caramel
For an extra drizzle of caramel, learn how to create an enticing caramel design on the top of your cake.
Presentation and Serving
Now that your No-Bake Twix Cake is ready to be unveiled, let’s discuss how to present and serve it to make the best impression.
Slicing and Plating
The Art of Slicing Neatly
Master the technique of slicing your cake neatly to create individual portions that showcase all the delicious layers.
Portion Sizes: Small but Decadent
Remember that a little goes a long way with this rich dessert. Small, bite-sized portions are often the perfect serving size.
The Use of Cake Lifters
Cake lifters can be your secret weapon in transferring delicate slices to serving plates without disturbing the layers.
A La Mode or Whipped Cream?
Ice Cream Pairing: The Classic Choice
Consider pairing your Twix cake with a scoop of vanilla ice cream for a classic combination that balances the sweetness.
Whipped Cream Swirls: Light and Airy
Alternatively, adorn your cake slices with a swirl of whipped cream for a light and airy contrast to the rich layers.
Garnishing with Fresh Berries
Fresh berries add a burst of color, freshness, and a hint of tartness that complements the sweet layers of the cake.
Savoring the Twixy Bliss
As you and your guests savor the No-Bake Twix Cake, take a moment to appreciate the textural symphony, the melting chocolate temptation, and the burst of flavor that comes with every bite.
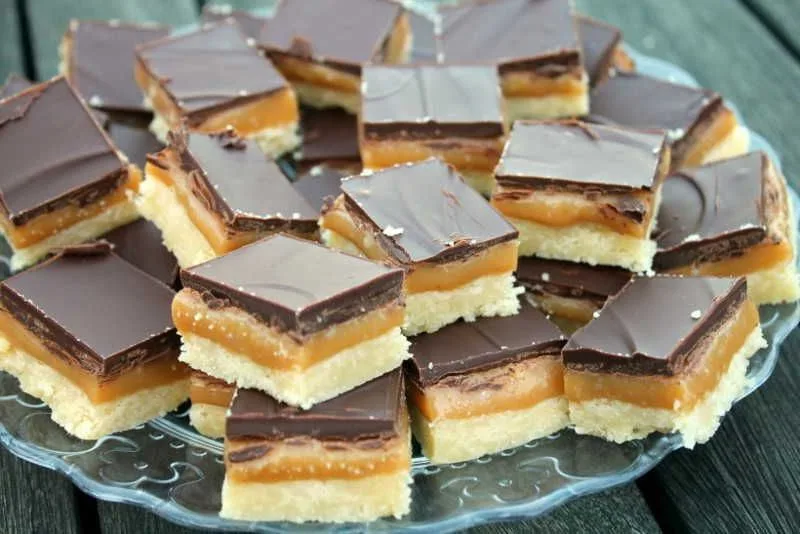
The Textural Symphony: Crunchy, Chewy, Creamy
Notice how the layers come together to create a delightful textural contrast: the crunch of the biscuit, the chewiness of the caramel, and the creaminess of the chocolate.
The Melting Chocolate Temptation
Allow the chocolate layer to melt in your mouth, releasing its rich cocoa flavor as it contrasts with the sweet caramel beneath.
The Flavor Burst: Caramel and Biscuit Bliss
Experience the harmony of flavors as the sweet, sticky caramel combines with the buttery biscuit base to create a heavenly taste sensation.
FAQs (Frequently Asked Questions)
As you embark on your journey to create the perfect No-Bake Twix Cake, you may have some questions. Here are answers to common queries:
Can I use homemade caramel instead of store-bought?
Absolutely! Homemade caramel adds a unique touch to your cake and allows you to adjust the sweetness to your liking.
Is it necessary to use both dark and milk chocolate?
No, you can choose to use either dark or milk chocolate based on your preference. Each imparts its own distinct flavor to the cake.
Can I make a gluten-free version of this cake?
Yes, you can easily make a gluten-free version by using gluten-free biscuits, ensuring that those with gluten sensitivities can also enjoy this treat.
How long can I store a no-bake Twix cake?
You can store your cake in the refrigerator for up to a week, making it a convenient make-ahead dessert. Alternatively, it can be frozen for longer storage, allowing you to enjoy Twixy bliss whenever you desire.
Can I substitute Twix bars with another candy bar?
Certainly! Feel free to experiment with other candy bars to create a unique twist on this recipe. Different candy bars will bring their own flavors and textures to the dessert.
Conclusion
The No-Bake Twix Cake is more than just a dessert; it’s a sweet masterpiece that combines simplicity with indulgence. Whether you’re celebrating a special occasion or simply treating yourself to a delightful sweet escape, this cake promises to satisfy your cravings and delight your taste buds. So, embrace the art of creating this Twixy sensation, and with each bite, relish in the layers of caramel, chocolate, and biscuit bliss. Enjoy the decadence, and savor the Twixy delight!