
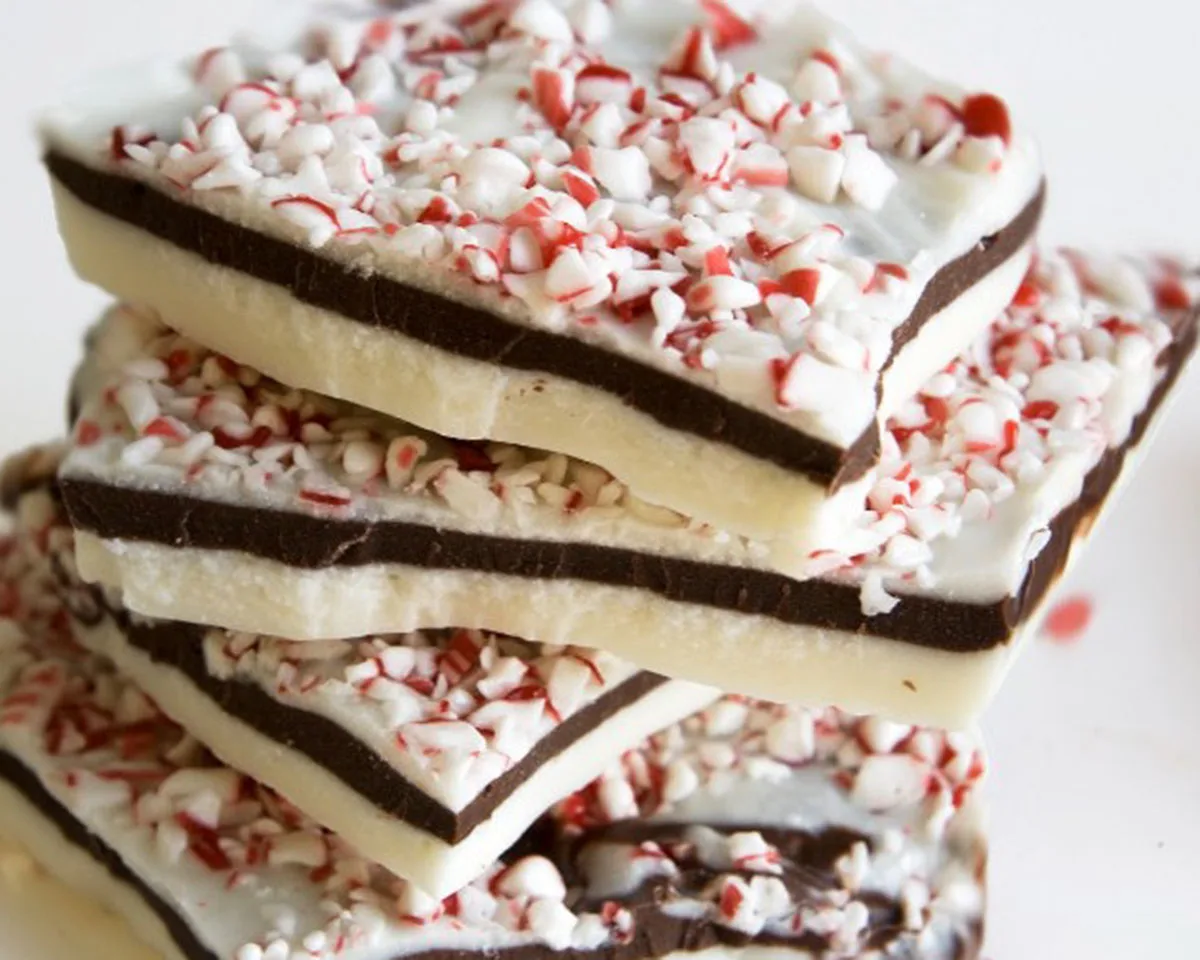
I still remember the first Christmas I tried to make homemade gifts for everyone on my list. I had big plans. Fudge, cookies, truffles, and caramels. By December 23rd, I stood in a messy kitchen with melted chocolate on my sweater and zero finished presents. Then my friend called and said, “Just make peppermint bark. It takes ten minutes.” I did not believe her. But I grabbed dark chocolate chips, white chocolate chips, and a box of candy canes. Twenty minutes later, I had a baking sheet full of glossy, crackly peppermint bark cooling in the fridge. I broke it into rustic pieces, stuffed them into clear bags, and tied them with red ribbon. Everyone raved about that peppermint bark. My brother asked if I bought it from a fancy chocolate shop. That year, I learned a valuable lesson. Simple does not mean boring. This three-ingredient peppermint bark proves that with minimal effort, you can create a stunning, professional-looking holiday treat. No candy thermometer. No double boiler. No special skills. Just chocolate, peppermint, and a little patience. Whether you need a last-minute gift, a crowd-pleasing dessert, or a fun project to make with kids, this peppermint bark recipe delivers every time. Let me show you how to make the best three-ingredient peppermint bark of your life.
Part 1: Why This 3-Ingredient Peppermint Bark Works So Well
The Perfect Marriage of Chocolate and Peppermint
Peppermint bark owes its popularity to a simple flavor principle. Rich, slightly bitter dark chocolate provides depth. Sweet, creamy white chocolate adds a vanilla-like contrast. Crushed candy canes bring cool mint, bright color, and satisfying crunch. Each layer plays a specific role. Dark chocolate grounds the bark. White chocolate lightens it. Peppermint wakes up your taste buds. Together, they create a balanced, addictive treat. You do not need any other flavors. No vanilla extract, no butter, no cream. The three ingredients shine on their own. This simplicity also makes peppermint bark incredibly forgiving. If your chocolate seizes, you can fix it with a drop of vegetable oil. If your layers swirl together, it still looks beautiful. If you use milk chocolate instead of dark, you still get a delicious result. The recipe welcomes small mistakes.
A Foolproof, No-Fuss Method Perfect for Beginners
Many homemade candies intimidate beginner bakers. Caramel requires precise temperature control. Fudge can turn grainy. Truffles need rolling and coating. Peppermint bark asks for none of that. You melt chocolate in the microwave. You spread it on parchment paper. You sprinkle crushed candy canes on top. Then you chill it. That is literally the whole process. No double boiler. No candy thermometer. No tempering chocolate. The refrigerator does the hard work of setting the bark. Because you serve peppermint bark cold or at room temperature, you do not need the glossy snap of tempered chocolate. This shortcut makes the recipe accessible to everyone. Kids can help crush candy canes and sprinkle toppings. You can make several batches in an hour. Cleanup requires washing only two bowls and a spatula. For busy holiday seasons, this efficiency is a lifesaver.
Part 2: Essential Ingredients and Equipment for Success
Choosing the Right Chocolate and Candy Canes
Quality ingredients make a noticeable difference. For dark chocolate, use eighteen ounces of dark chocolate chips. Look for chips with at least fifty percent cocoa for a balanced bittersweet flavor. Semi-sweet chips also work well. Milk chocolate chips create a sweeter, less complex bark. Avoid chocolate melting wafers meant for candy coatings. They lack depth. For white chocolate, use eighteen ounces of white chocolate chips. Real white chocolate contains cocoa butter, sugar, and milk solids. Read the label. Cheap white baking chips often use palm oil and artificial flavors. They do not melt as smoothly. For the peppermint, buy standard candy canes or hard peppermint candies. Avoid starlight mints with artificial colors unless you want pink or green specks. You need half a cup of crushed candies total. That is about six to eight regular candy canes.
The table below summarizes the key ingredients and smart swaps.
| Ingredient | Quantity | Notes and Substitutions |
|---|---|---|
| Dark chocolate chips | 18 oz | Semi-sweet or milk chocolate work |
| White chocolate chips | 18 oz | Real white chocolate preferred |
| Crushed candy canes | ½ cup | Hard peppermint candies also work |
Must-Have Tools and Prep Steps
You do not need special equipment. Gather a baking sheet (standard half-sheet size, about 13×18 inches). Line it with parchment paper. Do not use wax paper. Wax paper can stick and melt. Parchment paper is non-stick and heat-safe. You also need two microwave-safe bowls, a rubber spatula, and an offset spatula or butter knife for spreading. To crush candy canes, place them in a sealed ziplock bag. Use a rolling pin, meat mallet, or the bottom of a heavy skillet. Smash until you have a mix of fine dust and small chunks. Do not over-crush into powder. You want texture. Separate the crushed candy into two quarter-cup portions. One goes into the white chocolate. The other goes on top.
Part 3: Step-by-Step 3-Ingredient Peppermint Bark Recipe
Melting the Dark and White Chocolate Correctly
First, line your baking sheet with parchment paper. Set it aside. Second, pour the eighteen ounces of dark chocolate chips into a microwave-safe bowl. Microwave on high for forty-five seconds. Stir the chocolate thoroughly. Return to the microwave. Heat in ten-second intervals, stirring after each interval, until the chocolate is completely melted and smooth. This usually takes two to three rounds. Do not overheat. Burnt chocolate smells acrid and turns grainy. Third, pour the melted dark chocolate onto the prepared parchment paper. Use an offset spatula or the back of a spoon to spread it into an even layer about a quarter-inch thick. Aim for a rough rectangle. Do not worry about perfect edges. Fourth, repeat the melting process with the eighteen ounces of white chocolate chips in a separate bowl. Heat in forty-five seconds, then ten-second intervals. Once melted and smooth, add one quarter cup of the crushed peppermint candies. Stir to combine.
Layering, Topping, and Setting the Bark
Fifth, pour the white chocolate mixture directly on top of the dark chocolate layer. Use your spatula to spread it gently. Do not mix the two chocolates. A few swirls are fine and look beautiful. Spread almost to the edges of the dark chocolate layer. Sixth, immediately sprinkle the remaining quarter cup of crushed candy canes evenly over the white chocolate. Press down very lightly with your fingertips so the candy pieces adhere. Seventh, place the baking sheet in the refrigerator. Chill for ten to fifteen minutes, or until the chocolate is completely firm. Do not freeze. Freezing can cause condensation and make the bark sticky. Eighth, remove the baking sheet from the fridge. Lift the parchment paper and transfer the bark sheet to a cutting board. Use a sharp, heavy knife to cut the bark into pieces. Large shards look rustic. Small squares look neat. Run the knife under hot water and wipe it dry between cuts for cleaner edges. Ninth, store the finished peppermint bark in an airtight container in the refrigerator. It stays fresh for up to two weeks. Serve cold or at room temperature.
Part 4: Serving, Gifting, and Creative Twists
How to Present Peppermint Bark for Gifting or Parties
Peppermint bark looks stunning on a holiday dessert table. Arrange the broken pieces on a white platter. Scatter a few extra crushed candy canes and a dusting of powdered sugar around them. For individual servings, place two to three small pieces in a mini paper cup or a candy liner. For gifting, layer the bark pieces in clear cellophane bags. Tie with a red ribbon and a gift tag. Add a small candy cane to the ribbon for extra flair. You can also stack pieces in a decorative tin lined with wax paper. Include a handwritten note with the three ingredients. People appreciate homemade gifts, but they especially appreciate homemade candy that looks professional. This peppermint bark fits the bill perfectly. Serve it alongside hot cocoa, coffee, or peppermint tea. It also makes a great topping for ice cream or stirred into whipped cream.
Proper Storage, Make-Ahead Tips, and Flavor Variations
Store peppermint bark in an airtight container in the refrigerator. It stays fresh for up to two weeks. Do not store at room temperature unless your home is very cool. The chocolate can soften and bloom (develop white streaks). Bloom is safe to eat but looks less appealing. You can also freeze peppermint bark for up to three months. Wrap the bark tightly in plastic wrap, then place in a freezer bag. Thaw in the refrigerator overnight before serving. Freezing does not affect the flavor or texture significantly.
For creative variations, try these. Use milk chocolate instead of dark for a sweeter bark. Add a half teaspoon of peppermint extract to the dark chocolate for extra mint punch. Swirl the two chocolates together with a toothpick before adding the crushed candy canes. Top with a sprinkle of flaky sea salt for a sweet-salty version. Add a quarter cup of mini chocolate chips to the white chocolate layer. Use crushed starlight mints for a red-and-white speckled look. For a gluten-free and vegan version, use dairy-free dark chocolate and vegan white chocolate chips. Most candy canes are naturally vegan and gluten-free.
Frequently Asked Questions
Can I use chocolate chips from any brand?
Yes, but quality matters. Higher-quality chips melt more smoothly. Avoid store-brand chips that contain stabilizers. They can become thick and lumpy when melted. If that happens, add one teaspoon of coconut oil or vegetable oil to thin the chocolate.
Why did my white chocolate seize and become grainy?
White chocolate is sensitive to heat and moisture. You likely overheated it or got water in the bowl. Microwave in shorter intervals. Stir vigorously. If a drop of water falls in, the chocolate seizes. Start over with fresh chips.
Can I make this recipe without a microwave?
Yes. Use a double boiler. Fill a saucepan with an inch of water. Bring to a simmer. Place a heat-safe bowl over the water, making sure the bottom does not touch the water. Stir the chocolate until melted. Remove from heat.
How do I get clean, sharp edges when cutting the bark?
Use a large, sharp chef’s knife. Run the blade under very hot water for a few seconds. Wipe it dry. Cut straight down through the bark. Repeat heating and wiping between cuts. Do not saw back and forth.
Can I add toppings other than crushed candy canes?
Absolutely. Try crushed peppermint candies, nonpareils, sprinkles, chopped nuts, or dried raspberry pieces. Add them immediately after spreading the white chocolate so they stick.
How do I fix chocolate that is too thick to spread?
Stir in one teaspoon of vegetable oil, coconut oil, or cocoa butter. Microwave for five seconds. Stir again. The oil thins the chocolate without affecting the flavor. Do not add water. Water seizes chocolate.
Is peppermint bark gluten-free and dairy-free?
Standard peppermint bark contains dairy from white chocolate and dark chocolate (milk solids). For dairy-free, use vegan dark chocolate and vegan white chocolate chips. Candy canes are usually gluten-free. Check labels to be sure.
Conclusion
Three-ingredient peppermint bark proves that you do not need a long ingredient list or advanced skills to create a stunning holiday treat. With dark chocolate, white chocolate, and crushed candy canes, you make a confection that looks professional, tastes amazing, and comes together in under thirty minutes. You can gift it, serve it at parties, or keep a stash in the fridge for when those peppermint cravings hit. You now know how to melt chocolate without burning it, layer the two chocolates perfectly, and cut clean, beautiful shards. You have creative variations to keep things interesting and storage tips to make it last. So grab a bag of chocolate chips and a box of candy canes. Line that baking sheet with parchment paper. Microwave in short bursts, spread with confidence, and sprinkle with peppermint crunch. Your homemade peppermint bark will disappear fast. And you? You will wonder why you ever bought the store-bought version. Happy holidays, and happy snacking.
Full recipe:
Ingredients:
- 18 ounces dark chocolate chips can use semi-sweet or milk chocolate chips
- 18 ounces white chocolate chips
- ½ cup crushed candy canes or hard peppermint candies
Instructions
-
Line a baking sheet with parchment paper. Melt dark chocolate in a microwave safe dish for 45 seconds. Stir, then continue to heat in 10 second intervals, stirring in between, until completely melted.
-
Melt white chocolate chips in a separate bowl in microwave following melting instructions above. Add ¼ cup of the crushed peppermint candies to the white chocolate and stir to combine.
-
Pour melted dark chocolate onto parchment paper and spread evenly to about ¼ inch in thickness. Pour white chocolate on top and carefully spread over dark chocolate. Sprinkle with remaining ¼ cup crushed peppermints. Refrigerate for 10 minutes or until hard. Cut pieces with a sharp knife.