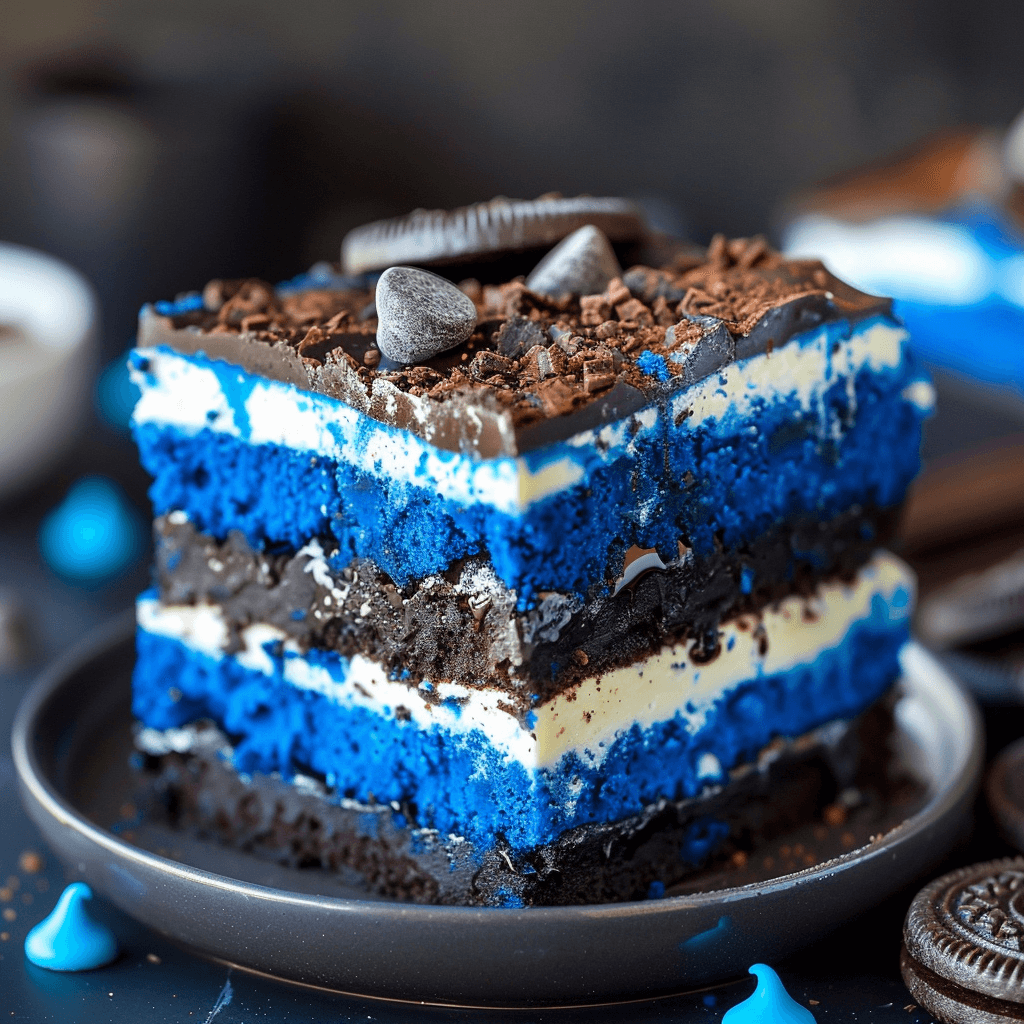
Blue Velvet Oreo Brownies: The Ultimate Decadent Dessert You Must Try

Section 1: The Story & Intro

I still remember the first time I made Blue Velvet Oreo Brownies. It was a last-minute dessert idea for a small gathering, and honestly, I wasn’t sure how people would react to bright blue brownies. But the moment I sliced into that rich, fudgy batch and saw the creamy Oreo layer topped with silky white chocolate, I knew I had something special.

Everyone kept asking for the recipe, and that’s when I realized how unforgettable Blue Velvet Oreo Brownies can be. They don’t just taste incredible—they look stunning too. That bold blue color instantly grabs attention, while the layers of chocolate and Oreo create a dessert that feels both nostalgic and exciting.

If you love classic brownies but want something more creative, Blue Velvet Oreo Brownies will quickly become your go-to treat. They combine the deep richness of chocolate, the crunch of Oreos, and a creamy topping that ties everything together beautifully.

Whether you bake for special occasions or just crave something indulgent, these Blue Velvet Oreo Brownies deliver every time.


PART 1: Blue Velvet Oreo Brownies Basics

What Makes Blue Velvet Oreo Brownies Unique

Blue Velvet Oreo Brownies stand out because they transform a classic dessert into something visually striking and flavor-packed. While traditional brownies focus on chocolate richness, this version adds a vibrant twist with blue velvet coloring and layered textures.

First, the base delivers a dense and fudgy consistency. Then, the Oreo truffle layer adds a creamy crunch that contrasts perfectly. Finally, the white chocolate topping seals everything with a smooth, sweet finish.

Moreover, the color plays a huge role. The deep blue hue makes these brownies perfect for themed parties, birthdays, or even holiday desserts. People often choose them when they want something that looks as good as it tastes.

Key Ingredients Breakdown

Here’s a simple table to understand the role of each key ingredient:

Ingredient Purpose
Bittersweet Chocolate Adds deep, rich flavor
Butter Creates moisture and fudginess
Sugar Sweetens and balances bitterness
Eggs Provide structure and texture
Flour Builds the base of the brownies
Oreo Cookies Adds crunch and creaminess
Cream Cheese Binds the Oreo layer
White Chocolate Creates a smooth topping
Food Coloring Gives the signature blue look

Each ingredient plays a critical role, so you shouldn’t skip or substitute carelessly if you want perfect Blue Velvet Oreo Brownies.


PART 2: How to Make Blue Velvet Oreo Brownies Perfectly

Step-by-Step Baking Process

To make flawless Blue Velvet Oreo Brownies, you need to follow each step carefully.

Start by melting the chocolate and butter together. Stir constantly to avoid burning. Then, mix in the blue and violet food coloring until you achieve a rich velvet shade.

Next, whisk in the sugar and eggs. Add them one at a time to ensure a smooth batter. After that, fold in the dry ingredients gently. Overmixing can ruin the texture, so keep it light.

Pour the batter into your prepared pan and bake until a toothpick comes out clean. Let the brownies cool completely before adding the Oreo layer. This step matters because warm brownies can melt the cream cheese mixture.

Finally, spread the Oreo truffle layer evenly, pour melted white chocolate on top, and let everything set before slicing.

Common Mistakes to Avoid

Many people rush the process, but that often leads to disappointing results.

First, avoid overbaking. Dry brownies lose their signature fudgy texture. Second, don’t skip cooling time. The layers won’t hold properly if the base stays warm.

Also, measure your ingredients accurately. Too much flour can make the brownies dense, while too little can make them fall apart.

If you want bakery-quality Blue Velvet Oreo Brownies, patience and precision make all the difference.


PART 3: Tips, Variations, and Serving Ideas

Pro Tips for the Best Results

If you want your Blue Velvet Oreo Brownies to stand out, follow these expert tips.

Always use high-quality chocolate. Better chocolate leads to richer flavor. Also, let your eggs reach room temperature before mixing. This helps create a smoother batter.

Additionally, chill the brownies slightly before cutting. This makes slicing cleaner and more precise. Use a sharp knife and wipe it between cuts for neat squares.

Creative Variations to Try

You can easily customize Blue Velvet Oreo Brownies to match your taste.

Try swapping Oreos with flavored varieties like mint or peanut butter. You can also add nuts for extra crunch or drizzle dark chocolate over the top for contrast.

Here are a few fun ideas:

Variation Description
Mint Oreo Version Adds a refreshing twist
Peanut Butter Swirl Creates a sweet and salty balance
Nutty Crunch Adds texture with walnuts or pecans
Double Chocolate Uses dark chocolate topping

These variations keep your Blue Velvet Oreo Brownies exciting every time you bake them.


PART 4: Storage, Nutrition, and Occasions

How to Store Blue Velvet Oreo Brownies

Proper storage keeps your brownies fresh and delicious.

Store them in an airtight container at room temperature for up to three days. If you want them to last longer, refrigerate them for up to a week.

For extended storage, freeze them. Wrap each piece individually and store them for up to three months. When ready to eat, let them thaw at room temperature.

When to Serve These Brownies

Blue Velvet Oreo Brownies work for many occasions.

They shine at birthday parties because of their bold color. They also fit perfectly at holiday gatherings or themed events.

Even for casual nights, they make an excellent dessert to enjoy with family. Their unique look and rich taste always impress guests.


Frequently Asked Questions

What are Blue Velvet Oreo Brownies?

Blue Velvet Oreo Brownies are layered brownies with a rich chocolate base, a creamy Oreo truffle middle, and a white chocolate topping, all enhanced with a vibrant blue color.

Can I make Blue Velvet Oreo Brownies without food coloring?

Yes, you can skip the coloring. The brownies will taste the same, but they won’t have the signature blue velvet appearance.

How do I keep brownies fudgy?

Avoid overbaking and measure ingredients carefully. Also, use enough butter and chocolate to maintain moisture.

Can I freeze Blue Velvet Oreo Brownies?

Yes, you can freeze them for up to three months. Wrap them tightly to preserve freshness.

What can I use instead of Oreos?

You can use any cream-filled cookies or even homemade cookie crumbs for a similar texture.


Conclusion

Blue Velvet Oreo Brownies combine bold color, rich flavor, and irresistible texture into one unforgettable dessert. From the fudgy chocolate base to the creamy Oreo layer and smooth white chocolate topping, every bite delivers pure indulgence.

If you want to impress guests or simply treat yourself, these brownies offer the perfect balance of creativity and comfort. Once you try them, you’ll keep coming back to this recipe again and again.

Full recipe:

Ingredients:

– Bittersweet Chocolate: 4 oz, chopped
– Butter: 3/4 cup
– Sugar: 2 cups
– Eggs: 4 large
– All-Purpose Flour: 1 1/2 cups
– Baking Powder: 1 1/2 tsp
– Vanilla Extract: 1 tsp
– Salt: 1/8 tsp
– Royal Blue Gel Food Coloring: 1 tbsp
– Violet Gel Food Coloring: a dab

Oreo Truffle Layer:
– Oreos: 1 package, crushed
– Cream Cheese: 8 oz

White Chocolate Layer:
– White Chocolate: 10 oz, bark or chips
– Mini Chocolate Chips: for garnish

Directions:
1. Preheat the oven to 350°F and grease your baking pan.
2. In a saucepan, melt the chocolate and butter together. Stir in the royal blue and violet food colorings until you achieve a deep blue color.
3. Whisk in sugar, then add eggs one at a time, followed by folding in flour, baking powder, vanilla, and salt until well combined.
4. Pour the batter into the prepared pan and bake for 44-48 minutes, or until a toothpick inserted into the center comes out clean. Let the brownies cool completely.
5. For the Oreo truffle layer, mix crushed Oreos with cream cheese until well combined. Spread this mixture evenly over the cooled brownies.
6. In a microwave-safe bowl, melt the white chocolate and pour it over the Oreo layer. Sprinkle with mini chocolate chips for garnish.
7. Allow the brownies to set before cutting into squares and serving.

Prep Time: 20 minutes
Cook Time: 48 minutes
Tips:
– For a richer flavor, opt for dark chocolate instead of bittersweet.
– Ensure the brownies are completely cooled before adding the Oreo truffle layer to prevent the cream cheese from melting.
– For the best flavor, let the brownies sit at room temperature for about 10 minutes before serving. Enjoy the delightful taste!

Leave a Comment