
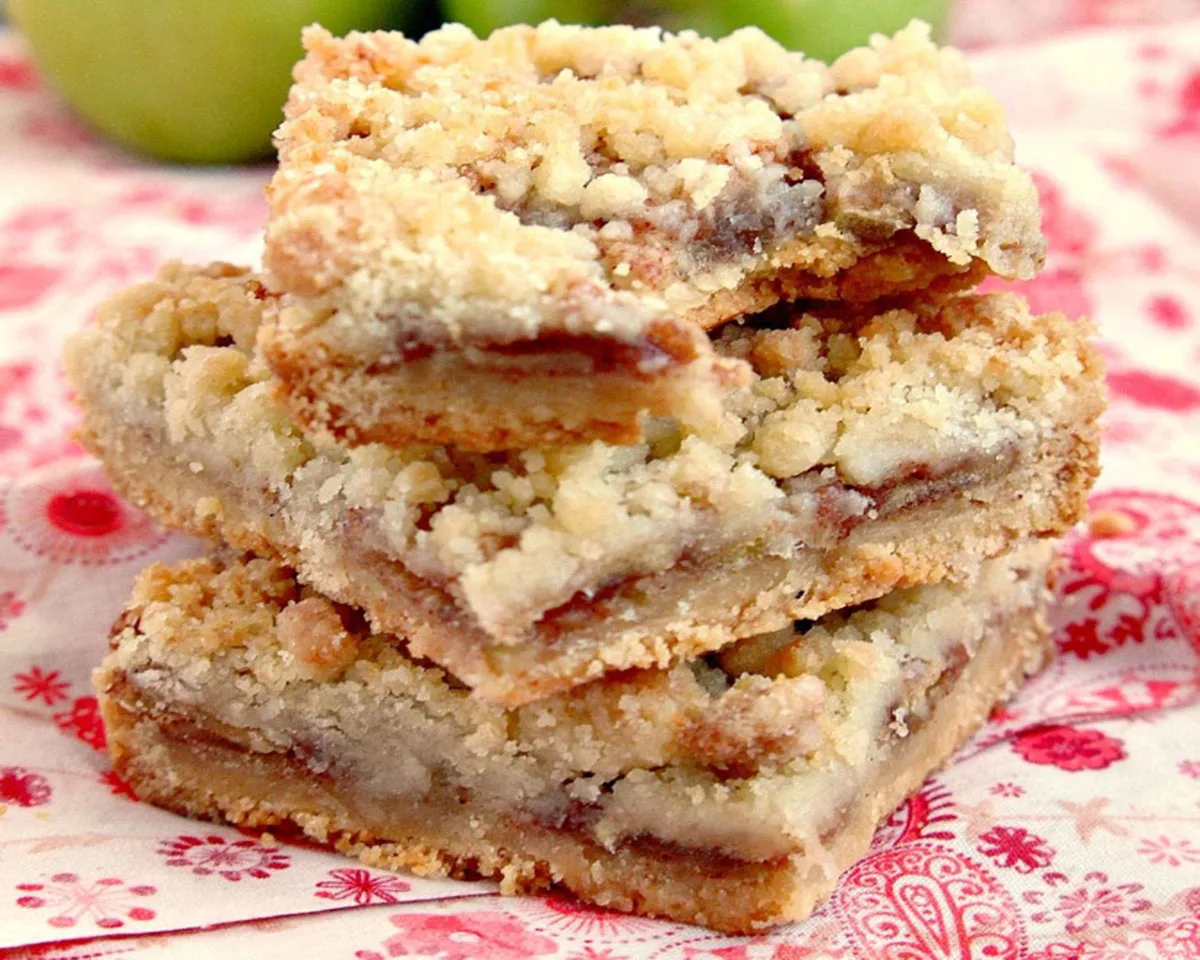
I still remember the first time I tried to make a Dutch apple pie for a family potluck. The pie looked beautiful coming out of the oven, with its golden crumb topping and bubbling apple filling. But when I tried to cut it into slices, the whole thing fell apart. Apples slid everywhere. The crumb topping scattered across the plate. I ended up serving what looked like apple crumble in a bowl. That disaster sent me searching for a better way. Then I discovered Dutch Apple Pie Bars. This recipe takes everything you love about the classic pie and turns it into sturdy, handheld squares. The first batch of Dutch Apple Pie Bars I made stayed perfectly intact. The buttery crust held firm. The spiced apples stayed in place. The crumb topping remained crunchy. I brought those Dutch Apple Pie Bars to the same family potluck the next year, and everyone asked for the recipe. Now I bake these Dutch Apple Pie Bars for fall birthdays, Thanksgiving dinners, and simple Sunday afternoons. They give you all the comfort of a traditional Dutch apple pie without the frustration of slicing.
Why These Bars Beat a Whole Pie Every Time
A traditional Dutch apple pie requires careful rolling, crimping, and transferring to a pan. Even experienced bakers sometimes end up with a soggy bottom or a cracked crust. These bars solve every problem. You press the crust directly into a square pan, no rolling pin needed. The apple filling goes on top without any risk of leaking through a bottom crust. The crumb topping sprinkles easily over everything. Baking happens in a standard 9×9 pan, so the bars come out uniformly thick and easy to slice. You can pick one up with your fingers and eat it while walking around a party. No plates, no forks, no mess. Plus, these bars travel incredibly well. Pack them in lunchboxes, bring them to bake sales, or mail them to friends. The sturdy structure survives bumps and drops. And the taste? Pure Dutch apple pie bliss. The buttery crust, the tender cinnamon apples, the sweet crumbly topping. Each bite delivers that perfect ratio of crust, fruit, and crumble. You never get a boring mouthful of just one component.
The Buttery Shortbread-Style Crust
Pressing, Not Rolling, for a Foolproof Base
The crust for these bars uses just three ingredients. One cup of all-purpose flour, one-third cup of sugar, and half a cup of cold butter. Cut the butter into the flour and sugar using a pastry blender or two knives. Work until the mixture looks like coarse crumbs with pea-sized butter pieces. Do not overmix. The butter needs to stay cold and distinct. Press this crumbly mixture into a buttered 9×9 square baking dish. Use the bottom of a measuring cup or a flat spatula to pack it down firmly. A loosely packed crust crumbles when you cut the bars. Press hard enough that the surface feels smooth and compact. Pre-bake this crust at 350°F for fifteen minutes. The pre-baking step ensures the bottom stays crisp and does not absorb too much moisture from the apples. After fifteen minutes, the crust should look lightly golden around the edges and set in the center. Remove it from the oven and let it cool for five minutes before adding the apple filling.
The Right Ratio of Sugar to Butter
This crust uses only one-third cup of sugar, which keeps it mildly sweet. The sweetness mainly comes from the apple filling and the crumb topping. If you prefer a sweeter crust, increase the sugar to half a cup. If you want a more savory base, reduce the sugar to two tablespoons. The butter provides richness and structure. Use unsalted butter so you control the salt level. Add a pinch of salt to the flour if you enjoy a sweet-salty contrast. For a gluten-free version, substitute the all-purpose flour with a 1:1 gluten-free baking blend. The texture will be slightly more delicate, so handle the bars gently. For a dairy-free option, use vegan butter. Let it chill in the refrigerator for fifteen minutes before cutting into the flour.
The Spiced Apple Filling
Choosing Tart Apples for the Best Texture
The recipe calls for three tart apples, like Granny Smith. Tart apples hold their shape during baking better than sweet varieties. They also balance the sugar in the crust and topping. Peel the apples thinly and slice them into uniform quarter-inch slices. Uneven slices bake unevenly. Thin slices soften faster, while thick slices stay crunchy. Aim for consistency. Granny Smith apples offer a sharp, tangy flavor that cuts through the sweetness. Other excellent choices include Honeycrisp, Braeburn, or Jonagold. Avoid Red Delicious or Macintosh, which turn mushy and release too much liquid. You need about three cups of sliced apples. After peeling and slicing, toss them immediately with the spice mixture to prevent browning. The lemon juice in the recipe? Actually, this recipe does not include lemon juice. The tartness comes from the apples themselves. If your apples taste very sweet, add a teaspoon of fresh lemon juice to brighten the flavor.
Cinnamon and Nutmeg – The Classic Spice Duo
In a separate bowl, mix one-third cup of sugar, two tablespoons of flour, half a teaspoon of ground cinnamon, and half a teaspoon of ground nutmeg. The flour thickens the juices that release from the apples during baking. This prevents a watery layer between the crust and topping. Cinnamon provides warmth and sweetness. Nutmeg adds a subtle, nutty earthiness. Do not skip the nutmeg. It gives Dutch apple pie its distinctive character. For a more complex spice blend, add a pinch of ground cloves or allspice. For a modern twist, add a quarter teaspoon of cardamom. Toss the sliced apples in this spice mixture until every piece gets coated. The sugar will draw out a tiny bit of liquid from the apples, creating a light syrup. Spoon the apple mixture evenly over the pre-baked crust. Spread it into an even layer. Do not press down. You want the apples to mound slightly. They will settle during baking.
| Apple Variety | Tartness Level | Baking Texture | Best For |
|---|---|---|---|
| Granny Smith | Very tart | Firm, holds shape | Classic Dutch apple bars |
| Honeycrisp | Medium tart | Crisp, slightly soft | Sweeter, juicier bars |
| Braeburn | Medium tart | Firm, balanced | All-purpose baking |
| Jonagold | Mild tart | Tender, juicy | Lighter, less acidic bars |
The Crumb Topping and Baking
Achieving a Golden, Crunchy Crumble
The crumb topping requires just three ingredients. Two-thirds cup of all-purpose flour, one-third cup of sugar, and a quarter cup of room-temperature butter. Combine the flour and sugar in a small bowl. Add the softened butter. Use a fork or your fingertips to mix until the mixture looks like wet sand with some larger clumps. Do not overmix. The clumps create crispy, crunchy bits on top of the bars. If the mixture seems too dry, add a teaspoon of melted butter. If it seems too wet, add a tablespoon of flour. Sprinkle the crumb topping evenly over the spiced apples. Use your hands to distribute it, breaking up any giant clumps. The topping should cover the apples but still let some red or green peek through. For extra crunch, add a quarter cup of chopped pecans or walnuts to the crumb mixture. For a more decadent topping, mix in two tablespoons of rolled oats.
Baking Time and Temperature Secrets
Bake the assembled bars at 350°F for thirty to thirty-five minutes. Start checking at thirty minutes. The top should look lightly browned, and the edges should bubble gently. Insert a toothpick into the apple layer. It should meet little resistance as the apples have softened. The crumb topping should feel firm to the touch. If the topping browns too quickly, tent a piece of aluminum foil over the pan for the last ten minutes. Do not pull the bars out early. Underbaked apples remain crunchy and release too much liquid when sliced. Overbaked apples turn mushy. The perfect bake leaves the apples tender but still holding their shape. The juices should be thick and syrupy, not watery. Remove the pan from the oven and place it on a wire rack. The hardest part comes next. You must let the bars cool completely before cutting.
Cooling, Slicing, and Serving
Why Cooling Completely Changes Everything
Let the bars cool in the pan for at least one hour. Do not skip this step. The apple filling needs time to set. If you cut into warm bars, the juices run everywhere, and the crumb topping falls apart. For cleaner slices, cool for two hours or refrigerate for one hour. Refrigeration firms up the butter in the crust and crumb topping. Once completely cool, run a knife around the edges of the pan. Use a sharp chef’s knife to cut into nine large squares or sixteen smaller rectangles. Wipe the blade clean between each cut. Lift the bars out with a small spatula. Serve them at room temperature. The flavors intensify overnight, so these bars taste even better on day two. Store leftovers in an airtight container at room temperature for up to four days. For longer storage, refrigerate for up to one week. Reheat individual bars in the microwave for ten seconds to restore that fresh-from-the-oven feel.
Creative Serving Ideas and Variations
Serve these Dutch Apple Pie Bars warm with a scoop of vanilla ice cream. The cold creaminess contrasts beautifully with the warm, spiced apples. For a breakfast treat, drizzle them with a simple glaze of powdered sugar and milk. For a caramel twist, warm up some store-bought caramel sauce and drizzle it over the top. For a salted caramel version, add a sprinkle of flaky sea salt right after baking. You can also swap the apple filling for pear, peach, or mixed berries. Adjust the sugar based on the fruit’s sweetness. For a lower-sugar version, reduce the sugar in the crust and topping by half and use a sugar substitute like monk fruit. The texture remains similar. For a vegan version, use vegan butter and a flax egg? This recipe has no eggs, so just use plant-based butter. For a gluten-free version, use a 1:1 gluten-free flour blend. The bars will be more delicate but still delicious.
Frequently Asked Questions
Can I use a different size pan?
Yes, but adjust baking time. An 8×8 pan makes thicker bars. Bake for thirty-five to forty minutes. An 11×7 pan makes thinner bars. Bake for twenty-five to thirty minutes. Do not use a pan smaller than 8×8 or larger than 11×7, or the proportions will be off.
Why did my crust turn out hard?
You may have overworked the dough or used too much butter. Cut the butter in just until crumbly. Do not let it warm up. Also, pre-baking for too long makes the crust dry. Bake just until lightly golden, about fifteen minutes.
Can I freeze these bars?
Yes, freeze the baked and cooled bars for up to three months. Wrap each bar individually in plastic wrap, then place them in a freezer bag. Thaw at room temperature for one hour. Reheat in a 300°F oven for five minutes to restore the crunch.
How do I prevent the apple filling from making the crust soggy?
Pre-bake the crust as directed. Toss the apples with flour, which absorbs excess juice. Do not overfill the pan. Spread the apples evenly without mounding too high in the center. Cool the bars completely before cutting.
Can I add a streusel topping with oats?
Yes, replace one-third cup of the flour in the crumb topping with rolled oats. Add a quarter teaspoon of cinnamon. The topping will be crunchier and more rustic. Bake as directed.
What if I only have sweet apples like Gala or Fuji?
Reduce the sugar in the apple filling to two tablespoons. Add one tablespoon of lemon juice to balance the sweetness. The bars will still taste delicious, but the texture may be softer.
Conclusion
Dutch Apple Pie Bars deliver all the warmth, spice, and comfort of a traditional Dutch apple pie in a completely portable, sliceable form. The buttery press-in crust eliminates the need for rolling dough. The spiced apple filling stays juicy but not runny. The crumb topping adds a sweet, crunchy finish. You can make the entire recipe in under an hour with basic pantry ingredients. No special equipment, no complicated techniques. These bars work for beginner bakers and experienced cooks alike. Serve them at fall gatherings, pack them in lunchboxes, or enjoy one with your afternoon coffee. They taste even better the next day, so make a batch ahead of time. However you choose to enjoy them, these bars capture the essence of autumn in every bite. So grab some tart apples, preheat your oven, and get ready to fall in love with your new favorite handheld dessert. One square is never enough.
Full recipe:
Ingredients:
**For the Crust:**
– 1 cup all-purpose flour
– ⅔ cup sugar, divided
– ½ cup (8 tablespoons) butter
**For the Apple Filling:**
– 2 tablespoons all-purpose flour
– ½ teaspoon ground cinnamon
– ½ teaspoon ground nutmeg
– 3 tart apples (like Granny Smith), peeled and thinly sliced
**For the Crumb Topping:**
– ⅔ cup all-purpose flour
– ⅓ cup sugar
– ¼ cup butter, room temperature
INSTRUCTIONS
1. Butter a 9×9 square baking dish and preheat the oven to 350°F.
2. In a mixing bowl, combine 1 cup of flour and 1/3 cup of sugar. Cut in the butter until the mixture becomes crumbly, using either 2 knives or a pastry blender. Press the mixture into the prepared pan and bake for 15 minutes.
3. In another bowl, mix the remaining 1/3 cup of sugar, 2 tablespoons of flour, cinnamon, and nutmeg. Stir in the thinly sliced apples, ensuring they are evenly coated. Spoon this apple mixture over the baked crust.
4. For the crumb topping, combine ⅔ cup of flour, ⅓ cup of sugar, and ¼ cup of room temperature butter. Mix until crumbly and sprinkle this over the apples.
5. Bake for approximately 30-35 minutes or until the top is lightly browned, and the apples have softened. Allow the bars to cool completely before cutting them into delightful squares.
6. Enjoy these Dutch Apple Pie Bars as a delightful handheld treat that encapsulates the comforting essence of a classic Dutch apple pie in each delicious bite!