
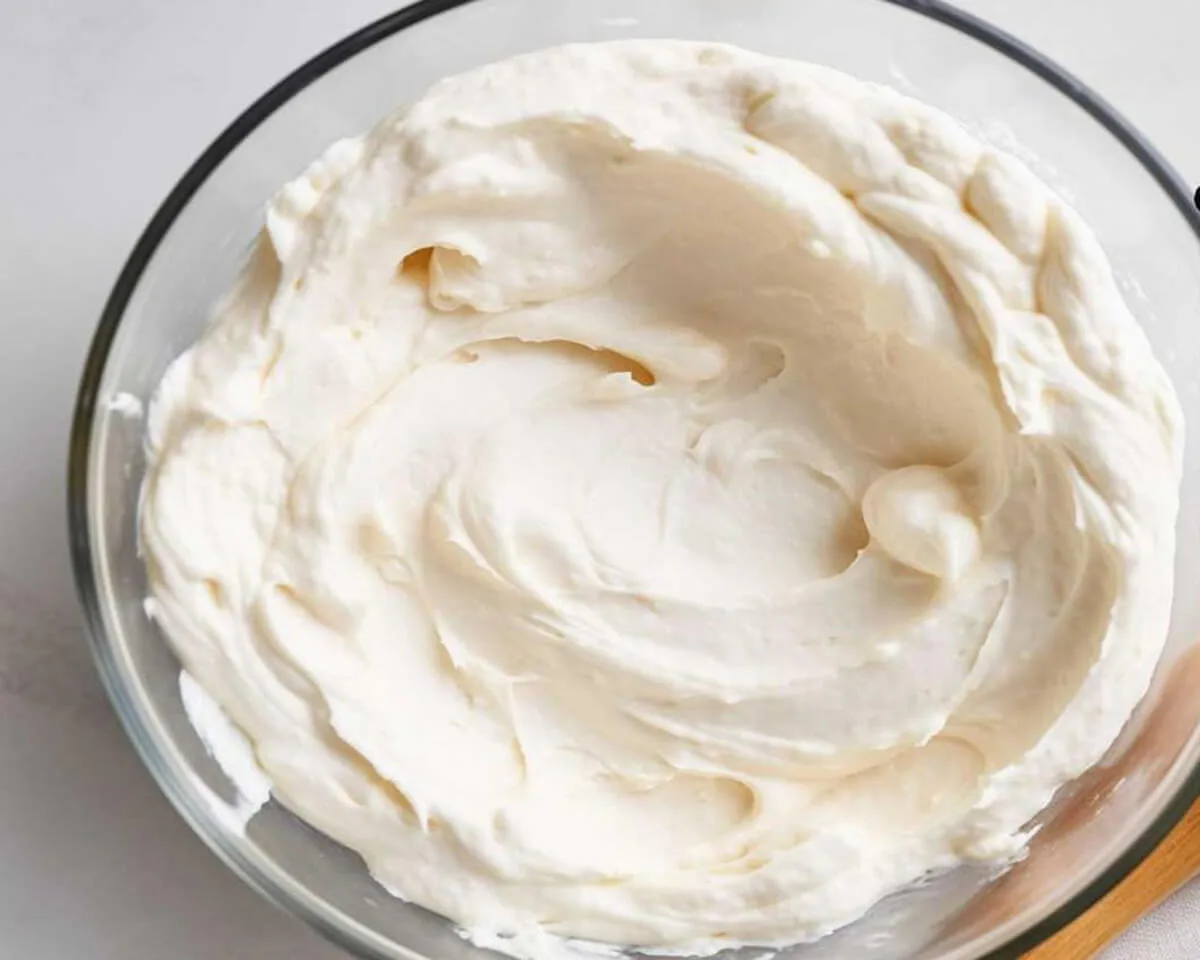
Part 1: The Story Behind My Ermine Frosting Obsession
Ermine Frosting came into my life when I finally admitted that most American buttercreams tasted too sweet for my cakes. I wanted a frosting that felt rich and creamy but did not make my teeth ache. A friend who bakes vintage recipes mentioned something called boiled milk frosting, or ermine frosting. I had never heard of it. She explained that you cook flour and milk into a thick paste, cool it, then beat it with butter and sugar. The result? A frosting as smooth as velvet and about half as sweet as traditional buttercream. That first batch of ermine frosting changed my baking forever. The texture felt impossibly light and silky. The flavor tasted like pure vanilla and butter, with the sugar playing a supporting role, not the star. I frosted a simple yellow cake with my ermine frosting, and my family could not stop eating it. Now this ermine frosting has become my go-to for birthday cakes, cupcakes, and even filling for layer cakes. I love that it uses pantry staples and comes together without a candy thermometer. Once you try this ermine frosting, you will understand why our grandmothers swore by it.
Why This Ermine Frosting Deserves a Comeback
Most modern frostings rely on powdered sugar and butter, which often tastes gritty or cloyingly sweet. Ermine frosting solves both problems by using a cooked flour-and-milk base to create structure. The flour thickens the milk into a pudding-like paste, which then emulsifies with butter and granulated sugar. The result is a frosting that spreads like a dream, pipes beautifully, and tastes delicate and balanced. This ermine frosting also holds up well at room temperature for hours, making it perfect for parties or outdoor events. You can flavor it with vanilla, chocolate, citrus zest, or even coffee. The recipe uses just five ingredients: flour, milk, butter, sugar, and vanilla. No powdered sugar, no cream cheese, no shortcuts. I have used this ermine frosting on red velvet cake, chocolate cupcakes, and even as a filling between cookie layers. Every time, people ask what makes it so smooth. When I tell them it is boiled milk frosting, they look skeptical. Then they taste it, and they become believers. Whether you are a seasoned baker or a beginner, this ermine frosting will elevate your desserts without overwhelming your palate.
Part 2: Essential Ingredients and Tools for Perfect Ermine Frosting
The Core Ingredients and Their Roles
Great ermine frosting starts with five simple ingredients. All-purpose flour, five tablespoons, acts as the thickener. Do not substitute gluten-free flour unless you add xanthan gum. Whole milk, one cup, provides richness and a smooth texture. Low-fat milk works but produces a slightly thinner paste. Unsalted butter, one cup (two sticks), must be softened to room temperature. Cold butter will not cream properly with the sugar. Granulated sugar, one cup, dissolves into the butter during creaming. Do not use powdered sugar; it changes the texture. Vanilla extract, one teaspoon, adds warmth and depth. You can also use almond, lemon, or peppermint extract for different flavors. For the cooking process, you need a medium saucepan, a whisk, a mixing bowl, and an electric mixer (hand or stand). Do not skip the step of cooking the flour and milk until thick. Undercooking leaves a raw flour taste.
Below is a table comparing ermine frosting to other frostings.
| Frosting Type | Sweetness Level | Texture | Best For |
|---|---|---|---|
| Ermine (boiled milk) | Low to medium | Silky, smooth | Cakes where flavor of cake shines |
| American buttercream | Very high | Gritty, thick | Quick decorating, kids’ parties |
| Swiss meringue | Medium | Light, fluffy | Smooth, elegant cakes |
| Cream cheese | Medium-tangy | Dense, creamy | Carrot cake, red velvet |
Why Temperature Matters
Success with ermine frosting depends entirely on temperature. The cooked flour-milk mixture must cool to room temperature before you add it to the butter-sugar mixture. If it is even slightly warm, it melts the butter, and your frosting turns into a soupy mess. If the butter and sugar are not fully creamed (light and fluffy), the final frosting will be dense and greasy. Plan ahead. Cook the flour-milk paste first, then let it cool while you cream the butter and sugar. You can speed cooling by spreading the paste on a plate and refrigerating for 15 minutes, but do not let it get cold. Room temperature is the goal. Also, ensure your butter is truly softened. Leave it on the counter for one to two hours. Do not microwave it because partial melting ruins the emulsion.
Part 3: Step-by-Step Instructions for Ermine Frosting
Making the Flour-Milk Paste
Start your ermine frosting by whisking five tablespoons of all-purpose flour with one cup of milk in a medium saucepan. Whisk until no lumps remain. Place the saucepan over medium heat. Cook the mixture, stirring constantly with a whisk or a silicone spatula. Scrape the bottom and corners to prevent scorching. After about three to five minutes, the mixture will thicken noticeably. You will see it turn into a smooth, pudding-like paste. When it starts to bubble, cook for one more minute, then remove from heat. The paste should be thick enough to coat the back of a spoon. Transfer the paste to a shallow bowl or plate. Cover it with plastic wrap pressed directly onto the surface to prevent a skin from forming. Let it cool to room temperature. This takes about 30 minutes. Do not rush this step.
Creaming the Butter and Sugar, Then Combining
While the flour-milk paste cools, prepare the butter and sugar for your ermine frosting. In a large mixing bowl, beat one cup of room-temperature unsalted butter with an electric mixer on medium speed until smooth and creamy, about one minute. Add one cup of granulated sugar. Beat on high speed for three to four minutes until the mixture becomes light, fluffy, and pale in color. Scrape down the sides of the bowl as needed. The sugar should feel almost dissolved. Now make sure your flour-milk paste has cooled completely. It should feel neither warm nor cold to the touch. With the mixer on medium speed, add the cooled paste one spoonful at a time. Beat well after each addition. The mixture may look curdled at first, but keep beating. After all the paste is incorporated, add one teaspoon of vanilla extract. Continue beating for another two to three minutes until the ermine frosting looks smooth, silky, and uniform. It should be thick enough to spread but light enough to pipe. Use immediately or store in the refrigerator.
Part 4: Storing, Using, and Customizing Your Ermine Frosting
How to Store, Re-Whip, and Use Leftovers
Ermine frosting is best used the same day you make it. However, you can store it in an airtight container in the refrigerator for up to three days. The frosting will become firm and may separate slightly. To bring it back to life, let it sit at room temperature for one hour. Then beat it with an electric mixer on medium speed for two to three minutes until smooth and fluffy again. Do not microwave it. If the frosting seems too soft after refrigerating, beat in a tablespoon of powdered sugar. If too stiff, beat in a teaspoon of milk. This ermine frosting spreads beautifully on cakes, cupcakes, and cookies. It also works as a filling for whoopie pies or sandwich cookies. You can pipe it through a star or round tip because it holds its shape well. For a chocolate version, add a quarter cup of melted and cooled dark chocolate after the vanilla. For a lemon version, replace the vanilla with two teaspoons of lemon zest and one tablespoon of lemon juice. For a coffee version, dissolve two teaspoons of instant espresso powder in the milk before cooking.
Common Mistakes and How to Fix Them
Even experienced bakers run into issues with ermine frosting. Here are solutions to the most common problems. If your frosting is runny, the flour-milk paste was too warm when added, or you did not cook the paste long enough. Fix by refrigerating the frosting for 30 minutes, then re-whipping. If your frosting tastes like raw flour, you undercooked the paste. Unfortunately, you cannot fix this once combined. Start over and cook the paste until it bubbles and thickens significantly. If your frosting is greasy, your butter was too soft or you overbeat after adding the paste. Chill the frosting for 20 minutes, then whip again briefly. If your frosting has lumps, you did not whisk the flour-milk paste smoothly. Strain the paste through a fine-mesh sieve before cooling. If your frosting curdled when you added the paste, keep beating. It will come together after a few minutes. Ermine frosting is forgiving if you give it time.
Frequently Asked Questions
What is the difference between ermine frosting and buttercream?
Ermine frosting uses a cooked flour and milk base, making it less sweet and silkier than American buttercream, which relies solely on powdered sugar and butter. Ermine also has a more stable emulsion at room temperature.
Can I use this ermine frosting on a cupcake?
Absolutely. This frosting pipes beautifully. Use a large star or round tip. Chill the frosted cupcakes for 15 minutes to set the shape before serving.
Why does my ermine frosting taste like flour?
You did not cook the flour-milk paste long enough. The mixture must bubble and thicken to a pudding-like consistency. Raw flour leaves a starchy taste. Next time, cook for a full minute after bubbling starts.
Can I make ermine frosting dairy-free?
Yes. Use plant-based butter (like Earth Balance) and unsweetened almond or oat milk. The texture may be slightly softer, so chill the frosting for 15 minutes before piping.
How far in advance can I make ermine frosting?
You can make the frosting up to three days ahead and store it in the refrigerator. Let it come to room temperature, then re-whip for two to three minutes before using. Do not freeze the frosting because the emulsion breaks.
Can I color ermine frosting?
Yes. Gel food coloring works best. Add it after the vanilla extract and beat until uniform. Liquid coloring may thin the frosting slightly. For a deep red or black, use concentrated gel.
Conclusion
Ermine frosting, also known as boiled milk frosting or heritage frosting, brings back a classic American technique that deserves a place in every baker’s repertoire. With just flour, milk, butter, sugar, and vanilla, you create a silky, less-sweet frosting that lets your cake flavors shine. The key steps include cooking the flour-milk paste until thick, cooling it completely, and creaming the butter and sugar until fluffy. Store leftover frosting in the fridge, re-whip before using, and experiment with chocolate, lemon, or coffee variations. Whether you frost a birthday cake, fill cupcakes, or pipe elegant rosettes, this ermine frosting delivers a velvety texture and balanced sweetness that modern buttercreams cannot match. Now pull out your saucepan and whisk, cook that flour and milk, and discover why generations of bakers loved this heritage frosting. Your cakes will never be the same.
Full recipe:
Ingredients:
- 5 tablespoons of all-purpose flour
- 1 cup of milk
- 1 cup of unsalted butter, softened
- 1 cup of granulated sugar
- 1 teaspoon of vanilla extract
Instructions:
- In a medium saucepan, whisk together the all-purpose flour and milk until you have a smooth mixture.
- Place the saucepan over medium heat and cook, stirring constantly, until the mixture thickens and starts to bubble.
- Remove the saucepan from the heat and allow it to cool to room temperature.
- In a large bowl, cream together the softened butter and granulated sugar until the mixture becomes light and fluffy.
- Add the cooled flour mixture to the butter and sugar mixture and beat until they are well combined.
- Add the vanilla extract and continue to beat until the frosting is thoroughly mixed.
- Spread this delicious frosting over your favorite cake or cupcakes and savor the delightful taste!
This classic Flour Frosting is a timeless favorite for cakes and cupcakes. Its smooth, creamy texture and delightful sweetness make it a perfect choice to enhance your baked treats. Whether you’re frosting a birthday cake or adding a finishing touch to your cupcakes, this frosting is sure to please your taste buds. Enjoy!