
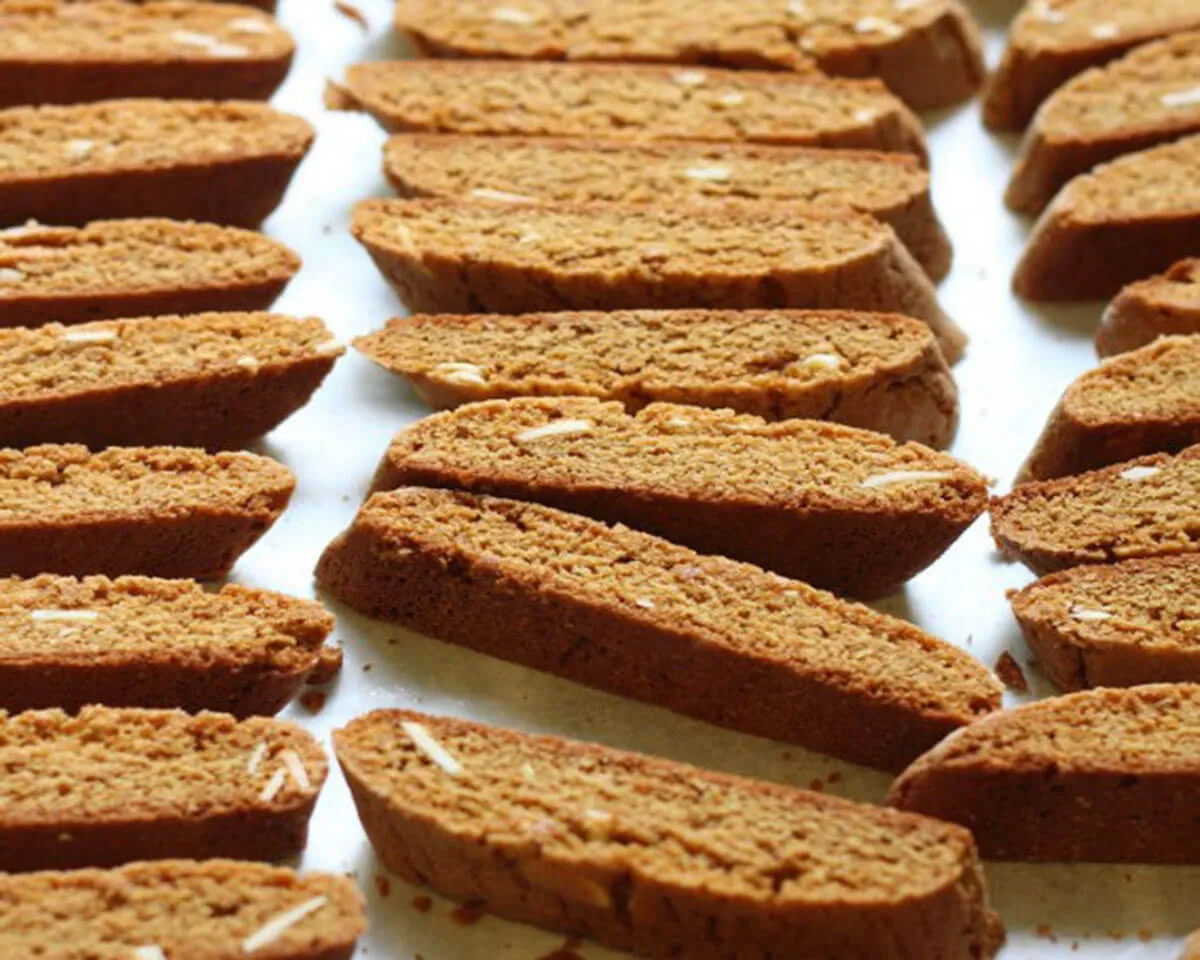
The Essential Guide to Homemade Gingerbread Biscotti

I still remember the first time I pulled a tray of Gingerbread Biscotti out of the oven on a snowy December afternoon. The kitchen was thick with the scent of molasses and toasted pecans, and for a moment, it felt like the very essence of the holidays had been captured in my small apartment. I had always been a fan of traditional gingerbread, but I often found it too soft to stand up to a hot cup of espresso. That is when I discovered the magic of the Italian “twice-baked” method. Turning those cozy, seasonal flavors into a crisp, dunkable biscuit changed my morning coffee routine forever. It is funny how a cookie originally designed for long sea voyages can become the most sophisticated addition to a modern holiday gift basket. Since that first batch, I have made Gingerbread Biscotti every year, refining the spice ratios and the fruit-to-nut balance to ensure every bite is a perfect symphony of textures. You do not need to be a professional pastry chef to master these biscuits; you just need a sharp serrated knife and a little bit of patience for the second bake.

The Unique Character of Gingerbread Biscotti

What truly sets Gingerbread Biscotti apart from your standard holiday cookie is the depth of flavor provided by the dark brown sugar and molasses. While many biscotti recipes are light and nutty, this version is bold and aromatic. The ginger provides a gentle heat that lingers on the tongue, while the cinnamon and cloves offer a comforting warmth. This is a cookie designed for the slow moments of winter—the quiet mornings by the fire or the late-night tea sessions after a festive dinner.

Why the Twice-Baked Method Works

The word “biscotti” literally means “twice-cooked,” and this process is essential for achieving the signature crunch of Gingerbread Biscotti. The first bake creates the structure, cooking the dough into a solid log. The second bake, performed after the logs are sliced, removes the remaining moisture from the interior. This is what gives the biscotti their legendary shelf life and their ability to absorb liquid without immediately falling apart. When you dunk a piece of Gingerbread Biscotti into a latte, it softens just enough to melt in your mouth while retaining its structural integrity.

Balancing Fruit and Nut Textures

In this recipe, we elevate the spice profile by adding coarsely chopped pecans and dried apricots. The pecans provide an earthy, buttery crunch that complements the molasses perfectly. The dried apricots are the secret weapon; they offer a chewy, tart contrast to the hard biscuit and the spicy ginger. When you slice into the Gingerbread Biscotti logs, you will see beautiful orange gems and toasted nut pieces embedded in the dark, spiced crumb, making these as visually stunning as they are delicious.

Preparing the Aromatic Gingerbread Dough

Creating the dough for Gingerbread Biscotti is a straightforward process, but following the order of operations is key to ensuring even spice distribution and a consistent texture.

Mixing Dry and Wet Ingredients

You begin by whisking together your flour, dark brown sugar, ginger, cinnamon, nutmeg, baking powder, baking soda, and salt. Using an electric mixer on a low speed ensures that the leavening agents are perfectly distributed throughout the flour. Once the pecans and apricots are folded in, you introduce the wet mixture: a blend of eggs, molasses, and fresh orange zest. The orange zest is crucial here; it provides a high-note of citrus that prevents the molasses from feeling too heavy.

Handling the Sticky Dough

Because of the high molasses and brown sugar content, the dough for Gingerbread Biscotti will be slightly sticky. This is completely normal and is actually a sign that your biscuits will have a great texture. When it comes time to shape the logs, lightly flour your hands or your work surface. You want to divide the dough into two equal portions and roll them into long, slender cylinders. Do not overwork the dough at this stage; you want to keep it just tight enough to hold its shape on the baking sheet.

Ingredient Role in the Biscotti Pro Tip
Dark Brown Sugar Sweetness and Moisture Pack it tightly for accurate measurement
Molasses Color and Deep Flavor Spray your measuring cup with oil first
Ground Ginger Aromatic Heat Use fresh spices for the best scent
Pecans Buttery Crunch Toast them lightly before adding to dough
Dried Apricots Tart Chewiness Snip them into small pieces with scissors

The First Bake and the Art of Slicing

The first trip to the oven sets the foundation for your Gingerbread Biscotti. This is where the kitchen really starts to smell like a holiday bakery.

Monitoring the First Bake

Bake the logs at 350°F for about 30 to 35 minutes. You are looking for the tops to develop slight cracks and for the dough to spring back when you press it gently with your finger. It is important not to overbake during this first stage, as a log that is too hard will be difficult to slice without crumbling. Once they come out, let them rest on the baking sheet for ten minutes. This “cooling-off” period allows the internal steam to settle, which makes the slicing process much smoother.

Using a Serrated Knife for Precision

To get those beautiful, professional-looking diagonal slices, you must use a sharp serrated knife (like a bread knife). Using a straight-edged knife will crush the delicate crumb and potentially break the pecans and apricots out of the biscuit. Move the knife in a gentle sawing motion, letting the teeth do the work. Aim for slices that are about 3/4-inch wide. This thickness is ideal for Gingerbread Biscotti because it is sturdy enough for dunking but thin enough to get perfectly crisp in the second bake.

The Second Bake: Customizing Your Crunch

The second bake is where you decide exactly how crunchy you want your Gingerbread Biscotti to be. This is a matter of personal preference, and you can easily adjust the timing to suit your taste.

Choosing Your Texture

Arrange the slices cut-side down on the baking sheet. For those who prefer a slightly softer, “cantucci” style biscuit that is a bit chewy in the middle, ten minutes in the oven is usually sufficient. However, if you want the traditional, hard-as-a-rock Gingerbread Biscotti that is designed for serious dipping, leave them in for up to twenty minutes. The longer they bake, the more the flavors of the molasses and ginger will intensify as the sugars slightly caramelize on the surface of the cut sides.

The Cooling and Setting Phase

Once the second bake is complete, move the biscotti to a wire cooling rack immediately. If you leave them on the hot baking sheet, they will continue to cook and may become overly hard. As they cool, the Gingerbread Biscotti will fully harden into their final form. This is also the time when the orange zest and ginger aromas really bloom. Once they are completely cold to the touch, they are ready to be served or stored for later enjoyment.

Serving and Gifting Your Gingerbread Biscotti

Because they are so sturdy and beautiful, Gingerbread Biscotti make for an incredible gift during the winter months. They are the perfect way to share a little bit of holiday warmth with neighbors, teachers, or friends.

The Perfect Drink Pairings

While coffee is the most common companion for Gingerbread Biscotti, they are also spectacular when paired with a spicy chai tea or a warm cup of apple cider. The spices in the biscuit harmonize with the cinnamon and cloves in the tea, creating a cozy flavor experience. For a more indulgent dessert, try dipping the end of each biscotti into melted white chocolate and letting it set before serving. The creamy sweetness of the white chocolate provides a lovely contrast to the spicy, dark biscuit.

Storage for Long-Lasting Freshness

One of the greatest advantages of Gingerbread Biscotti is their longevity. When stored in an airtight container at room temperature, they will stay fresh and crunchy for up to three weeks. This makes them an ideal make-ahead treat for holiday parties. If you live in a particularly humid climate, you can pop them back into a 300°F oven for five minutes to restore their crunch if they happen to soften over time. They also freeze exceptionally well, though it is rare for a batch to last long enough to make it to the freezer!

Frequently Asked Questions

Can I use a different nut besides pecans? Yes, walnuts or slivered almonds are excellent substitutes in Gingerbread Biscotti. Walnuts offer a similar richness, while almonds provide a more traditional Italian feel. Just make sure to chop them coarsely so they are easy to slice through.

What if I don’t like dried apricots? If apricots aren’t your favorite, you can replace them with dried cranberries or even crystallized ginger for an extra spicy kick. The goal is to have a small piece of dried fruit to provide a chewy contrast to the crunch of the biscuit.

Why did my biscotti crumble when I sliced them? This usually happens for two reasons: either the logs were overbaked in the first round, or you didn’t let them cool for the full ten minutes before slicing. If the dough is too hot or too dry, the serrated knife will cause it to shatter rather than cut cleanly.

Can I use light brown sugar instead of dark? You can, but the Gingerbread Biscotti will have a milder flavor and a lighter color. Dark brown sugar contains more molasses, which is a key component of that classic gingerbread taste and color.

Conclusion

Mastering the art of Gingerbread Biscotti is a journey into the heart of seasonal baking. It is a recipe that rewards attention to detail—from the careful creaming of the molasses and eggs to the precision of the second bake. By combining the rustic charm of gingerbread spices with the refined structure of an Italian biscuit, you create a treat that is as versatile as it is delicious. These biscotti are a celebration of the textures of winter: the crunch of the pecans, the chew of the apricots, and the warmth of the ginger. Whether you are enjoying a quiet moment alone with a cup of tea or sharing a festive platter with loved ones, these biscuits bring a sense of comfort and cheer to every occasion. Grab your mixing bowl, zest your orange, and let the scent of homemade Gingerbread Biscotti transform your kitchen into a holiday haven. Once you experience the satisfaction of that perfect, twice-baked crunch, you will never want to go through a winter season without them. Enjoy the process and the wonderful rewards of your holiday baking!

Full recipe:

Ingredients:

  • 2 ¼ cups all-purpose flour
  • 1 ¼ cups packed dark brown sugar
  • 2 teaspoons ground ginger
  • 1 ¼ teaspoons baking powder
  • 1 teaspoon ground cinnamon
  • 1/2 teaspoon salt
  • 1/4 teaspoon ground nutmeg
  • 1/4 teaspoon baking soda
  • 1 cup coarsely chopped pecans
  • 1/2 cup coarsely chopped lightly packed dried apricots
  • 1/4 cup molasses
  • 2 large eggs
  • 2 teaspoons finely grated orange zest

Instructions:

  1. Preheat the oven to 350°F and line a large baking sheet with parchment paper.
  2. In a large bowl, use an electric mixer to combine the flour, brown sugar, ginger, baking powder, cinnamon, salt, nutmeg, and baking soda on medium-low speed until well blended.
  3. On low speed, briefly mix in the pecans and apricots. In a measuring cup, lightly whisk the molasses, eggs, and orange zest. With the mixer on low, slowly pour in the egg mixture. Continue mixing until the dough is well blended and forms large, moist clumps (1 to 2 minutes).
  4. Transfer the dough onto an unfloured work surface. Divide it into two equal portions (about 1 pound each). Shape each portion into a log, approximately 10 inches long and 1 1/2 inches in diameter, lightly flouring your hands as needed, as the dough might be slightly sticky.
  5. Place the logs on the lined baking sheet about 4 inches apart. Bake for 30 to 35 minutes until the tops crack and spring back slightly when gently pressed. Let the logs cool on the baking sheet for about 10 minutes.
  6. Carefully transfer the biscotti logs from the parchment paper to a cutting board. Using a serrated knife, cut each log into diagonal slices about 3/4-inch wide. Place the slices, cut-side down, back onto the baking sheet, ensuring they touch, as they won’t spread during baking.
  7. Bake for an additional 10 to 20 minutes based on your desired texture (10 minutes for slightly moist and chewy, up to 20 minutes for a crunchier texture). Let the biscotti cool completely on a rack. Store the cooled biscotti in airtight containers.

Leave a Comment