
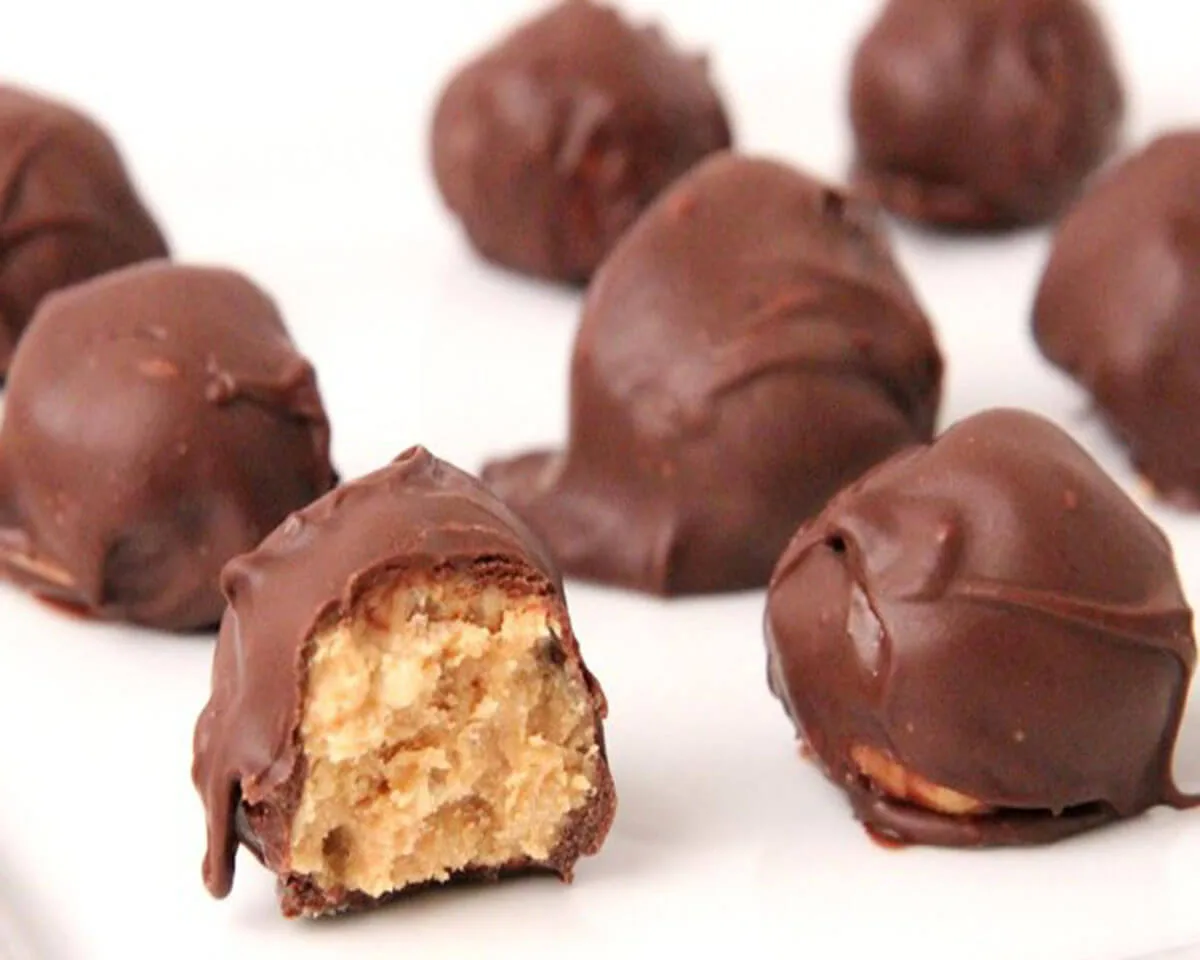
I have a confession to make. I once ate an entire batch of Peanut Butter Balls by myself in three days. Do I regret it? Not even a little. It happened during the holiday season a few years back. My neighbor brought over a plate of homemade treats, and tucked between the sugar cookies and fudge sat these beautiful little chocolate-dipped orbs. I took one bite, and my eyes went wide. The creamy, salty-sweet peanut butter center melted on my tongue, and the semi-sweet chocolate shell gave way with a satisfying snap. I asked my neighbor what they were called. She laughed and said, “Those are Peanut Butter Balls. Some people call them Buckeye Balls.” From that moment on, I became obsessed. I begged her for the recipe, and she finally caved. Now I make these Peanut Butter Balls for every party, every holiday, and honestly, just for random Tuesdays when I need a little pick-me-up. They take almost no time to prepare, require zero oven time, and taste like a million bucks. If you have never made homemade Peanut Butter Balls before, get ready to fall in love. This recipe will become your go-to dessert for every occasion.
PART 1: Why Peanut Butter Balls Deserve a Spot in Your Dessert Rotation
The Perfect Balance of Savory and Sweet
A great dessert knows how to play with contrasts. Salty against sweet. Creamy against crunchy. Rich against light. Peanut Butter Balls master this balancing act better than almost any other no-bake treat. The filling combines creamy peanut butter, confectioners’ sugar, and butter into a smooth, slightly salty dough. That savory peanut flavor cuts through the sweetness of the chocolate coating beautifully. You do not end up with a cloying, one-note sugar bomb. Instead, each bite delivers layers of flavor that keep you coming back for more. The chilled peanut butter center feels dense and fudgy, while the chocolate shell adds a crisp snap. This combination explains why Buckeye Balls have remained a beloved classic for generations.
No-Bake Simplicity for Busy Bakers
Let us be honest. Sometimes you want a homemade dessert without turning on the oven or spending hours in the kitchen. Peanut Butter Balls solve that problem completely. You mix four simple ingredients together. You roll them into balls. You chill them. You dip them in melted chocolate. That is it. The entire process takes about 45 minutes of active time, plus chilling periods. You do not need any special equipment. A mixing bowl, a baking sheet, and a saucepan for melting chocolate will do the job. This simplicity makes Peanut Butter Balls a fantastic project for kids, beginner bakers, or anyone short on time. They also travel well. Pack them in a tin, and they make wonderful homemade gifts for neighbors, teachers, or coworkers.
PART 2: Breaking Down the Four Essential Ingredients
Choosing the Right Peanut Butter and Butter
The quality of your ingredients directly affects how these Peanut Butter Balls turn out. For the peanut butter, use a standard commercial creamy peanut butter like Jif or Skippy. Natural peanut butter that separates and requires stirring will not work well here. Natural varieties contain too much oil, making the dough too soft and greasy. You need a stable, emulsified peanut butter that holds its shape when rolled. Avoid crunchy peanut butter unless you want textural surprises in every bite. For the butter, use unsalted butter. Salted butter adds extra sodium that throws off the flavor balance. Let the butter soften to room temperature before mixing. Soft butter incorporates more easily into the peanut butter and sugar, creating a smooth, lump-free dough.
The Role of Confectioners’ Sugar and Chocolate
Confectioners’ sugar, also called powdered sugar, plays a crucial role in this Peanut Butter Balls recipe. Granulated sugar will not work because it does not dissolve into the peanut butter mixture. You would end up with gritty, unpleasant balls. Confectioners’ sugar contains cornstarch, which helps absorb excess moisture from the peanut butter and butter. This absorption creates a firm, rollable dough that holds its shape during dipping. For the chocolate coating, use semi-sweet chocolate chips. Semi-sweet strikes the perfect balance between sweet and bitter, complementing the salty peanut butter without overwhelming it. Milk chocolate makes the balls too sweet. Dark chocolate can work but tastes more intense. If you want to get fancy, use a combination of semi-sweet and dark chocolate. Just avoid chocolate melts or candy coating wafers; they contain oils that change the texture and flavor.
| Ingredient | Recommended Type | Why It Matters |
|---|---|---|
| Peanut butter | Creamy commercial (Jif, Skippy) | Stable emulsion, holds shape, consistent flavor |
| Butter | Unsalted, softened | Controls salt level, smooth incorporation |
| Confectioners’ sugar | Powdered sugar, no substitutions | Dissolves completely, adds cornstarch for structure |
| Chocolate chips | Semi-sweet | Balances sweetness, provides crisp shell |
PART 3: Step-by-Step Guide to Perfect Peanut Butter Balls
Mixing and Rolling the Peanut Butter Dough
Line a baking sheet with waxed paper or parchment paper. Set it aside. In a medium bowl, combine 16 ounces of creamy peanut butter, 1 pound of confectioners’ sugar, and 3/4 cup of softened unsalted butter. Use a hand mixer or a sturdy spatula to mix everything together. Start on low speed to avoid a sugar cloud, then increase to medium. Mix until the dough comes together into a smooth, uniform mass. The mixture will look crumbly at first, but keep going. Within a minute or two, it transforms into a soft, pliable dough. Taste a tiny bit. Adjust nothing; it already tastes perfect. Now roll the dough into 1-inch balls. Use a cookie scoop or a teaspoon to portion equal amounts. Roll each portion between your palms until round and smooth. Place the balls on the prepared baking sheet, leaving a little space between each. This recipe should yield about 50 to 60 Peanut Butter Balls, depending on your size.
Chilling and Preparing for Dipping
Place the baking sheet with the rolled peanut butter balls into the freezer. Chill them for about 20 minutes. This step is non-negotiable. The cold firms up the butter and peanut butter, making the balls solid enough to withstand dipping. If you skip this chilling step, your balls will fall apart or slide off the toothpick when you try to dip them in warm chocolate. While the balls chill, prepare your chocolate melting station. Fill a small saucepan with about an inch of water. Bring the water to a light simmer. Place a metal or heatproof glass bowl over the saucepan, ensuring the bottom of the bowl does not touch the water. Add semi-sweet chocolate chips to the bowl. Stir occasionally with a spatula until the chocolate melts completely and looks smooth. Remove the bowl from the heat. Keep the chocolate warm but not hot.
PART 4: Dipping, Setting, and Serving Your Buckeye Balls
The Toothpick Technique for Clean Dipping
Remove the chilled peanut butter balls from the freezer. Work quickly so they stay cold. Insert a wooden toothpick into the top of one ball. Hold the toothpick and dip the ball into the melted chocolate, submerging about three-quarters of the ball. Leave the top portion undipped. This uncovered peanut butter creates the classic buckeye appearance. Gently shake off any excess chocolate. Place the dipped ball back onto the waxed paper-lined baking sheet. Repeat with the remaining balls. If the chocolate starts to thicken or cool down, reheat it gently over the simmering water for a few seconds. Do not overheat or the chocolate may seize. For a cleaner finish, after dipping each ball, use a second toothpick or a fork to slide the ball off the first toothpick onto the paper. This method prevents the toothpick hole from showing. Alternatively, you can leave the toothpick in place and remove it after the chocolate sets.
Setting, Storing, and Serving Suggestions
After dipping all the Peanut Butter Balls, return the baking sheet to the freezer for about 30 minutes. This final chill sets the chocolate completely. Once firm, transfer the balls to an airtight container. Store them in the refrigerator for up to two weeks. You can also store them at room temperature for a day or two, but the chocolate may soften. Serve these Buckeye Balls chilled or at room temperature. Arrange them on a festive platter for holiday cookie exchanges, game day parties, or birthday celebrations. They pair wonderfully with a glass of cold milk, a cup of coffee, or even a scoop of vanilla ice cream on the side. For a beautiful gift presentation, layer the Peanut Butter Balls in a decorative tin with waxed paper between layers. Tie a ribbon around the tin, and you have a homemade present that will make anyone smile. You can also freeze these balls for up to three months. Place them in a single layer in a freezer bag, then thaw in the refrigerator overnight before serving.
Frequently Asked Questions
Can I use natural peanut butter for this Peanut Butter Balls recipe?
Natural peanut butter contains too much oil and lacks the stabilizers found in commercial brands. The dough will turn out greasy, soft, and impossible to roll. Stick with creamy Jif, Skippy, or Peter Pan for best results.
Why did my peanut butter balls crack when I dipped them in chocolate?
Cracking happens when the peanut butter balls are too cold or when the chocolate is too hot. Let the balls chill for exactly 20 minutes, not longer. Also, keep your melted chocolate at a warm but not scalding temperature. Remove the chocolate from heat as soon as it melts.
Can I make these Peanut Butter Balls gluten-free?
Yes, all the ingredients are naturally gluten-free. Peanut butter, butter, confectioners’ sugar, and chocolate chips contain no gluten. However, check your specific brand labels for cross-contamination warnings if you have celiac disease.
What other chocolate coatings can I use?
White chocolate, milk chocolate, or dark chocolate all work beautifully. For a dramatic look, dip half the batch in semi-sweet and half in white chocolate. You can also drizzle a contrasting chocolate over the tops after the first coat sets.
How do I keep the chocolate from pooling at the bottom of the balls?
After dipping, hold the toothpick and gently tap it against the edge of the bowl to remove excess chocolate. Then place the ball on the waxed paper and immediately twist the toothpick slightly as you pull it out. This action breaks the surface tension and prevents pooling.
Can I add vanilla extract or other flavors to the peanut butter mixture?
Absolutely. Add 1 teaspoon of vanilla extract to the peanut butter mixture for extra depth. You can also add 1/2 teaspoon of cinnamon or a pinch of sea salt. For a crunchier texture, fold in 1/4 cup of finely chopped peanuts before rolling.
Conclusion
Peanut Butter Balls, or Buckeye Balls, represent everything I love about homemade desserts. They come together without fuss. They use simple, affordable ingredients. They taste absolutely incredible. The combination of creamy, salty peanut butter and smooth, semi-sweet chocolate creates a flavor pairing that never gets old. Whether you make them for a holiday cookie swap, a Super Bowl party, or just because you need a sweet treat after a long week, these no-bake bites will deliver every single time. The recipe I shared with you today has never failed me. It will not fail you either. So grab a jar of peanut butter, a bag of confectioners’ sugar, and some chocolate chips. Set aside twenty minutes to mix and roll. Chill, dip, and enjoy. Your family and friends will thank you. Just do not blame me if the entire batch disappears before you get a chance to share. Happy rolling.
Full recipe:
Ingredients:
- 16 oz peanut butter
- 1 pound confectioners sugar
- 3/4 cup butter
- Semi-sweet chocolate chips
Instructions:
Step I:
- Line a baking sheet with waxed paper; set aside.
Step II: 2. In a medium bowl, mix together the peanut butter, sugar, and 1 cup of butter.
- Roll the mixture into balls and place them on the prepared baking sheet. Chill in the freezer for about 20 minutes.
Step III: 4. Melt chocolate chips in a metal bowl over a pan of lightly simmering water. Stir occasionally until smooth.
Step IV: 5. Remove the peanut butter balls from the refrigerator.
- Insert a wooden toothpick into a ball and dip it into the melted chocolate.
- Return the chocolate-covered balls to the freezer for about 30 minutes.
Enjoy! These easy-to-make chocolate-covered peanut butter balls are a delightful treat. The creamy peanut butter center, coated in smooth chocolate, creates a perfect combination.