
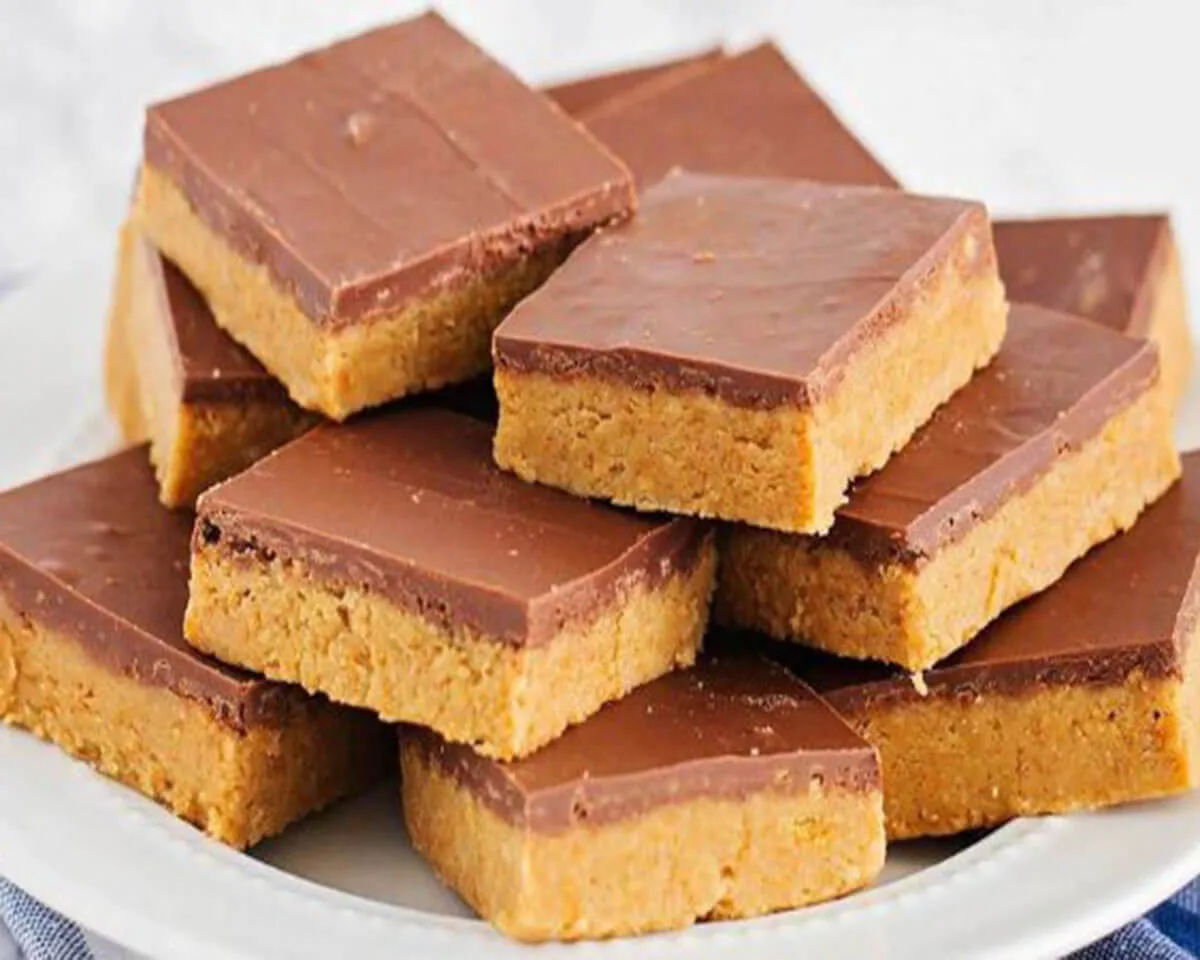
I have a confession. I judge potlucks by their dessert table. And for years, I brought the same sad store-bought cookies to every gathering. Then my neighbor introduced me to Peanut Butter Bars at a summer block party. She set down a pan of what looked like thick, glossy chocolate squares. I grabbed one, expecting a dense, dry granola bar. Instead, my teeth sank through a silky chocolate shell into a soft, creamy peanut butter layer that tasted like the inside of a Reese’s cup. I closed my eyes and let out an embarrassing noise. My neighbor just laughed. She told me the recipe takes fifteen minutes and requires no baking. I did not believe her until she handed me the instructions. Now I make these Peanut Butter Bars for every holiday, bake sale, and Tuesday night when I need a quick win. The combination of a buttery, sweet peanut butter base, rich chocolate topping, and festive sprinkles creates a dessert that looks impressive but could not be simpler. Let me show you how to master this foolproof, no-bake classic.
PART 1: Why Peanut Butter Bars Beat Every Other No-Bake Dessert
The Perfect Texture Contrast
What makes a great dessert bar stand out? Texture. These Peanut Butter Bars deliver two distinct experiences in every bite. The bottom layer combines creamy peanut butter, softened butter, and powdered sugar into a dense, fudgy, almost cookie-like base. It holds together beautifully but melts on your tongue. The top layer features melted chocolate chips mixed with a touch of coconut oil. That oil thins the chocolate, creating a smooth, glossy shell that cracks with a satisfying snap when you bite in. Together, these layers create a contrast between chewy and crispy, creamy and snappy. You get the richness of a peanut butter cup without any of the fuss of molding or tempering chocolate.
A Fifteen-Minute Wonder with No Oven Required
Traditional bar cookies require creaming butter, measuring flour, watching oven timers, and dealing with uneven baking. Peanut Butter Bars eliminate all of that. You mix the peanut butter base in one bowl. You press it into a pan. You melt the chocolate in the microwave. You pour it over the top. Then you chill. That is it. The entire active process takes about fifteen minutes. The refrigerator does the rest of the work. This makes the recipe perfect for hot summer days when you do not want to turn on the oven. It also works wonderfully for last-minute guests, children’s birthday parties, or holiday cookie exchanges where you need a no-fuss contribution. Plus, the bars travel well. Pack them in a single layer, and they hold their shape for hours.
PART 2: Ingredient Breakdown and Smart Substitutions
The Peanut Butter Base: Ratios That Matter
For the best Peanut Butter Bars, use creamy commercial peanut butter like Jif, Skippy, or Peter Pan. Natural peanut butter contains too much oil and produces a greasy, soft base that never firms up properly. You need 2 cups of creamy peanut butter. Measure carefully. Too little, and the bars taste weak. Too much, and they become overly soft. The ½ cup of unsalted butter must be softened to room temperature. Cold butter will not cream into the peanut butter smoothly. Leave the butter on the counter for an hour before starting. The vanilla extract (2 teaspoons) and salt (½ teaspoon) enhance the flavor without standing out. The powdered sugar provides structure. Start with 4 cups. If the mixture looks too wet and sticky after mixing, add up to 1 more cup gradually.
The Chocolate Topping and Optional Extras
The chocolate topping uses 1 ½ cups of semi-sweet chocolate chips. Semi-sweet balances the sweet peanut butter base perfectly. Milk chocolate makes the bars cloying. Dark chocolate works but tastes more intense. Add 1 teaspoon of coconut oil to the chocolate chips. Coconut oil thins the melted chocolate, making it easier to spread into a thin, even layer. It also adds a subtle sheen and helps the chocolate set with a clean snap. You can substitute vegetable oil or cocoa butter, but coconut oil gives the best results. Festive sprinkles are optional but highly recommended. They add color, a tiny crunch, and make the bars look like they came from a bakery. Choose sprinkles that match the occasion: red and green for Christmas, pastels for Easter, or classic rainbow for birthdays.
| Ingredient | Amount | Best Substitute |
|---|---|---|
| Creamy peanut butter | 2 cups | Almond butter (flavor changes) |
| Unsalted butter, softened | ½ cup | Vegan butter (for dairy-free) |
| Vanilla extract | 2 tsp | Almond extract (different flavor) |
| Salt | ½ tsp | Omit if using salted butter |
| Powdered sugar | 4-5 cups | Do not substitute granulated |
| Semi-sweet chocolate chips | 1.5 cups | Dark or milk chocolate chips |
| Coconut oil | 1 tsp | Vegetable oil or cocoa butter |
| Sprinkles | 2 tbsp (optional) | Chopped nuts or sea salt |
PART 3: Step-by-Step Assembly for Perfect Layers
Mixing and Pressing the Peanut Butter Base
Line an 8×8-inch or 9×9-inch baking dish with parchment paper. Leave some overhang on two opposite sides. These overhangs work as handles to lift the finished bars out of the pan. In a large bowl, combine 2 cups of creamy peanut butter and ½ cup of softened unsalted butter. Use an electric hand mixer on medium speed, or use a stand mixer with the paddle attachment. Beat until the mixture looks smooth, creamy, and fully combined. Add 2 teaspoons of vanilla extract and ½ teaspoon of salt. Blend again to incorporate. Now gradually add the powdered sugar. Start with 4 cups. Add it in half-cup increments, mixing on low speed after each addition. Scrape down the sides of the bowl frequently. The mixture will turn into large, crumbly clumps. It should hold together when pressed but not feel overly wet. If it feels sticky and does not clump, add another half cup of powdered sugar. Mix just until incorporated; do not overmix.
Pressing, Melting, and Topping
Pour the crumbly peanut butter mixture into the prepared parchment-lined pan. Use your hands or a spatula to press it down into an even, firm layer. For an extra smooth top, place a piece of parchment paper or wax paper directly over the dough. Press down firmly with the bottom of a measuring cup or a flat glass. The surface should become completely flat and even. Remove the top paper. Now make the chocolate topping. In a medium microwave-safe bowl, combine 1.5 cups of chocolate chips and 1 teaspoon of coconut oil. Microwave on high for 30 seconds. Stir. Microwave for another 30 seconds. Stir again. Microwave for a final 30 seconds. Stir until completely smooth and glossy. Do not overheat; chocolate burns easily. Pour the melted chocolate over the pressed peanut butter base. Use a spatula to spread it evenly to the edges. If using sprinkles, scatter them over the wet chocolate immediately so they stick.
PART 4: Setting, Cutting, and Serving Your Bars
The Chilling Process That Makes or Breaks Texture
Place the pan in the refrigerator. Chill for at least 20 minutes. The chocolate needs this time to harden completely. The peanut butter base also firms up during chilling, making the bars easier to cut. For the cleanest slices, chill for 1 hour. Do not skip this step. Warm bars will squish and smear when you try to cut them. If you are in a rush, place the pan in the freezer for 10 minutes instead. Freezer setting works well but may make the chocolate slightly more brittle. Once the bars feel completely firm to the touch, remove the pan from the refrigerator. Grasp the parchment paper overhangs and lift the entire block of Peanut Butter Bars out of the pan. Place the block on a cutting board. Use a sharp chef’s knife to cut into squares. Aim for 16 large squares (for an 8×8 pan) or 25 smaller squares (for a 9×9 pan). Wipe the knife clean between cuts for neat edges.
Serving, Storing, and Gifting Ideas
Serve these Peanut Butter Bars chilled or at room temperature. Chilled bars have a firmer chocolate snap and a denser peanut butter layer. Room temperature bars become slightly softer and more fudgy. Both ways taste incredible. Store leftovers in an airtight container in the refrigerator for up to two weeks. You can also store them at room temperature for up to three days, but the chocolate may soften. For longer storage, freeze the bars in a single layer in a freezer bag for up to three months. Thaw overnight in the refrigerator. These bars make fantastic homemade gifts. Stack them in a decorative tin with parchment paper between layers. Tie a ribbon around the tin, and you have a present that looks expensive but cost very little to make. They also work beautifully on dessert platters alongside brownies, cookies, and fudge.
Frequently Asked Questions
Can I use natural peanut butter for these Peanut Butter Bars?
Natural peanut butter contains too much oil and separates easily. It will make the base greasy and soft. Stick with commercial creamy peanut butter for the best texture and stability.
Why did my chocolate topping crack when I cut the bars?
Chocolate cracks when it becomes too cold or too thick. Let the bars sit at room temperature for 5 minutes before cutting. Also, use a sharp knife and cut with gentle pressure rather than forcing the blade down.
Can I make these Peanut Butter Bars dairy-free?
Yes. Use vegan butter (like Earth Balance) and dairy-free chocolate chips. Coconut oil is already dairy-free. Ensure your sprinkles are vegan if using them.
How do I get perfectly even squares without crumbling edges?
Chill the bars for at least 1 hour. Use a long, sharp chef’s knife. Wipe the blade clean after every two cuts. Score the chocolate lightly first, then press down in one smooth motion.
Can I add a layer of crushed peanuts or pretzels?
Absolutely. Sprinkle 1/4 cup of finely crushed peanuts or pretzels over the peanut butter base before pouring the chocolate. Press them in gently so they adhere. This adds a salty crunch.
My peanut butter base tastes too sweet. How can I balance it?
Reduce the powdered sugar to 3.5 cups instead of 4. Add 1/4 teaspoon more salt. You can also sprinkle flaky sea salt over the wet chocolate topping. The salt cuts the sweetness beautifully.
Conclusion
These Peanut Butter Bars have become my secret weapon for every gathering. They require no baking, no special skills, and almost no cleanup. Yet every time I set that pan down, people light up. The combination of creamy, sweet peanut butter and smooth, semi-sweet chocolate creates a flavor that feels nostalgic and exciting at the same time. You can dress them up with festive sprinkles or keep them plain for an elegant look. They store beautifully, travel well, and disappear faster than any other dessert on the table. My neighbor who first shared this recipe now asks me to bring them to her parties. That feels like a full-circle win. So grab your peanut butter, your powdered sugar, and your chocolate chips. Line that pan. Press that dough. Melt that topping. Your family and friends will thank you. And honestly, you will thank yourself every time you pull a perfectly square, perfectly layered bar out of the fridge for a late-night snack. Happy no-baking.
Full recipe:
Ingredients:
- 2 cups creamy peanut butter
- ½ cup unsalted butter, softened (1 stick)
- 2 teaspoons vanilla extract
- ½ teaspoon salt
- 4-5 cups powdered sugar (start with 4 cups and add more if too wet)
- 1 ½ cups chocolate chips
- 1 teaspoon coconut oil
- 2 tablespoons festive sprinkles (optional)
Instructions:
- Line an 8×8” or 9×9″ dish with parchment paper.
- In a large bowl, add the peanut butter and softened butter. Blend on medium speed with an electric hand mixer until smooth. Alternatively, use the bowl of a stand mixer fitted with the paddle attachment.
- Add the vanilla extract and salt to the peanut butter mixture and blend to combine.
- Gradually add the powdered sugar, mixing on low speed in between each addition. Scrape down the sides of the bowl as you add. Start with 4 cups, but you may need a little more if the peanut butter is too wet.
- Mix just until the sugar is incorporated, and the dough looks like large crumbles.
- Pour the dough into the prepared pan and press it down into an even layer. For an extra smooth top, place a piece of parchment paper or wax paper over the top and press the dough down until flat.
- In a medium microwave-safe bowl, add the chocolate chips and coconut oil. Heat for 30 seconds, then stir, and repeat for 2 other 30-second intervals, stirring between each interval.
- Pour the melted chocolate over the top of the peanut butter mixture and spread it out evenly.
- Top with sprinkles while the chocolate is still wet.
- Place the bars in the refrigerator for 20 minutes to set.
- Enjoy chilled or at room temperature.