
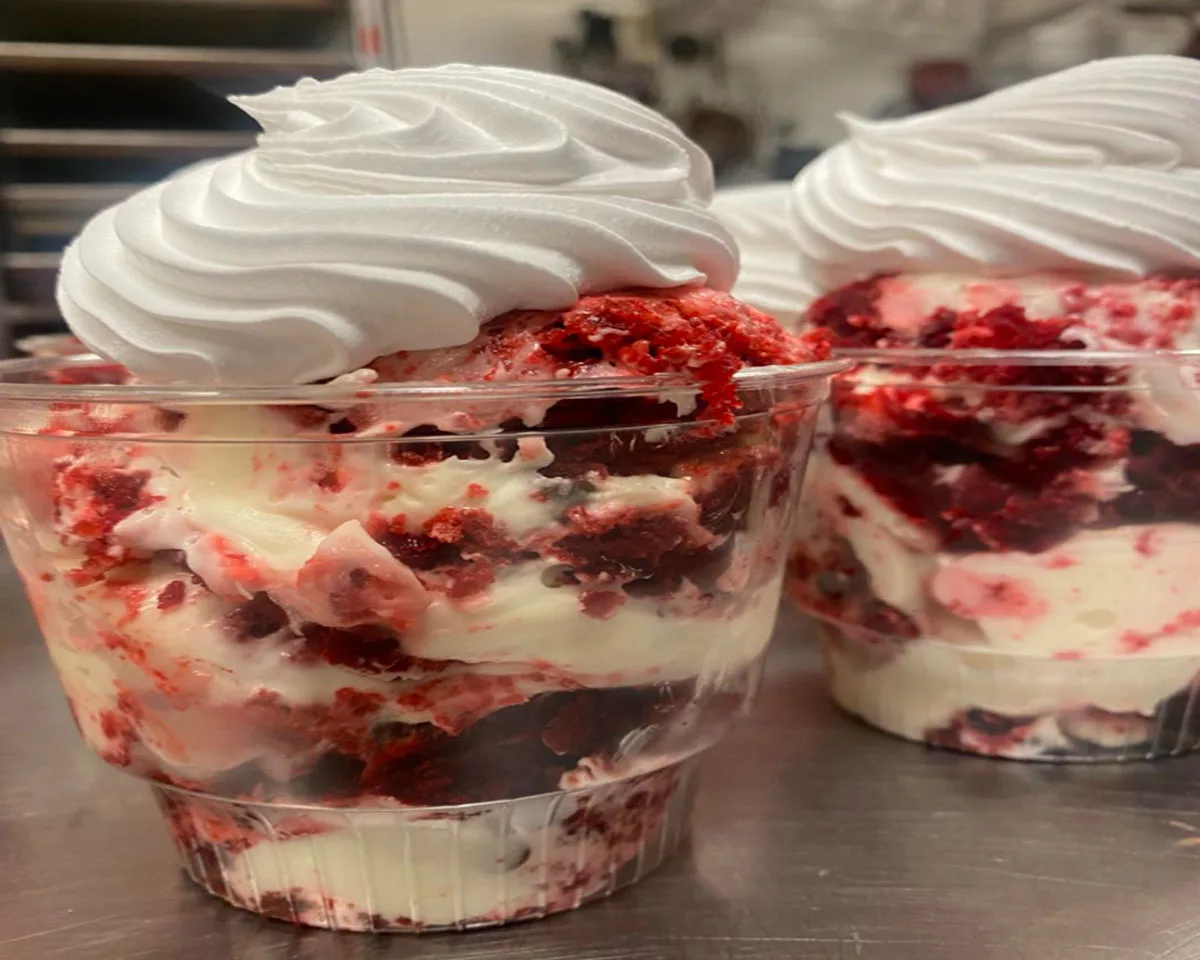
Red Velvet Banana Pudding: The Show-Stopping Dessert Your Table Desperately Needs

The first time I made red velvet banana pudding, I was trying to impress my mother-in-law during a Sunday family dinner. She’s the kind of woman who bakes everything from scratch and judges store-bought desserts with a single raised eyebrow. I wanted something that looked dramatic, tasted incredible, and didn’t require three days of preparation. I layered that gorgeous crimson cake, those creamy banana slices, and that cloud-like pudding mixture into a clear trifle dish and watched her face when I set it on the table. She went completely silent for a moment and then asked for the recipe before she even took her first bite. Red velvet banana pudding has that effect on people. It’s bold, it’s beautiful, and it delivers on every single promise it makes visually.

Red Velvet Banana Pudding: Understanding This Stunning Dessert Fusion

Red velvet banana pudding is exactly what it sounds like — a layered dessert that combines the rich, cocoa-kissed character of red velvet cake with the creamy comfort of classic banana pudding. Understanding what makes it special helps you execute it with real confidence.

Why This Flavor Combination Works So Brilliantly

At first glance, red velvet and banana pudding might seem like an unlikely pairing. However, the combination is actually remarkably intuitive once you taste it. Red velvet cake carries subtle cocoa notes wrapped in a tender, moist crumb that soaks up surrounding moisture beautifully. When those crumbles absorb the creamy vanilla pudding layer, they soften into something almost custardy and deeply satisfying. The sliced bananas then add natural sweetness and a fruity brightness that cuts through the richness of both the cake and the cream. Furthermore, the visual contrast between the deep crimson cake layers and the ivory pudding creates a dessert that genuinely stops people in their tracks. This isn’t just a delicious recipe. It’s a conversation starter, a centerpiece, and a celebration all at once.

The Key Ingredients That Drive the Recipe

Every component in red velvet banana pudding plays a specific and important role. Here’s a complete breakdown of what you need and why each ingredient matters:

Ingredient Quantity Purpose
Red velvet cake mix 1 package Creates the signature crimson cake crumbles
Milk 2 cups Forms the base of the pudding mixture
Sweetened condensed milk 14 oz can Adds richness and deep sweetness to the cream
Instant vanilla pudding mix 5.1 oz package Thickens the creamy layer and adds vanilla depth
Ripe bananas, sliced 4 to 5 Provides fresh fruit flavor and soft texture
Whipped topping 16 oz container Lightens and fluffs the pudding mixture
Red food coloring Optional Deepens the visual impact of the pudding layer
Red velvet crumbs or cookies For garnish Adds texture and visual drama on top
Extra banana slices For garnish Finishes the presentation beautifully

Choosing ripe bananas is especially important. Ripe bananas carry a deeper, sweeter flavor that complements the cocoa notes in the red velvet much more effectively than underripe ones. Additionally, using full-fat whipped topping produces a creamier, more stable pudding layer that holds its shape during refrigeration.

Step-by-Step Instructions for Making Red Velvet Banana Pudding at Home

This recipe comes together in two distinct stages: baking and crumbling the red velvet cake, then assembling the pudding layers. Neither stage is technically difficult, but moving through them in the right order saves time and produces the best result.

How to Prepare the Red Velvet Cake and Pudding Base

Start by baking the red velvet cake according to the package instructions on your chosen cake mix. Pour the batter into a standard baking pan, bake until a toothpick comes out clean, and allow the cake to cool completely before touching it. Rushing this step causes the crumbles to clump together and become dense rather than light and airy. Once the cake is fully cooled, break it apart using your hands or a fork and crumble it into small, irregular pieces. You don’t need perfect uniformity here. Varied sizes actually create a more interesting texture throughout the finished dessert. Set the crumbles aside while you prepare the pudding. In a large mixing bowl, pour the milk and sweetened condensed milk together. Whisk them thoroughly until they combine into a smooth, unified liquid. Next, add the instant vanilla pudding mix and continue whisking for about two minutes until the mixture begins to thicken noticeably. Then gently fold in the whipped topping using a rubber spatula. Use slow, sweeping motions rather than aggressive stirring to preserve the airiness of the whipped topping. If you want a more dramatic visual effect, add two or three drops of red food coloring at this stage and fold until the color distributes evenly throughout the cream.

How to Layer and Assemble the Perfect Trifle

Assembly is where red velvet banana pudding truly becomes a showpiece. A clear trifle dish or large glass bowl works best because it allows everyone to see those stunning red and cream layers from the outside. Start with a generous layer of red velvet cake crumbles spread evenly across the bottom of the dish. Then arrange a single layer of sliced bananas directly on top of the crumbles, covering the surface as evenly as possible. Spread a portion of the pudding mixture over the bananas in a smooth, even layer. Now repeat the entire sequence: crumbles, bananas, pudding. Continue layering until you’ve used all your ingredients, making sure the pudding mixture forms the final top layer. Smooth the surface with a spatula and then garnish generously with additional red velvet cake crumbles and a few fresh banana slices arranged decoratively. Cover the dish with plastic wrap and refrigerate it for at least four hours. Overnight refrigeration produces the absolute best result, as the flavors meld together completely and the crumbles reach that perfect softened texture.

Expert Tips for Making Red Velvet Banana Pudding That Truly Impresses

Knowing the recipe is just the beginning. These practical insights help you avoid the most common mistakes and elevate your red velvet banana pudding to genuinely memorable territory.

Critical Tips to Get Every Layer Right

First, always cool the red velvet cake completely before crumbling. Warm cake produces dense, gummy clumps that weigh down the layers and prevent the pudding from setting properly around them. Second, slice your bananas just before layering to minimize browning. If you need to slice them in advance, toss the pieces lightly in fresh lemon juice to preserve their pale color. Third, don’t rush the refrigeration step. Four hours is the absolute minimum, but overnight allows the cake crumbles to absorb just enough moisture from the surrounding pudding to reach that soft, almost bread-pudding-like consistency that defines this dessert at its very best. Furthermore, use a clear serving vessel whenever possible. The visual drama of those layers is a significant part of the experience, and hiding them in an opaque bowl genuinely wastes one of this dessert’s greatest assets.

Variations and Upgrades Worth Exploring

Once you’ve made the classic version confidently, several upgrades can take red velvet banana pudding in exciting new directions. Instead of using boxed cake mix, try making homemade red velvet cake for a richer, more complex crumb. Alternatively, substitute red velvet Oreos or store-bought red velvet cookies for the cake crumbles when you’re short on time. This shortcut actually works beautifully and produces a slightly firmer, crunchier texture that many people prefer. Additionally, swap the plain whipped topping for cream cheese-infused whipped cream to introduce the classic red velvet and cream cheese pairing into the pudding layer itself. A tablespoon of softened cream cheese folded into the whipped topping before mixing it into the pudding adds a subtle tang that makes the entire dessert taste more sophisticated. Moreover, adding a drizzle of caramel sauce between the banana and pudding layers introduces a warm, buttery sweetness that elevates every single bite.

Serving, Storing, and Presenting Red Velvet Banana Pudding

Presentation matters enormously with this dessert, and fortunately the recipe’s visual nature does most of the work for you. A little extra effort at the serving stage pays off significantly.

How to Present This Dessert for Maximum Impact

Serve red velvet banana pudding directly from the trifle dish at the table so guests can see the full visual effect of the layers before you scoop into them. Use a long-handled spoon to cut through all the layers cleanly when serving each portion, making sure everyone gets a balanced scoop of crumbles, banana, and cream. For individual presentations, assemble the pudding in clear glass cups or mason jars. This approach works especially well for parties and potlucks where individual servings make things easier. Top each glass with a distinctive garnish: a single banana slice propped against the rim and a small pinch of red velvet crumbles for visual consistency. Additionally, a light dusting of cocoa powder over the top layer adds color depth and reinforces the red velvet flavor story before anyone takes their first bite.

Storage and Make-Ahead Guidance

Red velvet banana pudding stores well in the refrigerator for up to three days in an airtight container or tightly covered trifle dish. However, the banana slices closest to the surface may begin to brown after the first day. To address this, hold back some of your banana slices and add them as a fresh garnish right before serving rather than layering all of them during assembly. This technique keeps the top layer looking vibrant and fresh even on day two or three. Avoid freezing this dessert, as the pudding layer separates upon thawing and the texture deteriorates significantly. For make-ahead convenience, prepare the cake crumbles and pudding mixture separately up to two days in advance, store them in the refrigerator, and assemble the layers the evening before your event for optimal freshness and presentation.

Frequently Asked Questions

Can I use homemade red velvet cake instead of boxed mix? Absolutely. Homemade red velvet cake produces a richer, more complex crumb that enhances the overall dessert significantly. Simply bake your favorite homemade recipe, cool it fully, and crumble it exactly as you would with the boxed version.

How do I prevent the banana slices from turning brown inside the pudding? Toss the banana slices lightly in fresh lemon juice before layering them. The citric acid slows oxidation without noticeably affecting the flavor. Additionally, the surrounding pudding layer helps protect the bananas from air exposure once the dish is sealed and refrigerated.

Can I make red velvet banana pudding without whipped topping? Yes. You can substitute freshly whipped heavy cream in equal amounts. Whip the cream to stiff peaks before folding it into the pudding base. Freshly whipped cream produces a slightly lighter, less sweet result compared to the stabilized whipped topping from a container.

How many people does this recipe serve? This recipe comfortably serves eight to ten people when made in a standard large trifle dish. For individual servings in mason jars or glass cups, the recipe fills approximately eight medium-sized portions depending on how generously you layer each one.

Can I substitute the instant vanilla pudding with another flavor? Yes. Instant banana cream pudding works exceptionally well and amplifies the banana flavor throughout the entire dessert. Alternatively, instant cheesecake pudding introduces a tangy, creamy note that pairs beautifully with both the red velvet and the fresh banana slices.

Conclusion

Red velvet banana pudding is the kind of dessert that earns genuine compliments and recipe requests every single time you serve it. It combines visual drama with approachable, crowd-pleasing flavor in a way that few other desserts manage to achieve so effortlessly. The recipe is forgiving, the assembly is intuitive, and the result is consistently stunning. Whether you’re making it for a holiday gathering, a birthday celebration, or simply a weekend treat that deserves to be remembered, this dessert delivers everything you could possibly want. So go ahead and bake that red velvet cake, slice those ripe bananas, and start building those gorgeous layers. Your guests won’t stop talking about it for weeks.

Full recipe:

Ingredients:

– 1 package red velvet cake mix
– 2 cups milk
– 1 can (14 ounces) sweetened condensed milk
– 1 package (5.1 ounces) instant vanilla pudding mix
– 4-5 ripe bananas, sliced
– 1 container (16 ounces) whipped topping
– Red food coloring (optional)
– Red velvet cookies or cake crumbs (for garnish)
– Banana slices (for garnish)

  Instructions:

1. Bake the red velvet cake according to package instructions. Once cooled, crumble or finely chop the cake into small pieces or crumbs.
2. In a mixing bowl, whisk together the milk and sweetened condensed milk until well combined.
3. Add the instant vanilla pudding mix to the milk mixture and whisk until it begins to thicken.
4. Fold in the whipped topping gently until fully incorporated. Add a few drops of red food coloring if desired for a deeper red color.
5. In a large trifle dish or serving bowl, start layering: Begin with a layer of red velvet cake crumbs at the bottom, followed by a layer of sliced bananas.
6. Spread a portion of the pudding mixture over the bananas, ensuring an even layer.
7. Continue layering in the same order until all ingredients are used, finishing with a layer of the pudding mixture on top.
8. Garnish with additional red velvet cake crumbs or crushed red velvet cookies and banana slices.
9. Refrigerate the Red Velvet Banana Pudding for at least 4 hours or overnight to allow the flavors to meld together.
10. Serve chilled and enjoy this delightful fusion of red velvet goodness with creamy banana pudding!

Leave a Comment