
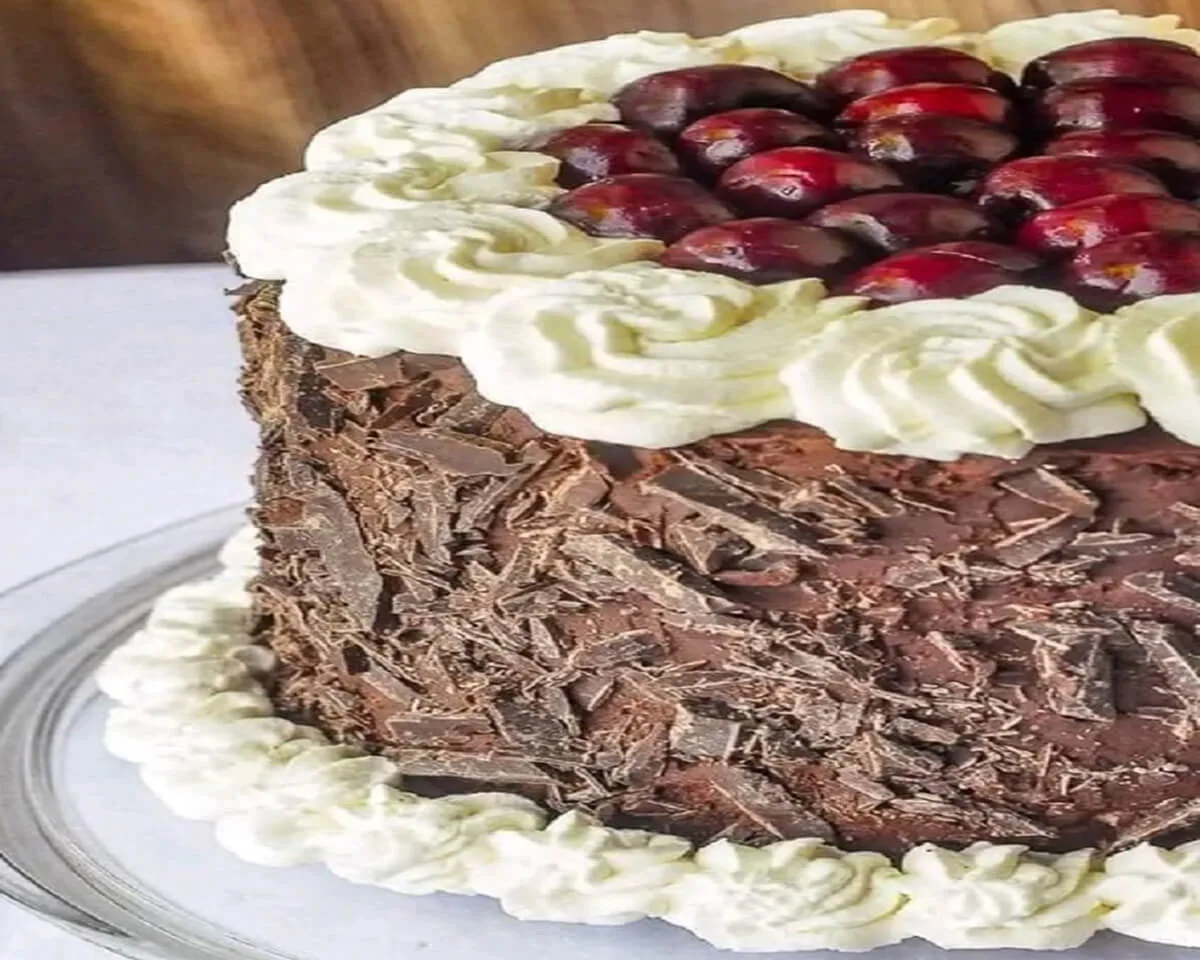
Double Chocolate Black Forest Cake – The Ultimate Cherry and Chocolate Indulgence

PART 1: The Birthday Cake That Started Everything

A Sweet Memory from My Grandmother’s Kitchen

I still remember my tenth birthday like it was yesterday. My grandmother asked me what kind of cake I wanted, and without hesitation, I shouted, “Black Forest cake!” She smiled and spent the whole afternoon in her tiny kitchen, dusting cocoa powder everywhere and pitting fresh cherries by hand. When she finally brought out that Double Chocolate Black Forest Cake, my eyes went wide. Dark chocolate layers, fluffy whipped cream, juicy cherries peeking out from every slice, and a glossy chocolate glaze dripping down the sides. That first bite tasted like pure magic. My grandmother has been gone for years now, but every time I bake this Double Chocolate Black Forest Cake, I feel her right next to me. This Black Forest cake recipe has become my go-to for anniversaries, Valentine’s Day, and any celebration that calls for something truly spectacular. I have tweaked her original recipe over time, adding a whipped chocolate ganache filling and an extra dose of dark chocolate. Trust me when I say this cake will earn you standing ovations.

Why This Double Chocolate Black Forest Cake Stands Out

Traditional Black Forest cake comes from Germany, where it is known as Schwarzwälder Kirschtorte. The classic version uses a light chocolate sponge, cherries soaked in kirsch (cherry brandy), and whipped cream. This Double Chocolate Black Forest Cake takes those beloved elements and turns up the chocolate intensity. You get two kinds of chocolate in the cake itself, thanks to cocoa powder and the rich, dark chocolate in the ganache filling. The whipped chocolate ganache frosting replaces the standard buttercream, adding a silky, decadent layer that complements the tart cherries beautifully. Fresh cherries provide a bright, juicy contrast to all that richness, while the vanilla whipped cream keeps every bite light and airy. This cake looks like a bakery showpiece, but you can make it at home with simple techniques and a little patience. Serve it for a birthday, an anniversary, or just because you want to treat yourself. Every slice delivers a perfect harmony of chocolate, cherry, and cream.

PART 2: Building the Dark and Delicious Chocolate Cake Layers

The Secret to an Intensely Chocolatey Cake

The cake layers form the foundation of this Double Chocolate Black Forest Cake. You need two cups of sugar, two cups of all-purpose flour, three-quarters of a cup of unsweetened cocoa powder, two teaspoons of baking powder, one teaspoon of baking soda, and half a teaspoon of salt. Whisk these dry ingredients together in a large bowl. In a separate bowl, beat two eggs, then add one cup of soured milk (mix a tablespoon of lemon juice or vinegar with a cup of milk and let it sit for five minutes). Soured milk adds tenderness and reacts with the baking soda for a better rise. Pour in one cup of black coffee, half a cup of vegetable oil, and one teaspoon of vanilla extract. The coffee does not make the cake taste like coffee. Instead, it deepens the chocolate flavor and adds moisture. Combine the wet and dry ingredients and beat with an electric mixer for two minutes. The batter will be thin, which is correct.

Baking, Cooling, and Splitting the Layers

Grease and flour two 9-inch cake pans, or dust them with cocoa powder for a darker finish. Divide the batter evenly between the pans. Bake at 350°F for thirty to thirty-five minutes. Insert a toothpick into the center. If it comes out clean, the cakes are done. Let them cool in the pans for ten minutes, then turn them out onto a wire rack to cool completely. Do not rush this cooling step. Warm cakes crumble when you try to slice them. Once completely cool, use a long, sharp serrated bread knife to split each layer horizontally. You will end up with four thin cake layers. This splitting technique creates more opportunities for fillings and makes the cake look tall and impressive. If the cakes dome on top, slice off the dome to create a flat surface before splitting.

Cake Layer Tip Why It Matters How to Do It
Use room temperature eggs Better volume, smoother batter Take eggs out 30 minutes before baking
Sour the milk with vinegar Tender crumb, activates baking soda Add 1 tbsp lemon juice to 1 cup milk
Add hot coffee to batter Deepens chocolate flavor, adds moisture Brew strong coffee; use immediately
Cool completely before slicing Prevents crumbling Cool 1 hour on wire rack

PART 3: The Whipped Chocolate Ganache and Vanilla Whipped Cream

Making a Silky, Pipeable Whipped Ganache

The whipped chocolate ganache serves as both a filling and the outer frosting. Start by melting three cups of dark chocolate chips in a double boiler. Stir constantly over a gentle simmer until the chocolate melts and becomes smooth. Do not overheat. The chocolate should feel only lukewarm to the touch. Remove it from the heat and transfer it to a large mixing bowl. In a separate bowl, whip two cups of cold heavy cream until firm peaks form. Do not overwhip into butter. Add the whipped cream to the melted chocolate in four separate portions. Gently fold each addition with a rubber spatula. This technique keeps the ganache light and airy. If the mixture seems too soft to spread, chill it in the refrigerator for thirty minutes. Fold the mixture every ten minutes to ensure even cooling. The final whipped ganache should have a mousse-like texture that spreads easily and holds its shape.

Preparing the Vanilla Whipped Cream Filling

The vanilla whipped cream adds a light, airy contrast to the rich chocolate and cherries. Whip two cups of cold heavy cream with four rounded tablespoons of powdered sugar and two teaspoons of vanilla extract. Beat until firm peaks form. Do not overbeat, or the cream will turn grainy and eventually become butter. This vanilla whipped cream goes between the cake layers alongside the cherries. It also serves as a decorative border on the final cake. Keep the whipped cream chilled until you are ready to assemble. If you make it ahead, store it in the refrigerator and give it a quick whisk before using. For best results, whip the cream right when you start assembling the cake.

PART 4: Assembling and Decorating the Double Chocolate Black Forest Cake

Layering Like a Pro

Place the first cake layer on your serving plate or a cake board. Spread a thin layer of vanilla whipped cream over the top. Add the second cake layer. Spread a thin layer of the whipped chocolate ganache on this layer. Arrange a generous layer of fresh pitted cherries on top of the ganache. Cover the cherries with more whipped chocolate ganache, smoothing it to the edges. Add the third cake layer, then another layer of vanilla whipped cream. Top with the fourth and final cake layer. Now frost the entire outside of the cake with the remaining whipped chocolate ganache. Use an offset spatula to create a smooth finish or swirls for texture. Do not worry about perfection. A rustic, homemade look adds charm.

Adding Cherry Topping, Chocolate Garnish, and Cream Borders

Place another layer of fresh pitted cherries on top of the frosted cake. Arrange them in a circular pattern or pile them generously in the center. Chop one cup of dark chocolate into small shards or curls. Press the chopped chocolate gently onto the sides of the cake. Use your hands or a spatula to adhere the chocolate pieces. The chopped chocolate adds crunch and visual appeal. Finally, pipe or dollop the remaining vanilla whipped cream around the top edge of the cake. You can use a star tip to create rosettes or simply spoon small mounds. For an extra touch, grate a little dark chocolate over the top cherries. Refrigerate the assembled cake for at least two hours before serving. This resting time allows the layers to set and the flavors to meld beautifully.

Serving and Storing Your Masterpiece

Remove the Double Chocolate Black Forest Cake from the refrigerator about twenty minutes before serving. This brief rest takes the chill off and allows the flavors to shine. Use a long, sharp knife to slice cleanly through the layers. Wipe the blade between cuts. Serve each slice with a few extra fresh cherries on the side if desired. Store leftover cake in an airtight container in the refrigerator for up to four days. The cake actually tastes even better on day two as the cherry juices soak into the chocolate layers. Do not freeze this cake with the whipped cream fillings. The cream becomes watery upon thawing. If you want to make ahead, freeze the unfrosted cake layers separately. Thaw them overnight in the refrigerator, then make fresh fillings and assemble.

Frequently Asked Questions

Can I use canned cherry pie filling instead of fresh cherries?
Yes, but drain the syrup well. Canned pie filling is sweeter and softer. Reduce the sugar in the cake slightly to balance. For the topping, fresh cherries look much more elegant, but canned works in a pinch.

What can I substitute for dark chocolate chips in the ganache?
Use semi-sweet chocolate chips or a good quality baking chocolate bar chopped into small pieces. Milk chocolate makes the ganache too sweet. White chocolate changes the flavor entirely but can work for a different twist.

How do I pit fresh cherries without a cherry pitter?
Use a paper clip, a metal skewer, or a chopstick. Push the tool through the stem end to pop out the pit. Wear an apron to avoid juice stains. Alternatively, buy frozen pitted cherries and thaw them before using.

Why did my whipped ganache turn grainy?
You likely overheated the chocolate or added the whipped cream while the chocolate was still hot. Melt the chocolate only until smooth, and let it cool to lukewarm. Fold gently, do not stir vigorously. If it seizes, start over.

Can I make this cake gluten-free?
Yes, substitute the all-purpose flour with a gluten-free 1:1 baking blend. Add a quarter teaspoon of xanthan gum if your blend does not already contain it. The texture will be slightly denser but still delicious.

Do I have to use coffee in the cake batter?
No, you can substitute hot water, but the chocolate flavor will be less intense. Instant espresso powder dissolved in hot water works beautifully. Decaf coffee is fine too.

Conclusion

The Double Chocolate Black Forest Cake brings together everything you want in a celebratory dessert. Dark, moist chocolate cake layers, a light and airy whipped chocolate ganache, sweet vanilla whipped cream, and bright, juicy cherries. The glossy finish and chocolate garnish make it look like a work of art. Yet the process is straightforward enough for a dedicated home baker. This cake tastes like a hug from your grandmother, like a birthday wish come true, like the perfect ending to a special meal. Bake it for Valentine’s Day, anniversaries, Christmas dinners, or any time you want to make someone feel loved. The combination of chocolate and cherries never goes out of style. Once you master this recipe, you will become the designated cake maker for every family gathering. So tie on your apron, preheat your oven, and get ready to create a dessert that will earn you rave reviews. Every slice of this Double Chocolate Black Forest Cake tells a story of indulgence, care, and the simple joy of homemade baking. Enjoy every single bite.

Full recipe:

Ingredients:

For the Chocolate Cake:

  • 2 cups sugar
  • 2 cups all-purpose flour
  • 3/4 cup cocoa
  • 2 tsp. baking powder
  • 1 tsp baking soda
  • 1/2 tsp salt
  • 2 eggs
  • 1 cup soured milk (mix a tablespoon of lemon juice or plain vinegar with a cup of milk)
  • 1 cup black coffee
  • 1/2 cup vegetable oil
  • 1 tsp vanilla extract

The Whipped Chocolate Ganache:

  • 3 cups dark chocolate chips
  • 1/2 cup whipping cream (slightly warmed first)
  • 2 cups whipping cream

For the Vanilla Whipped Cream:

  • 2 cups whipping cream
  • 4 rounded tbsp icing sugar (powdered sugar)
  • 2 tsp vanilla extract

Additional:

  • 1 pound ripe fresh cherries, pitted
  • 1 cup chopped chocolate for garnish

Instructions:

To Prepare the Chocolate Cake:

  1. Combine all the cake ingredients in a mixing bowl and beat with an electric mixer for 2 minutes.
  2. Pour the batter into 2 greased and floured (or dusted with cocoa) 9-inch cake pans.
  3. Bake at 350 degrees F for 30-35 minutes or until a toothpick inserted in the center comes out clean. Cool completely on a wire rack.
  4. Once cooled, split the two cake layers into four using a sharp serrated bread knife.

To Prepare the Whipped Ganache:

  1. Melt together the 3 cups of dark chocolate chips in a double boiler, stirring constantly over a gentle simmer until melted and smooth. Be careful not to overheat the mixture; it should be just at the melting point and only lukewarm to the touch. Transfer it to a large mixing bowl.
  2. In a separate bowl, whip the 2 cups of whipping cream to firm peaks.
  3. Add the whipped cream to the chocolate mixture in four portions, folding gently after each addition, until the whipped cream is completely incorporated into the chocolate.
  4. If the frosting is too soft to work with, chill it in the fridge for about 30 minutes, giving it a quick fold with a rubber spatula every 10 minutes to cool evenly.

Prepare the Vanilla Whipped Cream:

  1. Whip together all three ingredients until you achieve firm peaks.

Construct The Cake:

  1. Place the first layer of cake onto the cake plate and cover it with a little of the vanilla whipped cream.
  2. Add the next layer of cake.
  3. Spread a thin layer of the whipped chocolate ganache on this layer.
  4. Place a layer of pitted cherries on top, followed by more whipped ganache to completely cover the cherries.
  5. Add the next layer of cake, more of the vanilla whipped cream, and the final layer of cake.
  6. Frost the entire outside of the cake with the remaining whipped ganache frosting.
  7. Place another layer of pitted cherries on top of the cake.
  8. Garnish the sides with chopped chocolate and create borders with the vanilla whipped cream.

In conclusion, the Double Chocolate Black Forest Cake is a showstopping dessert that combines the richness of chocolate cake with the sweet and tangy goodness of cherries and the airy delight of whipped cream. The glossy chocolate glaze crowns this dessert, making it a visual and flavorful masterpiece, perfect for special occasions or indulgent moments. Now, let’s explore the step-by-step process to create this double chocolate delight in your own kitchen.

Leave a Comment