
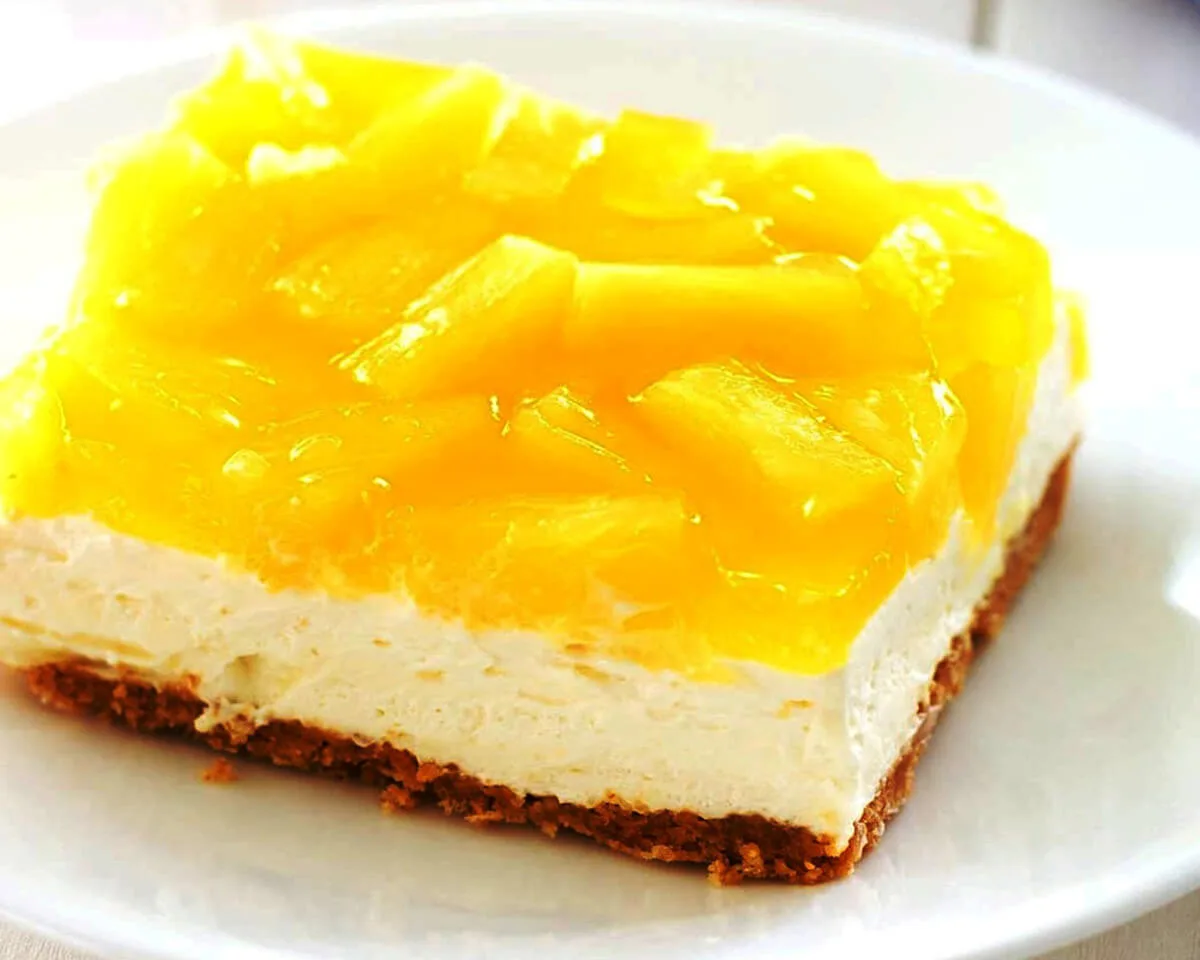
No-Bake Pineapple Cheesecake

I still vividly remember the first time I tried to make cheesecake for a summer gathering. I spent hours in the kitchen, preheating the oven, swirling a hot water bath, and carefully monitoring the timer. After all that effort, a massive crack formed right down the center of my beautiful cake. Not exactly the impressive dessert I had pictured. I served it anyway, but I vowed there had to be an easier way. That is when I discovered the magic of no-bake desserts, and eventually, this No-Bake Pineapple Cheesecake. Now, this No-Bake Pineapple Cheesecake is my secret weapon for potlucks, barbecues, and even holiday dinners. The beauty of this No-Bake Pineapple Cheesecake is that you can achieve it all without a single crack, without breaking a sweat, and with a fraction of the effort. It is, without a doubt, the perfect dessert for the modern cook who wants to spend more time with guests and less time scrubbing dishes.

Why You Will Fall in Love with This No-Bake Recipe

Ask anyone why they love cheesecake, and they will likely mention the rich, velvety texture and the satisfying contrast of a crunchy crust. This recipe delivers all of that while skipping the hardest parts. There is no water bath, no worry about over-baking, and no cooling the cake in the oven with the door cracked open. The filling relies on whipped cream and chilled cream cheese to set up beautifully in the refrigerator over a few hours. Beyond the convenience, the flavor here is a standout. You combine the tangy zip of cream cheese with the sweet, tropical burst of pineapple. The result is a dessert that feels both decadent and refreshing. It tastes like a tropical vacation. Serve it as a light finish to a heavy meal or as the centerpiece of a summer afternoon tea. This No-Bake Pineapple Cheesecake works for any occasion, and people always ask for the recipe.

The Foundation: A Buttery Graham Cracker Crust

Achieving the Perfect Crunch

The crust serves as the sturdy anchor for your creamy filling. Many recipes use a graham cracker base, and for good reason. It provides the perfect buttery balance to the tangy filling. I prefer a classic mixture of graham cracker crumbs, granulated sugar, and melted butter. Some recipes call for 1 1/2 cups of crumbs with 1/3 cup of butter, while others suggest a 2:1 ratio of crumbs to butter, such as 2 cups of crumbs to 1/2 cup of melted butter. Pulse whole graham crackers in a food processor or seal them in a bag and crush them with a rolling pin. You want to achieve fine, sand-like crumbs. In a bowl, combine the crumbs with just a couple of tablespoons of sugar. Pour in the melted butter and mix until the texture resembles wet sand. When you press the mixture into the pan, use the flat bottom of a measuring cup or a glass to tamp it down very firmly. A loosely packed crust will crumble apart when you are trying to slice and serve it.

Pre-Chilling for a Solid Base

Once you have pressed the crust into the bottom of a 9-inch springform pan or a 9×13 dish, do not rush to add the filling. Place the crust in the refrigerator for at least 10 to 30 minutes. This step allows the butter to resolidify, creating a firm, sliceable base that will not turn into a soggy mess. If you have time, chilling it while you gather other ingredients is helpful. This simple action makes a noticeable difference to the final texture. Some bakers even pre-chill it for up to an hour. However, avoid putting it in the freezer, as the condensation that forms later can add unwanted moisture to the bottom of your crust.

The Creamy, Tropical Filling

Room Temperature Cream Cheese Is Essential

The filling is where the magic happens, but it is also where things can go wrong if you move too quickly. Take your cream cheese out of the refrigerator at least 30 minutes before you plan to mix it. Cold cream cheese fights against you, leaving nasty lumps in your otherwise smooth batter. Beat the softened cream cheese and powdered sugar together until the mixture is light, fluffy, and completely free of lumps. This usually takes about 2 to 3 minutes with a hand mixer on medium speed. Be patient here. A smooth cream cheese base is the secret to a professional-looking result. For those who want added stability, some contemporary recipes include a box of instant vanilla pudding mix or even a touch of gelatin. However, most home cooks find that the combination of whipped cream and full-fat cream cheese sets up perfectly on its own.

Draining the Pineapple

Now, let us talk about the pineapple. This ingredient brings the bright, zesty flavor that defines the dessert, but it also brings excess liquid. Too much moisture in the filling will prevent your cheesecake from setting properly. You must drain your canned crushed pineapple thoroughly. Use a fine-mesh strainer set over a bowl. Press down on the pineapple with a spatula to squeeze out as much juice as possible. Let it sit and drain for at least 10 minutes. Some people even blot the drained fruit with paper towels for extra dryness. I admit, this feels wasteful, but trust me, removing that liquid is the number one factor in getting a sliceable, firm texture rather than a soft, scoopable mess. Reserve a little of the juice if you want to add a hint of pineapple flavor back into the mixture, but do not leave the fruit wet.

Folding for an Airy Texture

Once the cream cheese base is smooth and the pineapple is drained, you need to incorporate the whipped cream. If you are making your own whipped cream, whip cold heavy cream until stiff peaks form. If you are using store-bought whipped topping, make sure it is thawed. Gently fold the whipped cream into the cream cheese mixture using a spatula. Use a cutting motion down through the center and scooping up from the bottom. You want to maintain as much air in the mixture as possible. This keeps the cheesecake light and mousse-like rather than dense and heavy. After the whipped cream is mostly incorporated, fold in the drained crushed pineapple. Mix just until combined, stopping before the mixture looks muddy.

Assembly, Chilling, and Serving

The Overnight Rule

Pour the creamy filling over your chilled crust. Smooth the top with a spatula. This is the time to make the surface even, as any bumps will be visible once the cheesecake is set. Cover the pan with plastic wrap and place it in the refrigerator. The chilling time is crucial. Most recipes recommend a minimum of 4 hours. However, I strongly advocate for 8 hours or, ideally, overnight. Overnight chilling ensures the center is firm enough to hold a clean slice. When you cut into it too soon, the filling may still be soft in the middle, causing the layers to slide apart or the slices to look messy. This chilled time also allows the flavors of the tangy cream cheese and the sweet pineapple to meld together beautifully.

Garnishing for Presentation

Before serving, get creative with the toppings. A classic garnish is fresh pineapple chunks or slices arranged around the edge of the cake. You can also swirl additional crushed pineapple on top or pipe rosettes of whipped cream around the border. A sprinkle of toasted coconut adds a gorgeous crunch and reinforces the tropical vibe. Some recipes also suggest a drizzle of caramel sauce or a dusting of cinnamon for a more autumnal twist. If you are serving this at a party, pull the cheesecake out of the refrigerator about 15 minutes before slicing. This allows it to soften ever so slightly, making it easier to cut and giving it a better mouthfeel.

Storing Leftovers

Store leftover No-Bake Pineapple Cheesecake in the refrigerator, covered tightly. It will stay fresh for up to 5 days. I do not recommend freezing this particular dessert. The high moisture content from the pineapple can cause the texture to become icy and grainy upon thawing. However, the cheesecake is so delicious that odds are you will not have many leftovers to worry about anyway.

Creative Variations to Make It Your Own

One of the best things about this recipe is how flexible it is. You can easily switch up the flavors to suit your mood. For a classic combination, try an Orange Pineapple Swirl Cheesecake by adding a 1/2 cup of fresh orange juice and orange zest to the filling, then swirling in orange marmalade before chilling. For a vegan version, substitute vegan cream cheese and coconut cream for the dairy products. If you are dealing with a nut allergy, you can stick to the standard graham crust, or for a gluten-free option, use certified gluten-free graham crackers blended into crumbs using the same proportions. You could also swap the pineapple for drained mandarin oranges or mango puree. The possibilities are endless. Keep the ratios of cream cheese to whipped cream to fruit the same, and you will have a new dessert every time.

Frequently Asked Questions

Can I use fresh pineapple instead of canned?
No, you should not. Fresh pineapple contains an enzyme called bromelain. This enzyme breaks down proteins and can prevent your cheesecake from setting properly, leaving you with a soupy mess. Always use canned crushed pineapple for the filling. Save the fresh pineapple for a garnish.

Why is my filling too soft?
This usually means there was too much moisture in the filling or it did not have enough time to chill. First, ensure you drained the crushed pineapple very well. Second, make sure you chilled the cheesecake for at least 4 to 8 hours. If you are in a humid environment, consider adding 1/4 cup of powdered sugar to the mix to help absorb excess moisture.

How do I get clean slices?
Wipe your knife clean between each cut. For straight, professional-looking cuts, dip the knife in hot water and dry it before slicing. This melts through the cold filling easily without dragging. The parchment paper trick also helps removal.

Can I make this in a different pan size?
Yes. You can use a 9×13 pan if you increase the crust ingredients by half. The baking time remains the same. For mini cheesecakes, press the crust into a lined muffin tin and divide the filling among the cups. Reduce the chilling time to about 3 hours.

What is the best way to soften cream cheese quickly?
Place the unwrapped block of cream cheese on a microwave-safe plate. Microwave it on low power for 10 seconds. Flip the block over and microwave for another 10 seconds. It should be soft to the touch but not melted. Do not microwave it for too long, or it will break down.

How long does no-bake cheesecake last?
It will last for up to 5 days in the refrigerator when stored in an airtight container. After day 3, the texture may begin to soften slightly, but the flavor will remain delicious. Do not leave it out at room temperature for more than 2 hours.

Conclusion

The No-Bake Pineapple Cheesecake is proof that you do not need an oven to create a truly spectacular dessert. It offers the luxury of a traditional cheesecake without the stress, turning a notoriously tricky dessert into a foolproof success. With its buttery crust, velvety filling, and bursts of sweet, tangy pineapple, it is a dessert that delivers sunshine on a plate. Whether you are a seasoned baker or a complete beginner, this recipe will work for you. It is the ultimate make-ahead dessert for holidays, summer barbecues, or any time you need a little tropical escape. So, go ahead and chill that bowl. Your family and friends are going to love this one.

Full recipe:

Ingredients:

  • 600 to 800 grams of blackberries
  • 150 grams flour
  • 80 grams fine sugar + 2 tablespoons
  • 80 grams butter
  • 50 grams coconut
  • 1/2 teaspoon baking powder
  • 3 tablespoons milk or vegetable milk

Directions:

  1. Wash the blackberries well and drain them. Place them in an ovenproof dish (ideally a pie plate), then sprinkle with 2 tablespoons of sugar. Mix and set aside.
  2. In a bowl, place the flour, sugar, coconut, baking powder, butter cubes, and coconut. Mix by hand until the dough is half shortbread and half compact.
  3. Add milk and mix everything together. Leave it to rest for half an hour in the refrigerator.
  4. After this time, collect the dough. Cut small pieces of dough the size of a walnut. Roll it into a ball and crush it with the palm of your hand to form discs about 4 cm in diameter.
  5. Cover the blackberries with these discs.
  6. Bake for 30 minutes at 180 °C.
  7. Serve warm or at room temperature

In conclusion, the No-Bake Pineapple Cheesecake is a delightful and hassle-free dessert that brings together the velvety richness of cheesecake with the tropical sweetness of pineapple. This refreshing treat is perfect for warm days or when you crave a quick and satisfying dessert without the need for baking. Now, let’s dive into the step-by-step process of creating this delicious No-Bake Pineapple Cheesecake in your own kitchen.

Leave a Comment