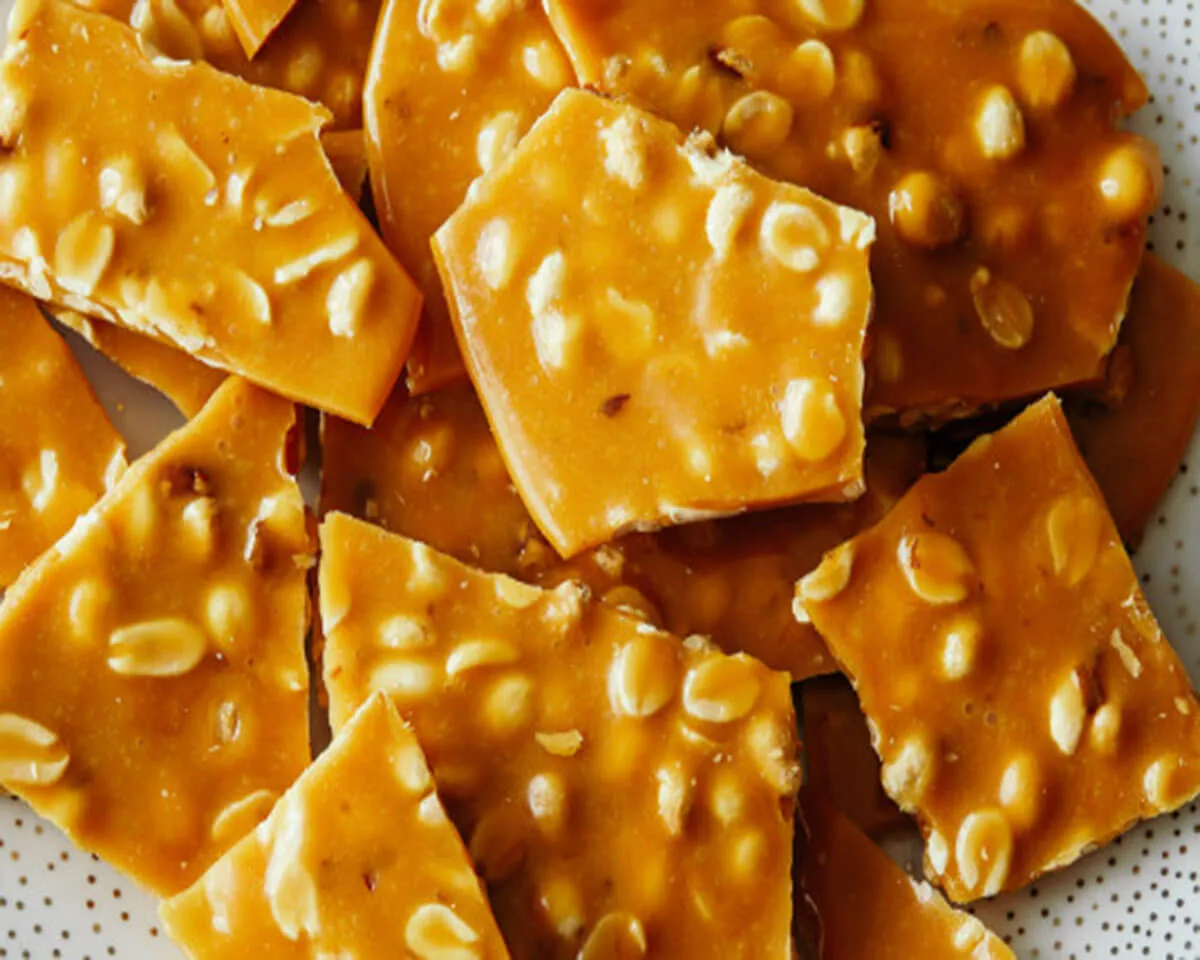
There is something undeniably magical about the process of making Peanut Brittle. It’s one of those rare culinary experiences that feels like a science experiment and a work of art all at once. I remember standing in my kitchen for the first time with a candy thermometer, watching the sugar transform from a clear liquid into a deep, amber gold. The moment you add the baking soda and the mixture foams up like a cloud is pure theater. It’s a treat that carries a heavy sense of nostalgia—the kind of candy that has been passed down through generations, often synonymous with holiday traditions and warm kitchen memories. You don’t need a pantry full of exotic ingredients to create this Peanut Brittle; you just need a bit of focus and the willingness to embrace the sizzle. The result is a glass-like, buttery confection that offers a satisfying snap in every bite. I’ve found that giving away a small tin of handcrafted Peanut Brittle is one of the most appreciated gestures you can make for friends or neighbors. It’s a classic that never goes out of style because it hits every note of sweetness, salt, and crunch perfectly.
The Secret to a Perfectly Airy Brittle Texture
The hallmark of a superior Peanut Brittle is its delicate, airy structure. If the candy is too hard, it becomes difficult to enjoy, but if it’s prepared correctly, it should shatter easily when you bite into it. This characteristic texture is achieved through the chemical reaction between the hot sugar and the baking soda. When you stir in that small amount of soda at the very end, it creates thousands of tiny carbon dioxide bubbles that become trapped as the candy cools. This “aeration” is what gives the brittle its signature honeycomb-like appearance and makes it feel light rather than dense. It’s the final crescendo in the candy-making process that ensures your Peanut Brittle is professional-grade.
Why a Candy Thermometer is Essential
Precision is the most important factor when you are working with boiled sugar. While some experienced candy makers claim they can tell the stage of the sugar by looking at it, I always recommend using a sturdy candy thermometer for consistent results. You are aiming for the “Hard Crack” stage, which occurs exactly at 300°F. If you stop too early, your Peanut Brittle will be chewy and stick to your teeth; if you go too far, the sugar will burn and become bitter. By keeping a diligent eye on the temperature as you stir the peanuts, you guarantee that the caramelization stops at the perfect moment of golden sweetness. This tool takes the guesswork out of the process, allowing you to focus on the rhythm of the stir.
The Role of Baking Soda and Vanilla
The finishing touches are what elevate a simple syrup into a complex confection. Once you hit the 300°F mark, you must work quickly to stir in the softened butter, vanilla, and baking soda. The butter adds a rich, creamy mouthfeel that balances the sharp sweetness of the sugar, while the vanilla provides an aromatic depth that lingers on the palate. The baking soda, of course, provides the volume and the crunch. You will notice the mixture change color slightly and expand significantly in the pan. This is the moment of “alchemy” where the ingredients transform into the brittle we all know and love. It’s an exciting, fast-paced step that requires caution but yields the most rewarding results.
Preparing Your Kitchen for Candy Success
Preparation is your best friend when making Peanut Brittle because once the sugar reaches the correct temperature, you have very little time to act. I always make sure my baking sheet is lined and buttered before I even turn on the stovetop. This recipe includes a clever trick of warming the baking sheet in a 200°F oven. This prevents the hot candy from cooling too quickly the moment it hits the foil, giving you a few extra seconds to spread it into an even, thin layer. If the pan is cold, the brittle might set in a thick clump, making it harder to break into those beautiful, handcrafted shards later on.
Selecting the Best Salted Peanuts
The choice of nuts provides the savory counterpoint to the sweet caramel. I prefer using salted roasted peanuts because the salt is already distributed perfectly across the nuts, saving you from having to add extra salt to the syrup. The roasting process enhances the earthy flavor of the peanuts, which complements the toasted notes of the caramelized sugar. As you cook the peanuts in the syrup, they toast even further, releasing their natural oils into the mixture. This infusion ensures that the peanut flavor is present in every single millimeter of the brittle. Consequently, you get a balanced snack that satisfies both sweet and salty cravings.
Spreading and Cooling for the Best Snap
Once you pour the hot mixture onto your warmed, buttered foil, you should use a circular or linear pattern to distribute it. You can gently tilt the pan to help the brittle flow toward the edges. Avoid the temptation to use a spatula to spread it too much, as this can pop the delicate bubbles you just created with the baking soda. Let the Peanut Brittle cool completely at room temperature; resist the urge to put it in the fridge, as the moisture can make the sugar sticky. Once it is firm and cool to the touch, the real fun begins—breaking the sheet into irregular, exquisite pieces. There is a deep satisfaction in hearing that rhythmic crackle as you prepare the candy for serving or gifting.
| Ingredient | Amount | Purpose |
| Sugar | 1 cup | The primary base for caramelization |
| Light Corn Syrup | 1/2 cup | Prevents crystallization for a smooth texture |
| Water | 1/4 cup | Helps dissolve the sugar evenly |
| Salted Roasted Peanuts | 1 1/4 cups | Provides the savory crunch and nutty flavor |
| Baking Soda | 3/4 teaspoon | Creates the airy, bubbled texture |
| Unsalted Butter | 2 tablespoons | Adds richness and a smooth mouthfeel |
| Vanilla Extract | 1 teaspoon | Enhances the aroma and depth of flavor |
Tips for Storing and Sharing Your Brittle
Proper storage is the final step in maintaining the “symphony of crunch” you worked so hard to create. Sugar is highly sensitive to humidity, so you must keep your Peanut Brittle in an airtight container as soon as it has cooled. If left out in the open, the candy can absorb moisture from the air and become tacky or soft. I suggest placing pieces of parchment paper between the layers if you are stacking them in a tin to prevent them from sticking together. If stored correctly, this brittle can stay fresh and snappy for several weeks, making it an ideal make-ahead gift for the holidays.
Creative Ways to Use Brittle Leftovers
While this candy is incredible on its own, it’s also a versatile ingredient for other desserts. You can crush up the smaller “crumbs” at the bottom of your container and sprinkle them over a bowl of vanilla ice cream for an instant upgrade. Some people even fold crushed Peanut Brittle into cookie dough or use it as a crunchy topping for a decadent chocolate cake. The bold, nutty flavor stands up well against other sweets, adding a sophisticated texture to anything it touches. It’s a great way to ensure that not a single golden morsel goes to waste.
Packaging Your Brittle for Gifts
If you are planning to share your creation, consider using clear cellophane bags tied with a festive ribbon. This allows the beautiful golden color and the embedded peanuts to be visible to the recipient. You could even include a small handwritten note about the “Symphony of Crunch” to add a personal touch to your homemade gift. Handcrafted candy is a gesture of love that shows you took the time to master a traditional art form. Whether you are giving it away or enjoying it yourself, this Peanut Brittle is a celebration of simple ingredients transformed into something extraordinary.
Conclusion
Mastering Peanut Brittle is a journey that rewards you with one of the most satisfying textures in the world of sweets. By understanding the balance of temperature, the chemistry of aeration, and the importance of high-quality nuts, you can produce a confection that rivals any specialty shop. This recipe is a testament to the joy found in the simple pleasures of home cooking and the timeless appeal of a well-made candy. I hope this guide gives you the confidence to fire up your stovetop and compose your own symphony of delight. Every crunchy bite is a reminder of the magic that happens when tradition and passion meet in the kitchen. Happy candy making, and enjoy the golden, nutty goodness of your handcrafted masterpiece!
Full recipe:
Ingredients:
- 1 cup sugar
- 1/2 cup light corn syrup
- 1/4 cup water
- 1 1/4 cups salted roasted peanuts
- 3/4 teaspoon baking soda
- 2 tablespoons unsalted butter, softened
- 1 teaspoon vanilla extract
Instructions:
- Preparation: Preheat your oven to 200 degrees. Line a baking sheet with aluminum foil, ensuring a minimum 1/2-inch rim. Coat the foil with butter and warm it in the oven.
- Stovetop Process: In a sturdy 2.5-quart or larger saucepan, combine sugar, corn syrup, and water. Attach a candy thermometer and bring the mixture to a boil, stirring frequently to dissolve the sugar. Once boiling, add the roasted peanuts and continue cooking until the temperature reaches 300 degrees, stirring diligently.
- Finishing Touch: Retrieve the baking sheet from the oven. Quickly remove the peanut brittle from heat and stir in the softened butter, baking soda, and vanilla. Exercise caution as it foams up, transforming into a delightful texture. Pour the caramel in a circular or linear pattern, tilting to evenly spread the peanut brittle. Allow it to cool at room temperature before breaking it into exquisite, handcrafted pieces.
Conclusion:
With each bite of this Symphony of Crunch, relish the melding of rich, buttery notes with the satisfying crunch of roasted peanuts. Sharing these delectable morsels becomes more than a treat—it’s a creation of cherished memories, a testament to the timeless art of homemade goodness.