
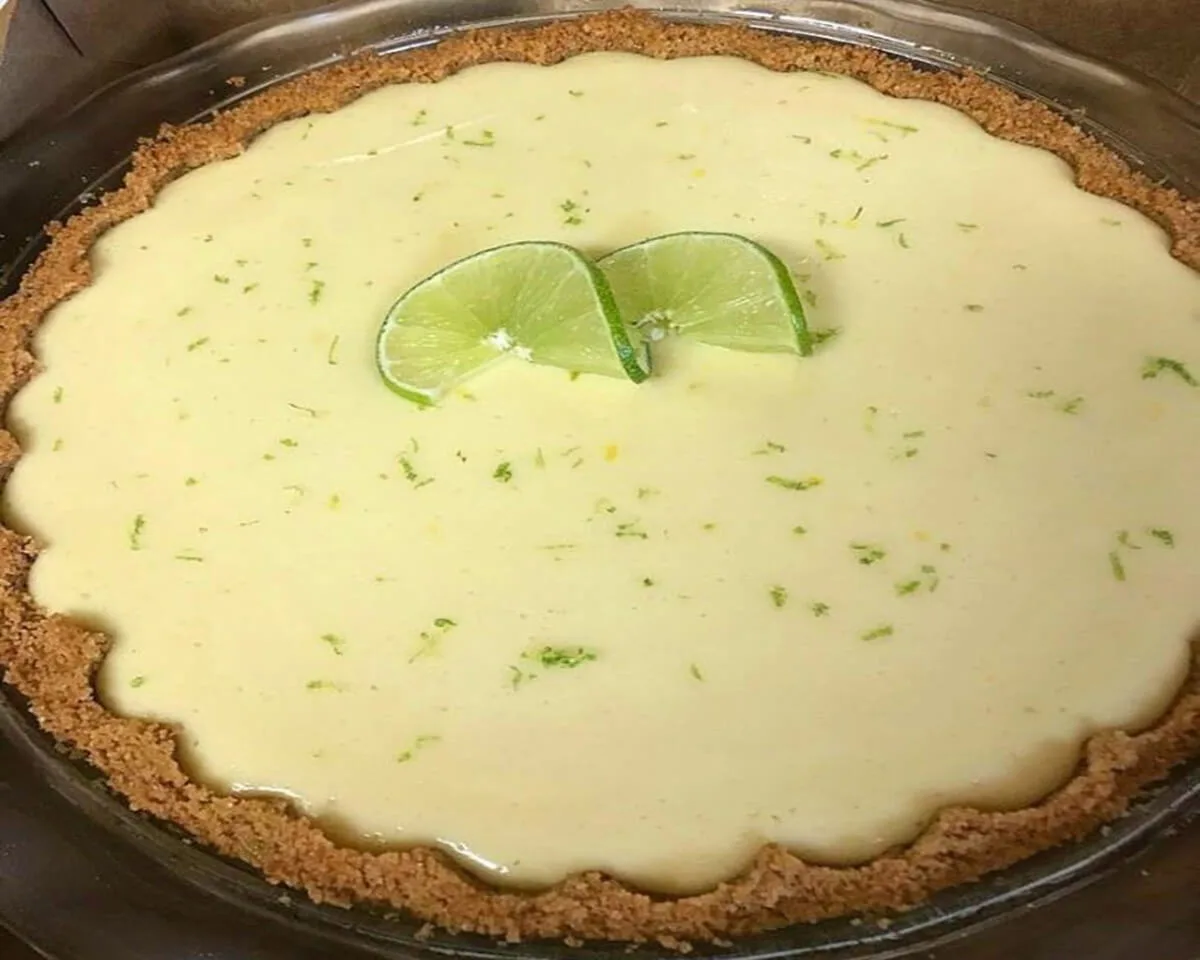
Homemade Key Lime Pie: The Zesty, No-Fuss Dessert That Brings the Tropics to Your Table

I still remember the first time I tasted real Key Lime Pie. It happened on a sweltering July afternoon at a small seafood shack in the Florida Keys. My family ordered a slice to share, and I expected something aggressively tart or cloyingly sweet. Instead, the pie delivered pure magic. The filling felt silky and smooth, with a bright, tangy punch that woke up my entire mouth. The graham cracker crust added a buttery, crunchy contrast. A cloud of whipped cream on top mellowed everything into perfect balance. I ate my slice in about four bites and immediately wanted another. That day, I fell in love with Key Lime Pie. Years later, I tried to recreate that experience at home. I tested recipe after recipe. Some turned out too runny. Others tasted like sugary lime pudding. Finally, I landed on this incredibly simple version that uses sweetened condensed milk, key lime juice, sour cream, and lime zest. No complicated techniques. No fancy equipment. Just a few minutes of mixing and a short bake. This Key Lime Pie delivers that same bright, refreshing sensation I discovered in Florida. Now I want to share it with you.

PART 1: Why This Key Lime Pie Recipe Stands Out from the Rest

The Perfect Balance of Tart and Creamy

Many Key Lime Pie recipes go wrong in one of two directions. Some use too much lime juice, making the filling face-scrunchingly sour. Others rely on too much sugar, creating a dessert that tastes like candy rather than fruit. This Key Lime Pie achieves the ideal balance. Sweetened condensed milk provides a rich, caramel-like sweetness and a thick, creamy texture. The key lime juice delivers that signature zesty brightness. Sour cream might seem like an unusual addition, but it works wonders. It adds a subtle tang that complements the limes, plus extra creaminess that makes each forkful feel luxurious. The lime zest packs an aromatic punch that reminds you these are real limes, not artificial flavoring. You get a dessert that tastes authentic, refreshing, and deeply satisfying.

A Short Bake for a Foolproof Set

Traditional Key Lime Pie recipes sometimes require no baking at all, relying solely on refrigeration to set the filling. Those versions can turn out soft or runny if you do not chill them long enough. This recipe calls for a brief 5 to 8 minute bake. That short time in the oven does two important things. First, it helps the filling set more firmly without turning rubbery. Second, it creates tiny pinhole bubbles on the surface, a telltale sign that the pie has baked just enough. The filling will still look wobbly when you pull it from the oven, but that wobble transforms into a silky, sliceable texture after chilling. You get a pie that holds its shape beautifully without any gelatin or cornstarch. The ingredients do all the work.

PART 2: Gathering and Understanding Your Ingredients

The Importance of Real Key Limes

True Key limes differ from the Persian limes you find in most grocery stores. Key limes are smaller, more yellow when ripe, and have a more floral, aromatic, and less acidic flavor. They make a noticeable difference in your Key Lime Pie. However, they can be hard to find outside of Florida or specialty markets. If you cannot find fresh Key limes, look for bottled Key lime juice. Many brands sell 100% Key lime juice in the juice aisle. Avoid regular Persian lime juice; it lacks that distinct floral note. For the best results, use ¾ cup of Key lime juice. If you have access to fresh Key limes, you will need about 20 to 25 of them to yield that much juice. Roll them on the counter before juicing to maximize extraction.

The Supporting Cast: Sweetened Condensed Milk and Sour Cream

Sweetened condensed milk forms the backbone of this Key Lime Pie. Do not confuse it with evaporated milk. Sweetened condensed milk contains sugar and has a thick, syrupy consistency. It provides both sweetness and structure. You need 3 cups, which equals about two 14-ounce cans. The sour cream adds a pleasant tang and extra creaminess. Use full-fat sour cream for the richest texture. Low-fat works but yields a slightly less luxurious mouthfeel. For the crust, this recipe calls for a prepared 9-inch graham cracker crust. You can buy one at any grocery store. If you prefer homemade, crush 1.5 cups of graham crackers with 6 tablespoons of melted butter and 2 tablespoons of sugar, then press into a pie dish and bake at 350°F for 8 minutes before filling.

Ingredient Amount Notes
Sweetened condensed milk 3 cups (two 14-oz cans) Do not substitute evaporated milk
Key lime juice ¾ cup Fresh or bottled Key lime juice only
Sour cream ½ cup Full-fat preferred
Lime zest 1 tablespoon From Key limes if possible
Graham cracker crust 1 (9-inch) Prepared or homemade

PART 3: Step-by-Step Preparation and Baking

Mixing the Filling for Maximum Smoothness

Preheat your oven to 350°F (175°C). Take your prepared graham cracker crust out of its packaging and set it on a baking sheet. This baking sheet catches any drips and makes moving the pie in and out of the oven much easier. In a medium bowl, combine 3 cups of sweetened condensed milk, ¾ cup of Key lime juice, ½ cup of sour cream, and 1 tablespoon of grated lime zest. Whisk everything together until the mixture looks completely smooth and uniform. The sour cream may cause a few small lumps at first, but keep whisking. Within a minute, the mixture turns into a thick, pale yellow liquid with a wonderful citrus aroma. Taste it at this stage. You want a bright, tangy flavor with enough sweetness to balance. Adjust nothing; the recipe is perfectly calibrated.

Baking and Watching for the Magic Bubbles

Pour the filling directly into the prepared graham cracker crust. Use a spatula to spread it evenly to the edges. The filling will come almost to the top of the crust. Place the baking sheet with the pie into the preheated oven. Bake for exactly 5 to 8 minutes. Do not walk away. Watch the surface closely. After about 5 minutes, you will see tiny pinprick bubbles begin to appear and burst on the surface of the pie. These bubbles signal that the filling has heated enough to set the proteins from the egg yolks (in traditional recipes) or the milk solids. For this recipe, the bubbles indicate the right doneness. The filling will still wobble like jelly when you gently shake the pan. That is correct. The pie should not look browned at all; only the crust edges may darken slightly. Remove the pie from the oven immediately when you see those bubbles.

PART 4: Cooling, Chilling, and Serving Your Key Lime Pie

The Crucial Chilling Step

Transfer the pie on its baking sheet to a wire rack. Let it cool to room temperature, which takes about 30 minutes. During this time, the filling will firm up slightly but will still be quite soft. Once cooled, place the pie in the refrigerator. Chill it for at least 1 hour. For best results, chill for 3 to 4 hours or even overnight. The cold temperature sets the filling into a silky, sliceable texture that holds its shape when you cut into it. Do not skip or rush the chilling step. A warm Key Lime Pie will run all over your plate and taste far less refreshing. Patience rewards you with clean, beautiful slices and that perfect creamy-tart bite.

Garnishing and Serving Suggestions

Just before serving, garnish your Key Lime Pie with a generous dollop of whipped cream. You can use store-bought or whip your own heavy cream with a little powdered sugar and vanilla. For an extra pop of color and flavor, sprinkle additional lime zest over the cream. Thin slices of fresh lime also make a lovely decoration. Serve the pie chilled. It pairs wonderfully with a cup of hot coffee or a glass of iced tea. For a more decadent experience, drizzle a little white chocolate sauce over each slice. This pie also freezes well. Wrap it tightly and freeze for up to one month. Thaw overnight in the refrigerator before serving. Leftovers keep in the fridge for up to 5 days, though the crust may soften slightly over time.

Frequently Asked Questions

Can I use regular limes instead of Key limes for this pie?
Yes, but the flavor will be more acidic and less floral. Use the same amount of juice. Persian limes work in a pinch, but the pie will taste like a standard lime pie, not authentic Key Lime Pie.

Why did my Key Lime Pie turn out runny?
Runny filling usually means you did not chill the pie long enough, or you used low-fat or fat-free sweetened condensed milk. Always use full-fat sweetened condensed milk. Also, ensure you baked the pie until you saw the tiny bubbles on the surface.

Can I make this Key Lime Pie without baking?
You can skip the bake and simply refrigerate the pie for at least 6 hours. However, the texture will be softer and less set. The short bake helps the filling firm up more reliably.

How do I get clean slices without the crust crumbling?
Use a sharp knife and wipe it clean between cuts. For the cleanest slices, chill the pie for at least 4 hours, then dip your knife in hot water and dry it before each cut.

Can I use a homemade crust instead of a prepared one?
Absolutely. Combine 1.5 cups of graham cracker crumbs, 6 tablespoons of melted butter, and 2 tablespoons of sugar. Press into a 9-inch pie dish. Bake at 350°F for 8 minutes before adding the filling.

What is the best way to juice Key limes?
Roll each lime firmly on the counter under your palm to break down the internal membranes. Cut the lime in half and use a hand juicer or simply squeeze with your fingers. Strain the juice to remove seeds and pulp.

Conclusion

This homemade Key Lime Pie brings the bright, tangy flavors of the Florida Keys straight to your kitchen. You only need five ingredients and about 15 minutes of active work. The sweetened condensed milk and sour cream create a luscious, creamy filling that balances perfectly with the tart lime juice. A short bake and a longer chill transform that filling into a silky, sliceable dessert that tastes like sunshine. Whether you serve it at a summer barbecue, a holiday dinner, or a quiet weeknight treat, this pie always earns rave reviews. I have made it for picky eaters, dessert snobs, and even people who claim they do not like lime. Every single person asked for seconds. So grab some Key limes or a bottle of Key lime juice. Preheat your oven. Make this pie today. Your taste buds will thank you, and you might just start a new family tradition.

Full recipe:

Ingredients:

– 3 cups sweetened condensed milk
– ¾ cup key lime juice
– ½ cup sour cream
– 1 tablespoon grated lime zest
– 1 (9-inch) prepared graham cracker crust

Instructions:

1. Preheat the oven to 350 degrees F (175 degrees C).

2. In a bowl, combine sweetened condensed milk, key lime juice, sour cream, and lime zest. Mix well.

3. Pour the mixture into the prepared graham cracker crust and place the pie on a baking sheet.

4. Bake in the preheated oven for 5 to 8 minutes, until tiny pinhole bubbles burst on the surface of the pie. The filling will be wobbly but not browned.

5. Transfer the pie to a wire rack to cool, then thoroughly chill the pie in the refrigerator before serving, about 1 hour.

6. Garnish with lime slices and whipped cream if desired.

Whether you’re hosting a summer soiree or simply craving a taste of the tropics, this Key Lime Pie recipe offers a quick and satisfying solution. Revel in the simplicity of the process and the delight it brings to your palate. With its zesty charm and effortless preparation, this homemade Key Lime Pie is destined to become a go-to dessert in your repertoire.

Leave a Comment